How To Use A Windows 11 ISO File To Perform A Clean Install
The Windows 11 era has finally begun, now that the OS is out of the beta stage. You can now upgrade to Microsoft’s latest offering without joining the Windows Insider Program. However, upgrading from a previous version of Windows to a completely new one makes room for potential issues. The right way to upgrade is to clean install any version of Windows 11.
We recommend clean installing any newer version of the operating system (provided your PC is compatible) rather than updating it directly. Also, you can skip the line at your own risk if you haven’t received the update on your system yet.
Clean Install Windows 11
The process of clean installation of Windows 11 is quite similar to that of Windows 10. To proceed with the installation, make sure you have a backup of your files and a USB drive with at least 8GB of storage. Windows 11 requires TPM 2.0 support and Secure Boot turned on; if your PC supports both, make sure both are enabled in your UEFI Firmware settings (or BIOS). If you’ve made sure you have the pre-requisites checked, you can begin installing Windows 11 using this Windows 11 guide.
1.1. Download Windows 11 ISO: Method 1
You can download the official Windows 11 ISOs from Microsoft’s website.
1. Visit the Windows 11 download page.
2. Scroll down to see the Download Windows 11 Disk Image (ISO) section.
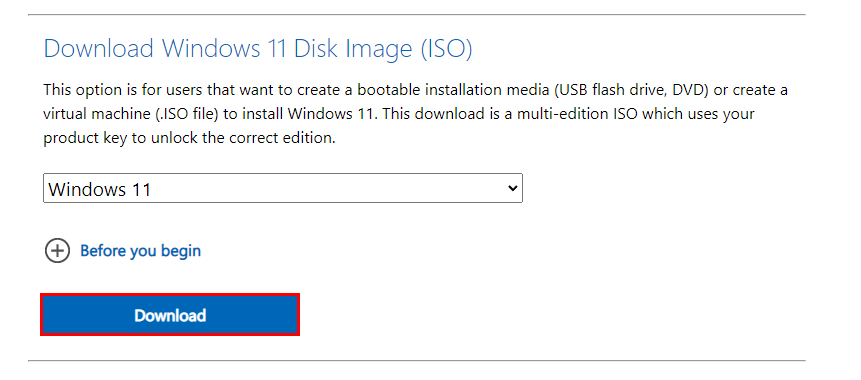
3. From the drop-down menu, select Windows 11 and click on the blue Download button.
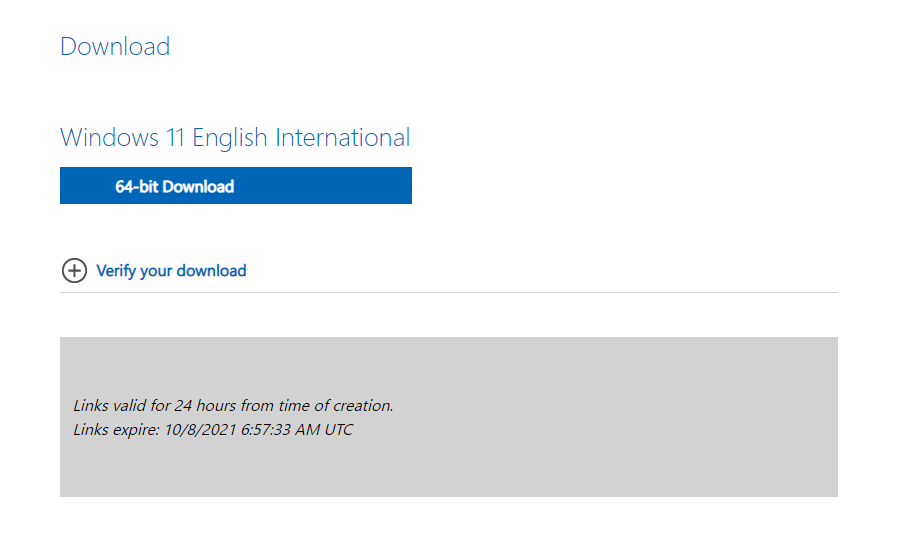
4. Further, select your preferred language and confirm.
5. Finally, click on “64-bit Download” to start the download.
1.2. Download the modified Windows 11 ISO: Method 2
Alternatively, you can use a simple open-sourced script to download a Windows 11 ISO that bypasses TPM checks while installing. This ISO will be helpful if your PC doesn’t have support for TPM 2.0.
1. Head over to the official repository, download the zip file.
2. Extract MediaCreationTool.bat from the zip file and run it. If Windows flags the file as dangerous, select “run anyway.”
3. Select “11” from the MCT version menu.
4. Click on Create ISO and select “Yes” if Windows prompts you.
5. Once the process is over, the tool will provide you with an ISO file that you can use even if you don’t have TPM.
2. Make a bootable USB drive to clean install Windows 11
Microsoft has made it challenging to create Windows 11 installation media. Earlier, we could simply use the third-party tool Rufus to select Windows ISO and create USB installation media. However, Rufus formats the USB drive in NTFS format as the installation files are beyond the bandwidth of the FAT32 format. Further, you can’t boot an NTFS drive without disabling secure boot. Windows 11 requires a secure boot to be enabled. Hence, it’s not possible to use Rufus at the moment.
However, we have a workaround.
1. Insert your USB drive and make sure it’s backed up.
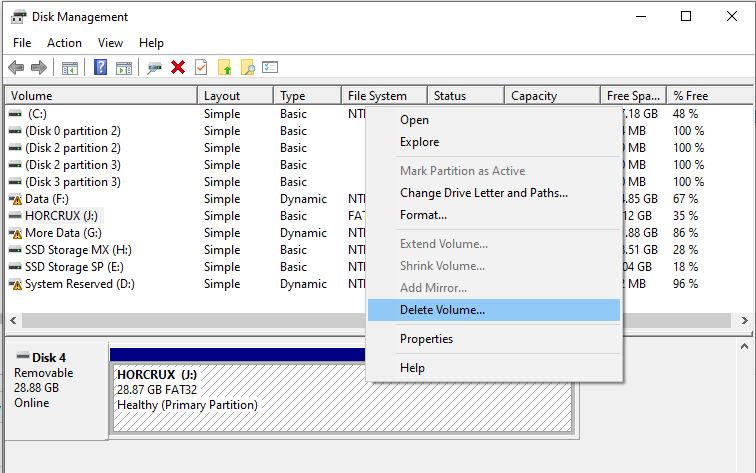
2. Right-click on the Start button and select Disk Management.
3. On the bottom section, search for your USB drive and delete all the partitions on it by right-clicking and choosing the Delete Volume option.
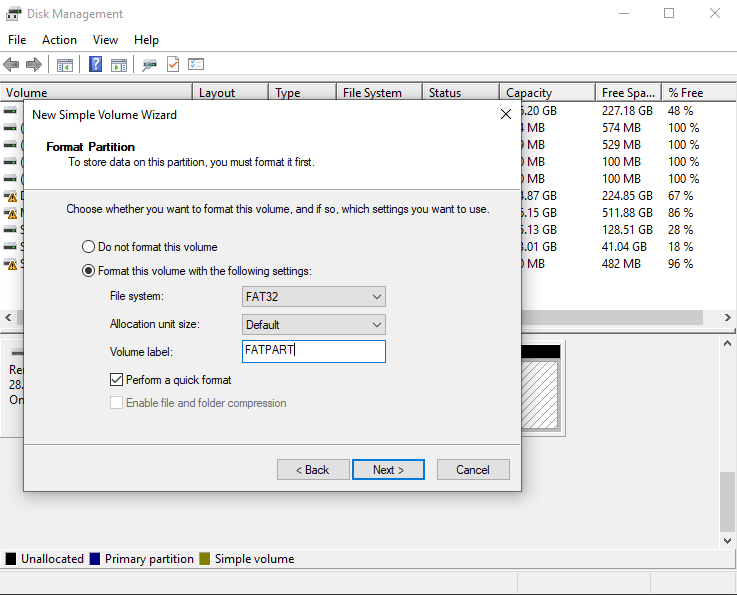
4. Now, right-click on the unallocated space and select New Simple Volume.
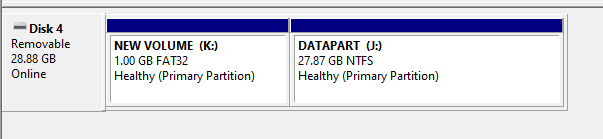
5. Follow through with the wizard to create a new volume that’s 1GB in size and has the FAT32 file format.
6. Further, create another volume that uses all of the remaining space on the drive and select NTFS as its file format.
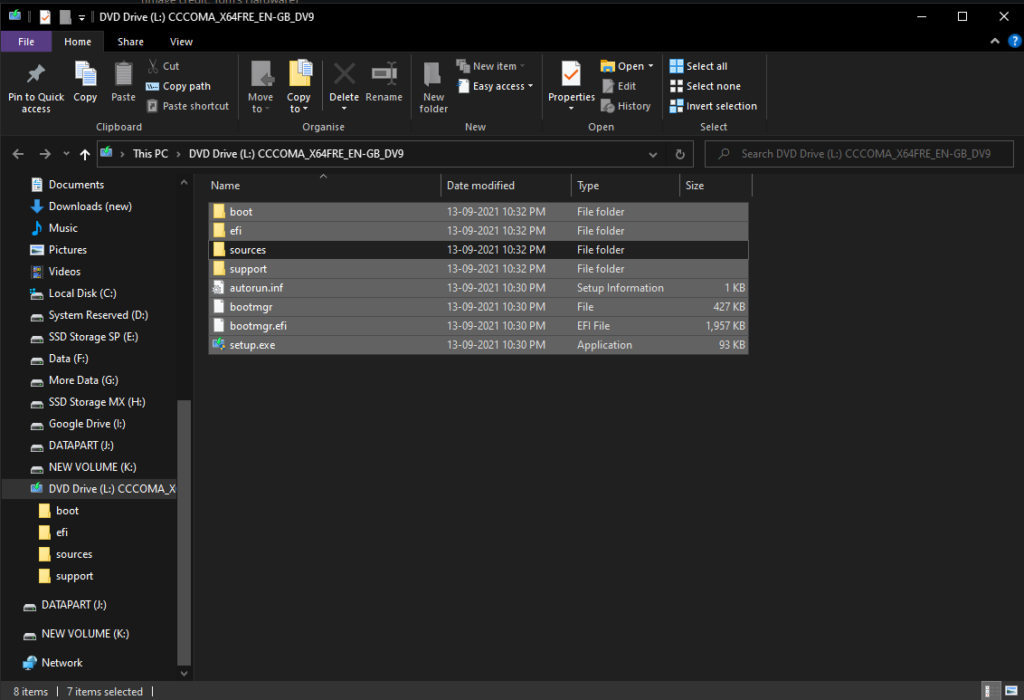
7. Now, head over to the directory where the Windows 11 ISO is stored, and right-click on the file, and select Mount.
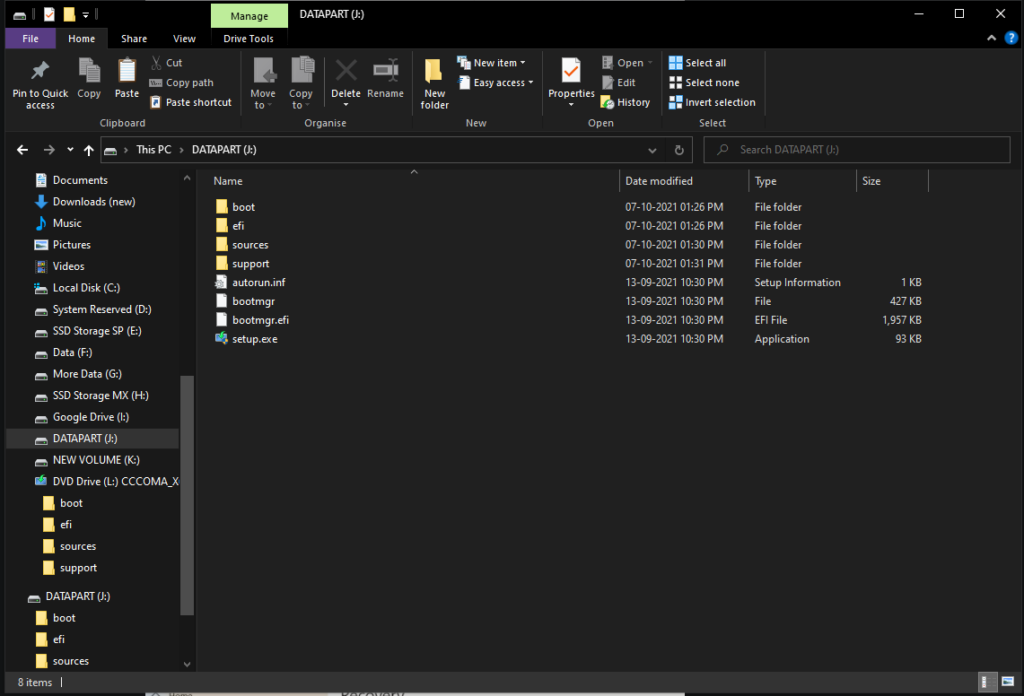
8. On the Explorer window, select and copy all of the items in the folder except for the “sources” folder and paste them into the FAT32 partition of the USB drive using Windows Explorer.
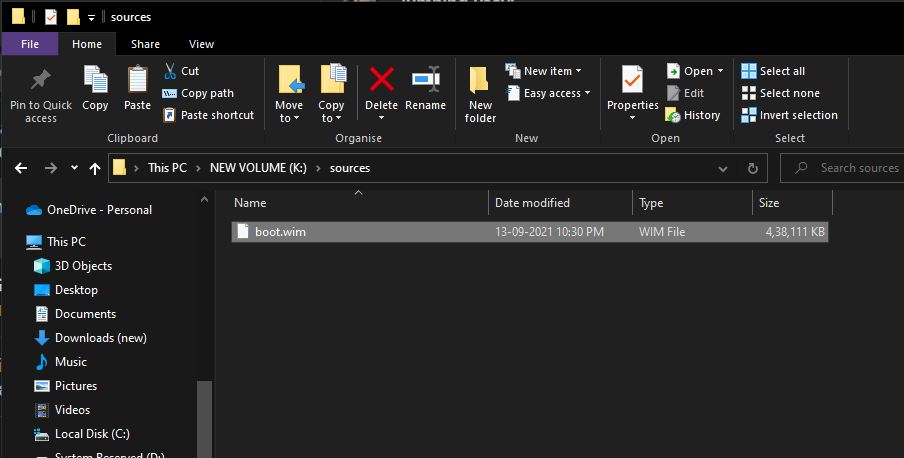
9. Now, create a new folder called “sources” on the FAT32 partition of the drive.
10. Navigate to the original sources folder of the ISO and copy the “boot.wim” file to the newly created sources folder on the FAT32 partition.
11. Finally, select all the files from the ISO folder, including the ones that you previously copied, and copy all of them to the NTFS partition of the USB drive.
You now have a bootable USB drive ready that can clean install Windows 11 with Secure Boot on.
Meanwhile, you can also check out our article on how to find windows 10 product key using command prompt here!
3. Perform a clean install
After you have the installation media ready, you can proceed with the final step of installing Windows. Likewise, you will need to boot into the USB drive via the boot menu or the in-built settings. Every motherboard on every PC has its way of getting into the boot menu. Hence, check the manufacturer’s website to know how to open the boot menu while your PC starts; if you managed to open the boot menu, you could skip stepping number 5.
1. Firstly, restart your PC to open the Advanced Startup Options. To do it, hold the Shift key on your keyboard while choosing the Restart option from the power menu.
2. Then, click on the “Use a device” option from the advanced startup options.
3. Further, you’ll see two options for your USB drive. The upper one should be the NTFS partition, which is the one you need to open. If not, select the lower one by repeating this step.
4. Finally, the Windows 11 setup screen will appear. Follow the on-screen instructions to go through the terms, edition, product key, and select the “Custom: Install Windows only” option.
5. Select the drive partition that was previously your “C:” drive and format it. Now, select the same drive and click Next.
6. The clean Windows 11 clean install will now begin, and your PC might restart. Post that, you can continue with the OS’ initial setup.
Finally, the process of clean installing Windows 11 is finished. There’s no doubt that the process is harder than it used to be, but it’s still the best way to upgrade to an all-new OS from previous Windows versions.
However, if you are using Ubuntu operating system, check out our detailed article on how to create bootable USB from ISO here!
More on Windows 11 Setup
- Windows 11 System Requirements: What Hardware Do You Need?
- How To Check If My Existing PC Can Run Windows 11?
- List Of Windows 11 Compatible Devices
- Do These 3 Things Before Installing Windows 11 On Your PC
- How To Install Windows 11 Using Windows 11 Installation Assistant
- Where Can I Buy My First Windows 11 Laptop?
- How To Set Up A Local Account On Windows 11 First Boot?
- How To Reset Windows 11 Using Settings?
- How To Roll Back To Windows 10 From Windows 11 Insider Preview?
- Windows 7 Users Can Upgrade To Windows 11, But There’s A Catch