What Is Apple Time Machine On Mac? How To Use It
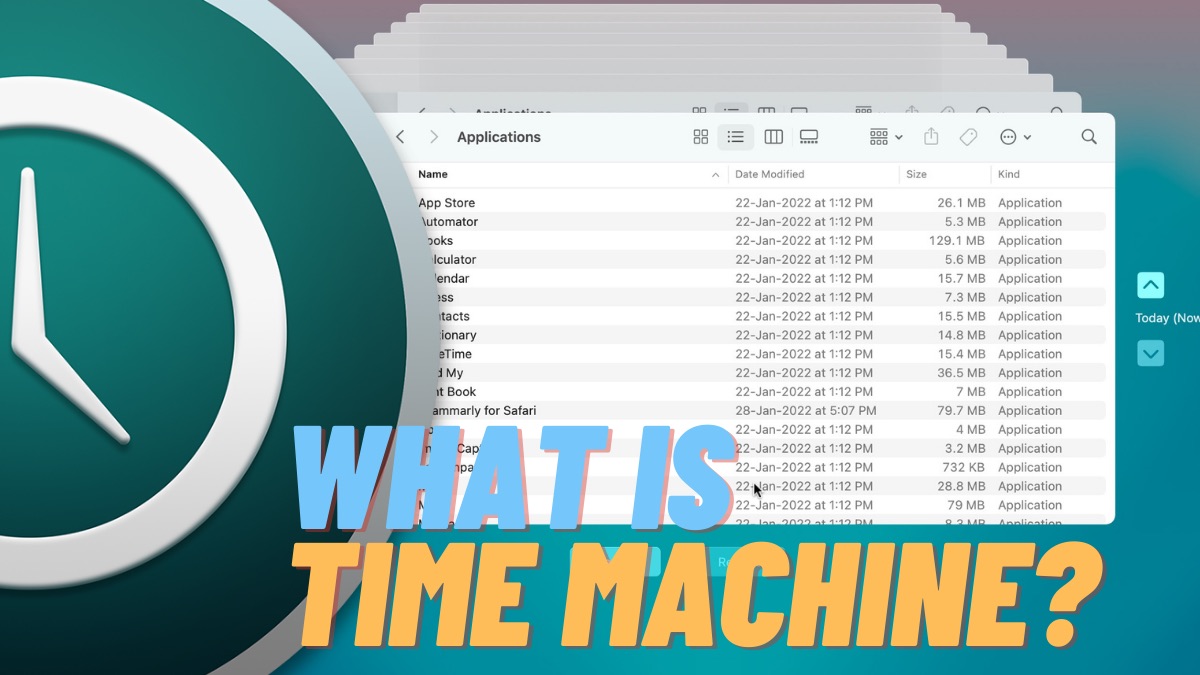
The Apple Time machine is a built-in backup feature on your Mac. It regularly takes snapshots of your entire system and saves them on an external drive.
Apple launched Time Machine with Mac OS X 10.5 Leopard, and it is still there on the latest macOS versions. You can also encrypt a Time Machine backup with a password so you can restore it.
How Does ‘Time Machine’ On Mac Work?
You can attach an external hard disk, AirPort Time Capsule, or use another Mac to take a Time Machine backup.
AirPort Time Capsule is an external wireless backup solution that Apple launched in 2008 and discontinued in 2018.
You can use Time Machine to restore specific files or the entire system. It backs up apps, music, photos, email, and other documents from your Mac, so you won’t miss out on anything.
It takes hourly, daily, and even monthly backups of everything in your system. Time Machine optimizes this process by only backing up files that have changed since the last backup.
Time Machine automatically deletes the oldest backups when your external storage peaks and makes room for the new ones.
Here are a couple of things you should know before making a Time Machine backup.
- Since it takes regular full-system backups, use at least a 1TB disk external drive.
- The drive you use will be formatted to APFS.
- You can use an external AirPort Time Capsule for wireless backups.
How To Take A Time Machine Backup
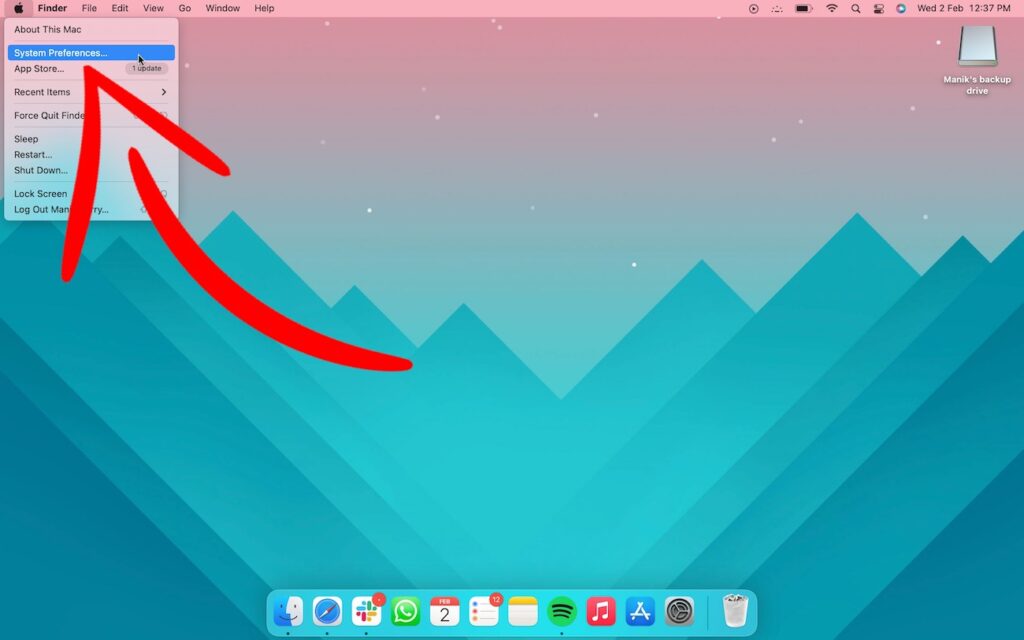
1. Plug in the external drive and go to System Preferences from the Apple Menu.
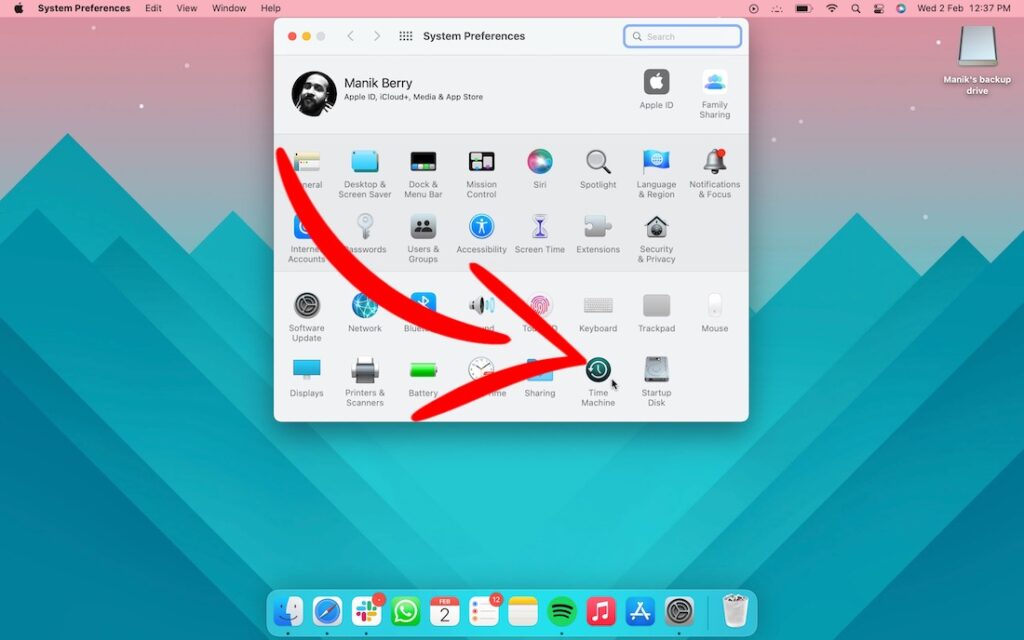
2. Select Time Machine.
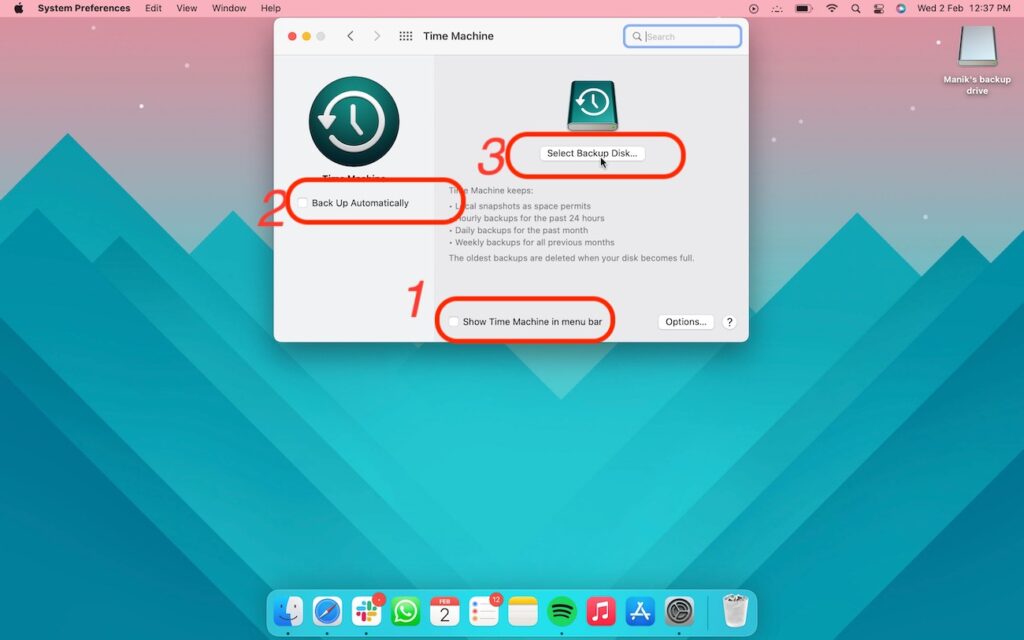
3. Turn on Automatic backups, check ‘Show Time Machine in the menu bar,’ and Choose Select Backup Disk.
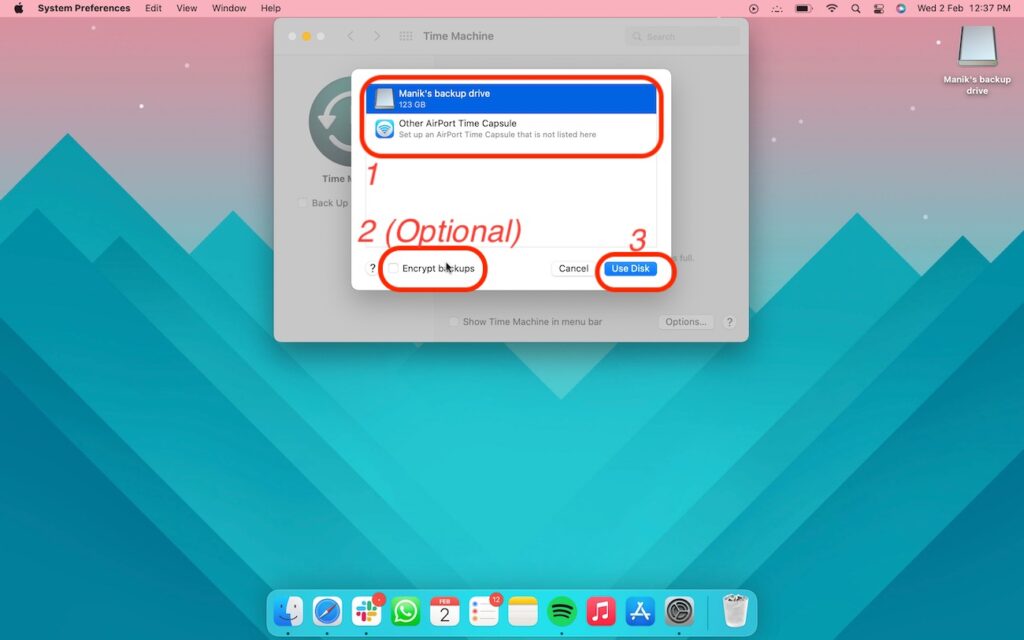
4. Click on the disk you wish to use as a Backup drive and select Use Disk. Check the ‘Encrypt Backups‘ box if you want to password-protect your backups.
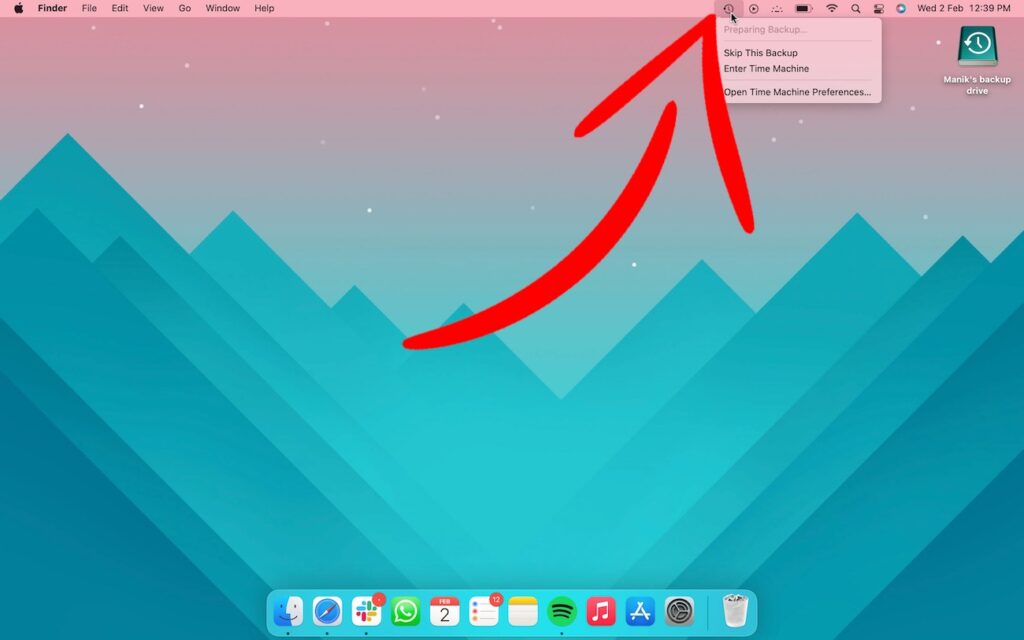
6. Click on the Time Machine icon in the menu bar to get a backup, skip one, or enter Time Machine preferences
How To Restore Time Machine Backup
To erase your Mac, you can follow these steps to restore it using a Time Machine backup. You can also enter the Time Machine from the Menu bar shortcut and choose to restore an older backup.
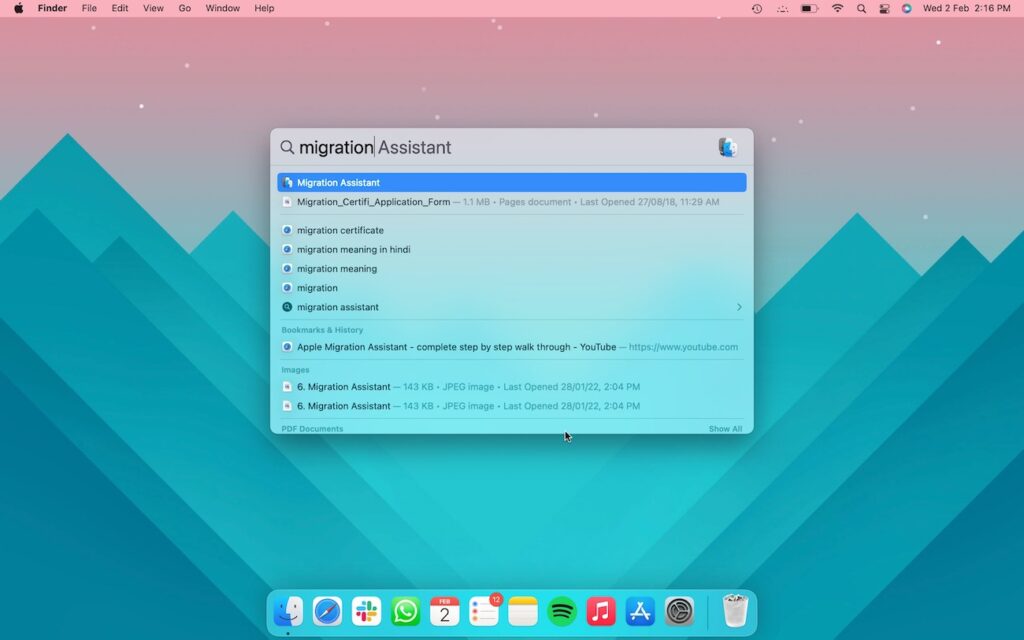
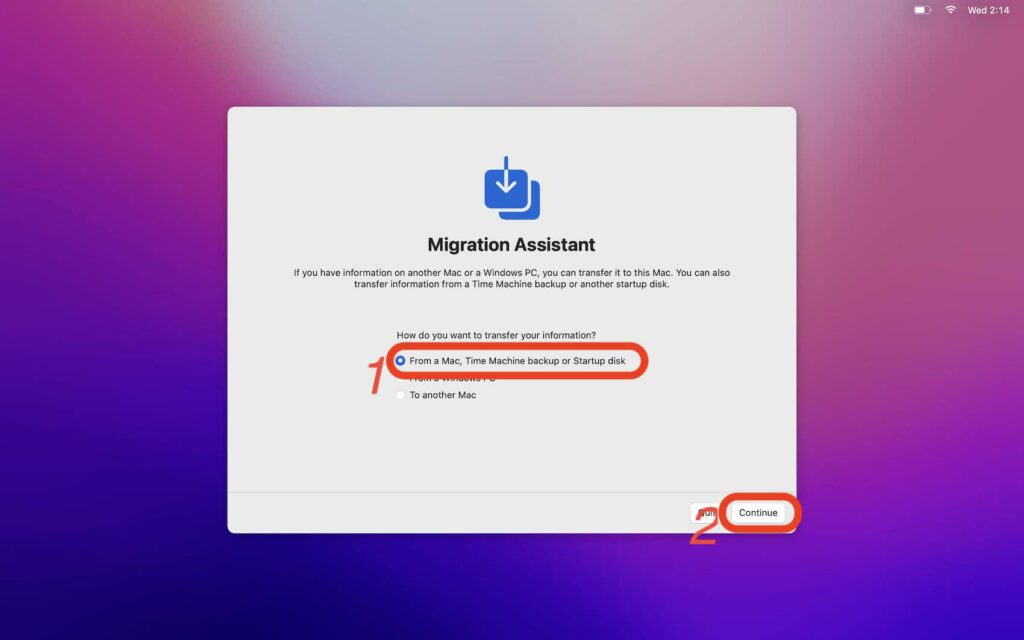
1. Summon Spotlight with Command + Space and search for Migration Assistant
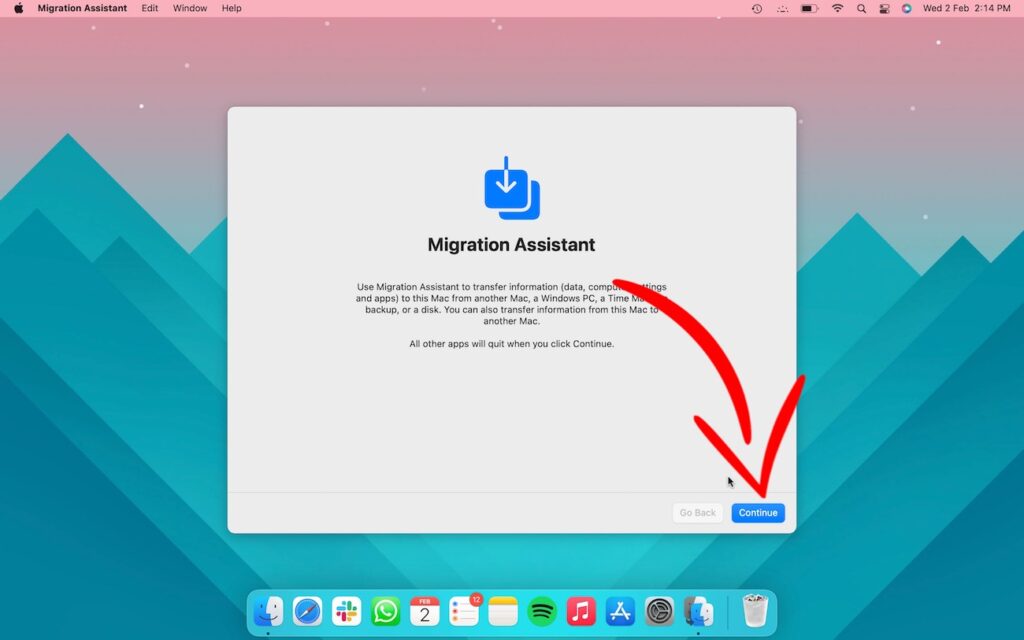
2. Tap on Continue
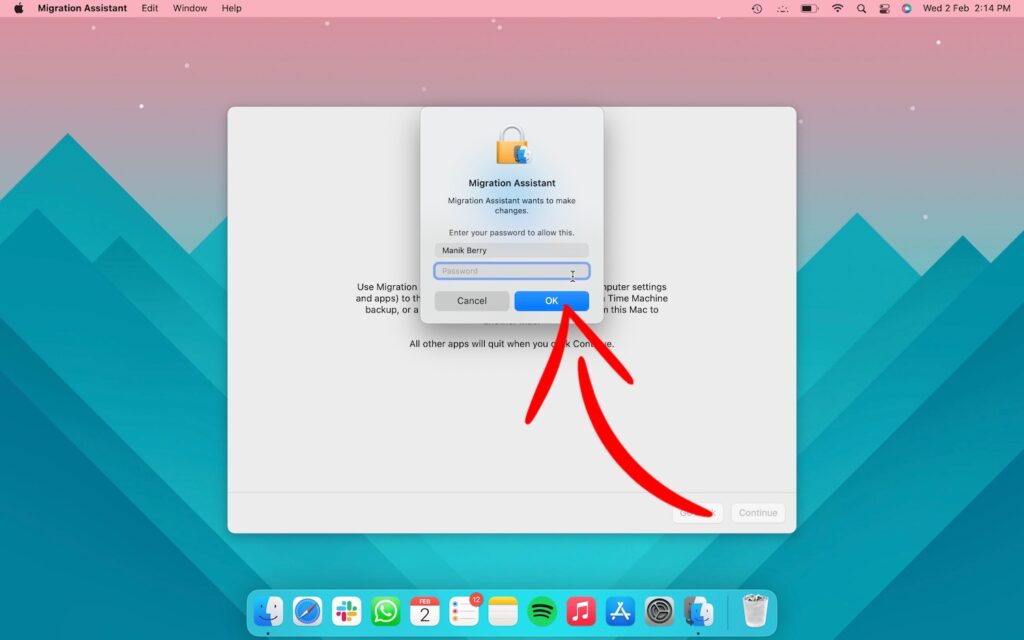
3. Enter your password and hit Continue
4. Select ‘From a Mac, Time Machine Backup, or Startup Disk’ and follow the on-screen instructions.
And that’s it. Now you know Time Machine on Mac, how to take a backup with Time Machine, and how to restore that backup anytime you want.
If you like this simple explainer, check out our Short Bytes section. We take complex tech topics and break them into short, easy-to-understand articles.

