How To Install Linux Kernel 4.13 In Ubuntu And Linux Mint?
The road to this latest kernel has been pretty interesting as Linus Torvalds had to deal with “seven hours of pure agony due to a kidney stone.” Linux kernel 4.13 release also kicked off the development of Linux 4.14, which has been confirmed as the next LTS kernel.
Having said that, let’s come to the installation part. You can install Linux kernel 4.13 in Ubuntu Linux, Linux Mint, and other Ubuntu flavors using two methods. However, before going ahead, read the note mentioned below carefully:
Important Note: Till now, only mainline kernel PPAs for 4.13 are available for Ubuntu. They are build from the latest unmodified mainline kernel sources. They are only provided by the Ubuntu team for testing and debugging purposes and they don’t come with any Ubuntu-provided drivers or patches. So, install them at your own risk–probably only if you think it’s going to fix some critical problem you’re facing.
How to install Linux kernel 4.13 in Ubuntu and Mint?
Method 1: Linux kernel 4.13 installation using Ukuu
In case you’re a Linux beginner, there are chances that you might not be too comfortable on terminal. To help you out, here I’m going to tell you how to install Linux 4.13 using a tool named Ukuu.
In the past, I’ve written a detailed tutorial on Ukuu–Ubuntu kernel update utility–and its working. You can read that article and install Ukuu on your Ubuntu or Mint machine. After that, run the following command to launch Ukuu GUI. You can also search for Ukuu in the list of installed programs.
sudo ukuu-gtk
After Ukuu launches, it’ll take some time to list all the available kernels. As you can see in the picture below, the kernels with red Tux logo are unstable ones. At the top, you can see Linux kernel 4.13.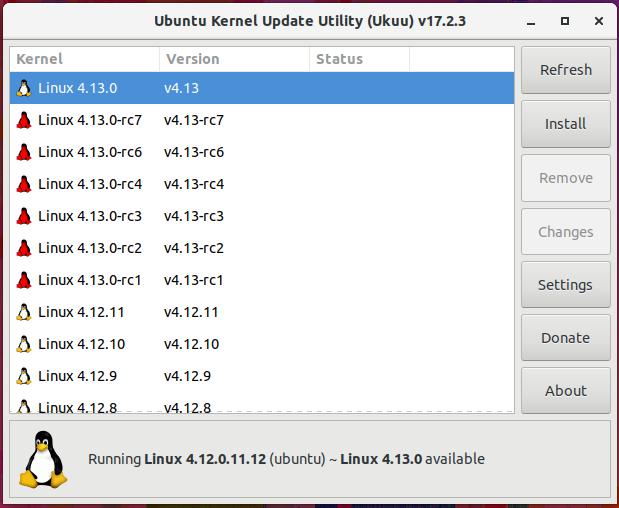 You need to select Linux kernel 4.13.0 and hit the Install button in the top-right corner. Now reboot your computer and use the new kernel.
Method 2: Installing kernel 4.13 kernel.ubuntu.com packages
In case you wish to stick to the terminal, I’ve got you covered. Follow the steps mentioned below to install Linux kernel 4.13 on your machines:
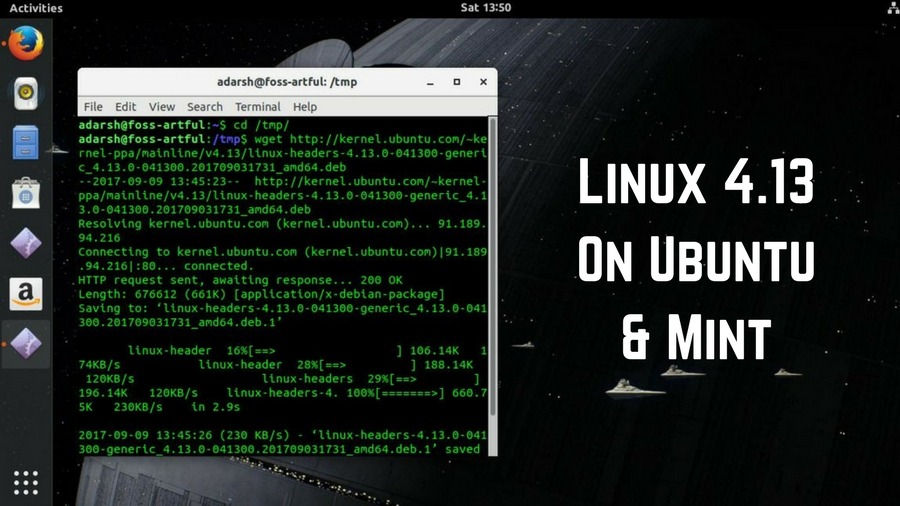
1. You need to download the .deb packages from kernel.ubuntu.com using terminal. Launch a new terminal window and run the following command one-by-one. Please note that these commands are only for 64-bit machines:
cd /tmp/
wget https://kernel.ubuntu.com/~kernel-ppa/mainline/v4.13/linux-headers-4.13.0-041300_4.13.0-041300.201709031731_all.deb
wget https://kernel.ubuntu.com/~kernel-ppa/mainline/v4.13/linux-headers-4.13.0-041300-generic_4.13.0-041300.201709031731_amd64.deb
wget https://kernel.ubuntu.com/~kernel-ppa/mainline/v4.13/linux-image-4.13.0-041300-generic_4.13.0-041300.201709031731_amd64.deb
2. For 32-bit machines, you need to run the following commands to download the kernel:
cd /tmp/
wget https://kernel.ubuntu.com/~kernel-ppa/mainline/v4.13/linux-headers-4.13.0-041300_4.13.0-041300.201709031731_all.deb
wget https://kernel.ubuntu.com/~kernel-ppa/mainline/v4.13/linux-headers-4.13.0-041300-generic_4.13.0-041300.201709031731_i386.deb
wget https://kernel.ubuntu.com/~kernel-ppa/mainline/v4.13/linux-image-4.13.0-041300-generic_4.13.0-041300.201709031731_i386.deb
 3. After downloading the latest kernels, you need to install them on your machine by running the following command:
sudo dpkg -i *.deb
4. After closing all the open applications and saving your work, now you need to restart your computer to use the newly installed Linux kernel 4.13.
This was a detailed tutorial on how to install Linux kernel 4.13 in Ubuntu and Mint machines. Don’t forget to share your experiences with us.
Also Read: Linux Mint 18.3 Features & Release Date — What’s Hot In Next Version