What Is “Service Host SuperFetch” | 100% Disk Usage in Windows 10

Microsoft introduced many system processes in Windows 10 with the best of intentions. However, they have gradually become a pain in the neck. SuperFetch is one such process that causes high disk usage in Windows 10 PCs, resulting in sluggish performance.
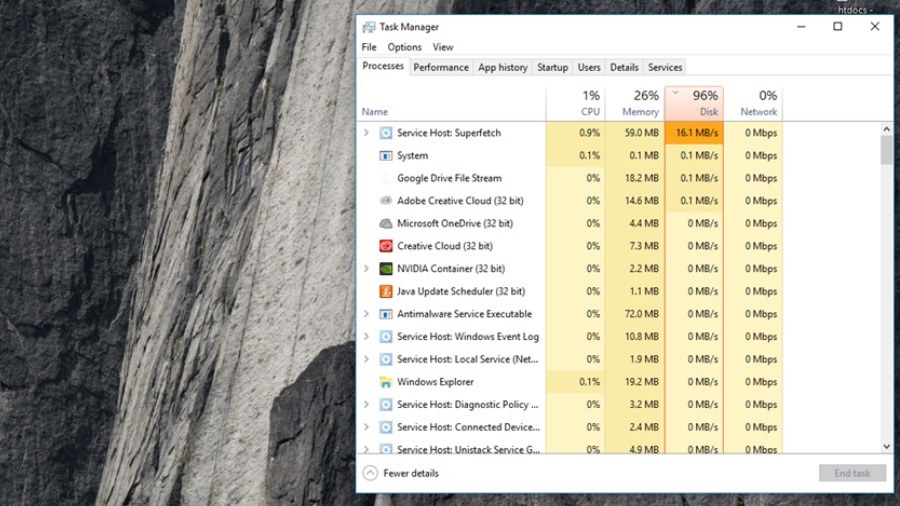
Windows users, at some point in their lives, have faced high disk usage because of “Service Host: Superfetch” taking up memory in the Task Manager. If it happens to be one of you, here is everything you need to know about SuperFetch.
What is SuperFetch In Windows 10 and what does it do?
SuperFetch is an innovative memory manager that analyzes usage patterns over time to optimize memory content. It was initially introduced in Windows Vista as a successor to PreFetch, found in Windows XP.
With the help of a lightweight tracking algorithm, Windows 10 Superfetch process builds a cache profile of applications and programs. These are applications which you use most frequently. For example, the ones you opened first thing in the morning or the one you entered after a lunch break.
SuperFetch takes notice of every application running on your system. When you exit a frequently used application, SuperFetch asks the system’s main Memory manager to give up some applications cache memory so when you start that program again, Windows 10 won’t have to run it from the disk and can load the program within a brief amount of time.
Obviously, if you are using an SSD, you don’t really need SuperFetch to pre-load an application because programs run extremely fast on SSD in comparison to HDD.
Also Read: What Is SSD And How SSDs Work — All You Need To Know About SSDs
Superfetch and 100% disk usage in Windows 10?

At this point, you might be wondering if Superfetch is so helpful then why the nagging process takes up high disk usage in Windows 10.
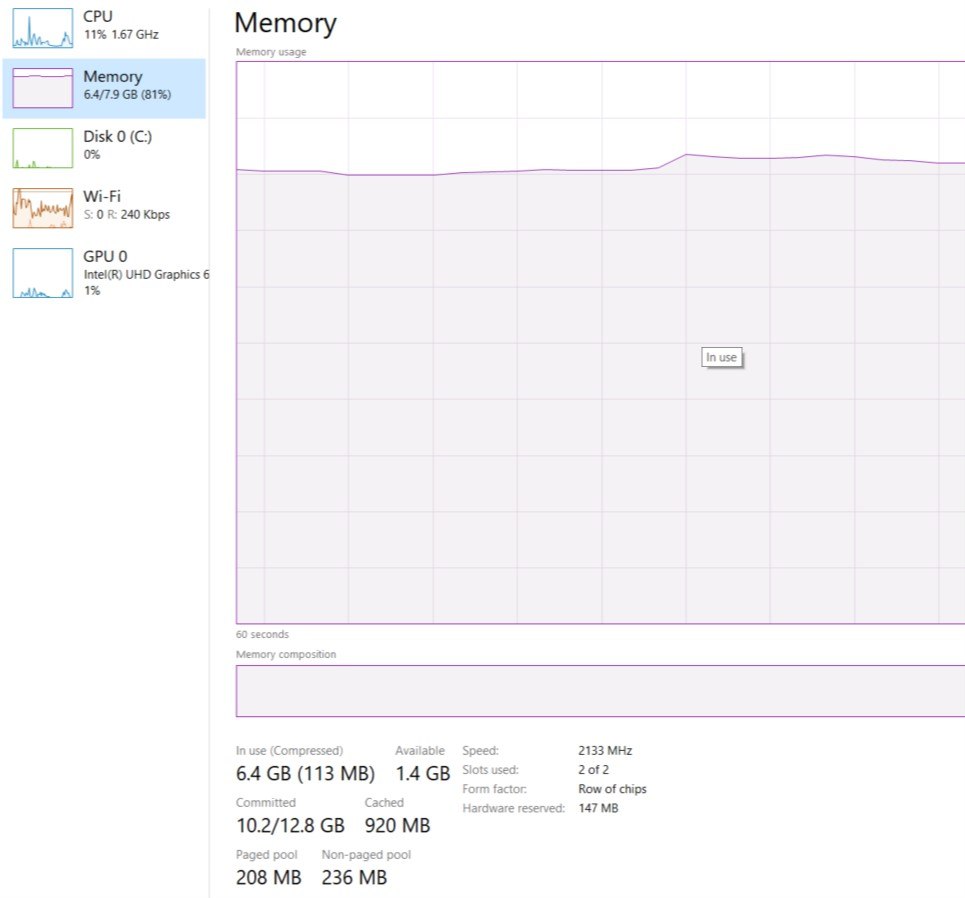
To put it simply, the memory manager process itself takes some amount of RAM to run smoothly. Moreover, it tends to run in the background as well.
That’s not the only reason. Sometimes, it can mess up on its own, not knowing when to stop or which process to pre-load. On bootups, it makes things even worse by running all the processes that could have been executed at a later point in time.
Many users have repeatedly reported that Superfetch gets in their way while gaming, bringing frame rates down. Many also say that the Superfetch process results in unexpected spikes of memory, even at times freezing the system.
Is SuperFetch Needed In Windows 10? Should I disable it?

In the end, everything comes down to this question — Should I disable SuperFetch in Windows 10? And in doing so, will it have any consequences?
Out of hundreds of processes that create issues upon disabling them, thankfully, Windows 10 SuperFetch is not one of them. Like I mentioned above, “Service host Superfetch” is merely a memory management process so even if you disable it, it won’t create any significant errors.
With that said, it’s not an entirely unwanted process. Since it’s known to run the PC more efficiently, one might face issues like a slight increase in booting time, slower response upon opening programs and applications, and other minute bugs.
But on the contrary, we are dealing with Windows 10 100 percent disk usage, which certainly can’t be ignored at all — especially when booting time shoots for the skies.
How to Disable SuperFetch in Windows 10?
Although there haven’t been any reports of users facing any significant change after disabling Windows 10 Superfetch, I’ll recommend you to err on the side of caution. If disabling Superfetch doesn’t give satisfactory results, turn it right back on.
Now that you know everything about Superfetch, let’s look at how to disable Superfetch and get rid of high disk usage in Windows 10, once and for all –
Disable Windows 10 SuperFetch Using Command Prompt

- Search “Cmd” in Windows Search
- Right-click on it ⇒ Click on “Run as administrator.”
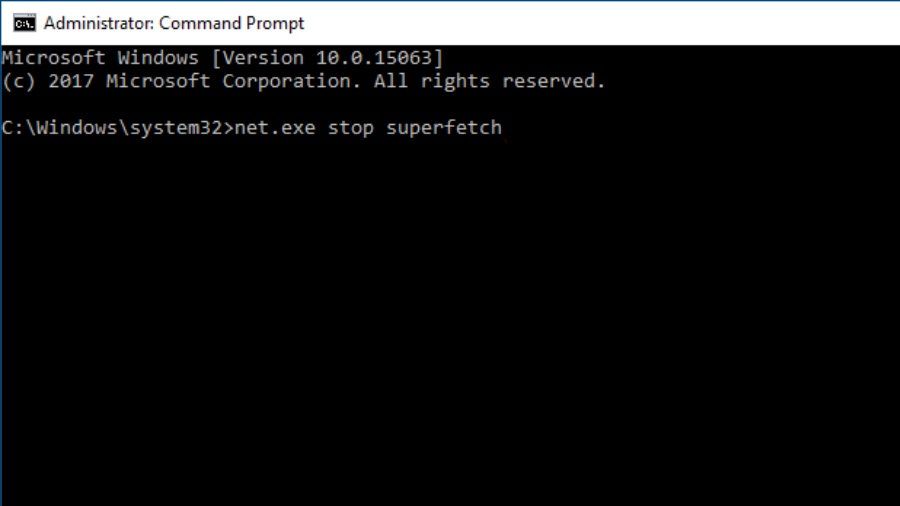
- On the Command Prompt (Cmd) ⇒ Type “net.exe stop superfetch” and Press Enter
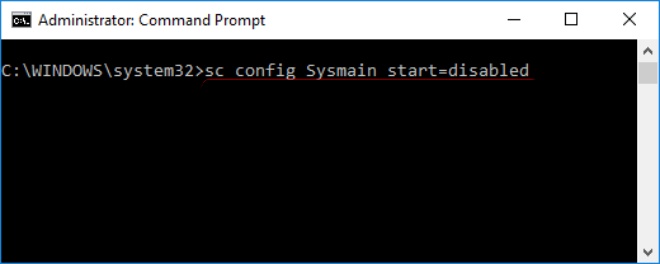
- Similarly, type “sc config sysmain start=disabled” and Press Enter
Disable Windows 10 SuperFetch Using Registry Editor
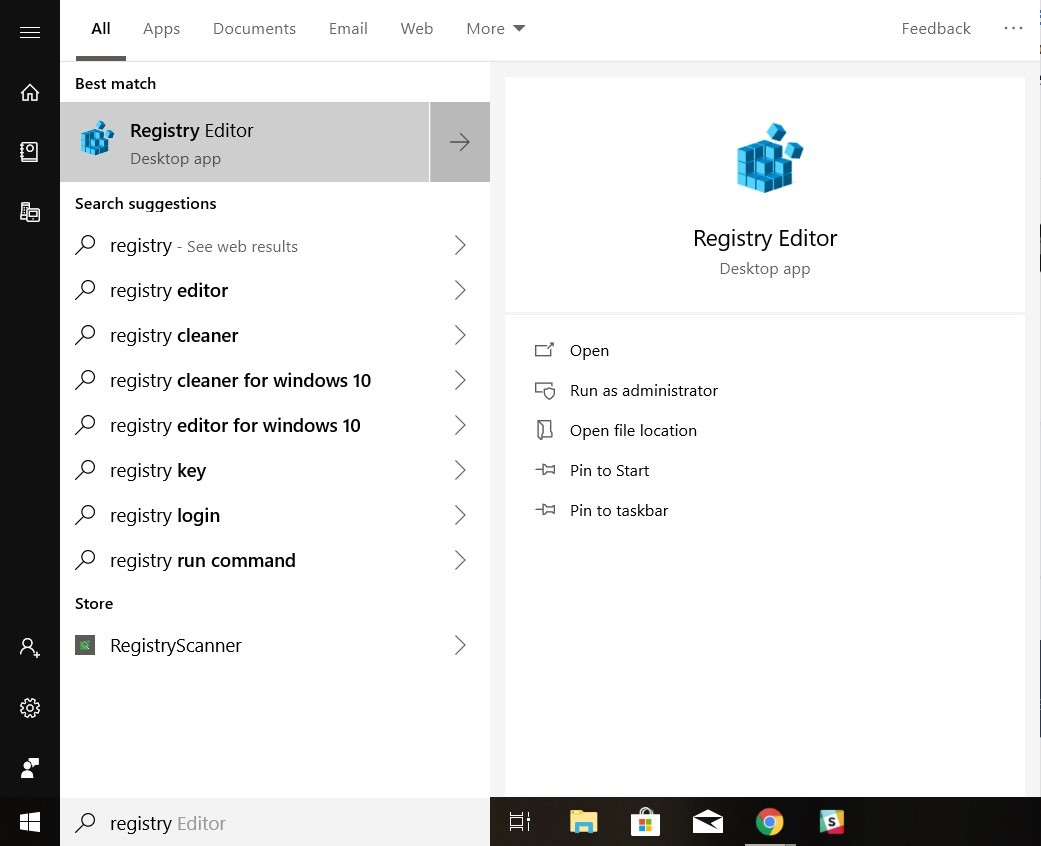
- Search “Registry Editor” in Windows Search and open it.
- Head over to the search bar and type the following address –“HKEY_LOCAL_MACHINE / SYSTEM / CurrentControlSet / Control / Session Manager / MemoryManagement / PrefetchParameters”
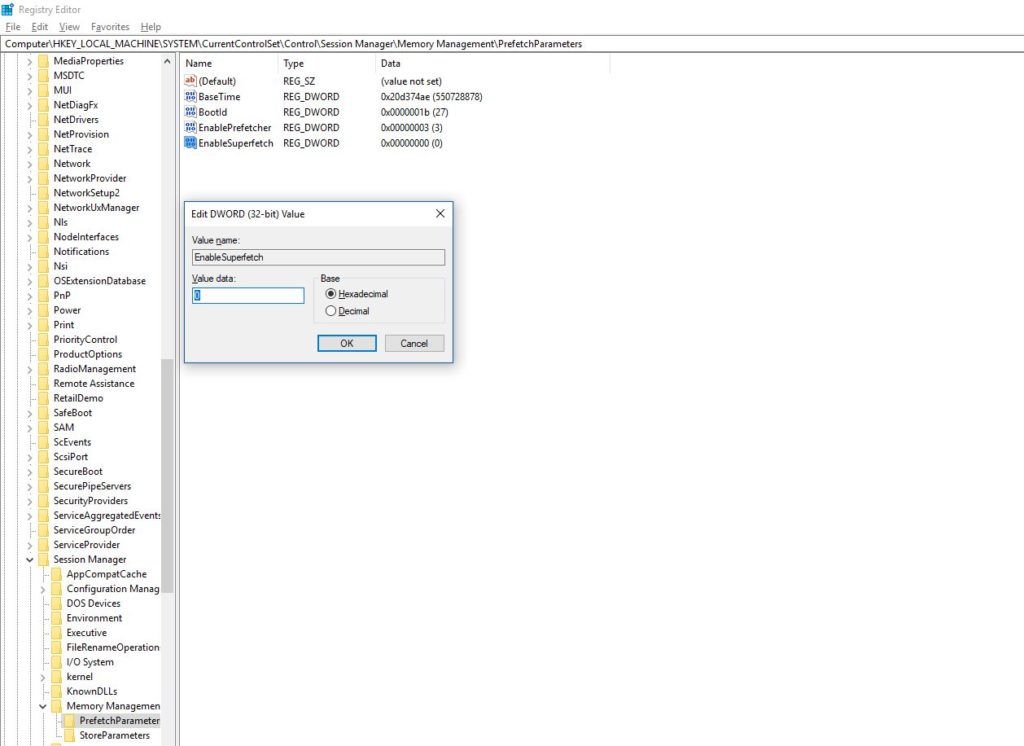
- Double-click on the “Enable Superfetch” key on the panel on the right side.
- Change its value from ‘1’ to ‘0’ ⇒ Click on OK
- Close the Registry Editor and Restart the system.

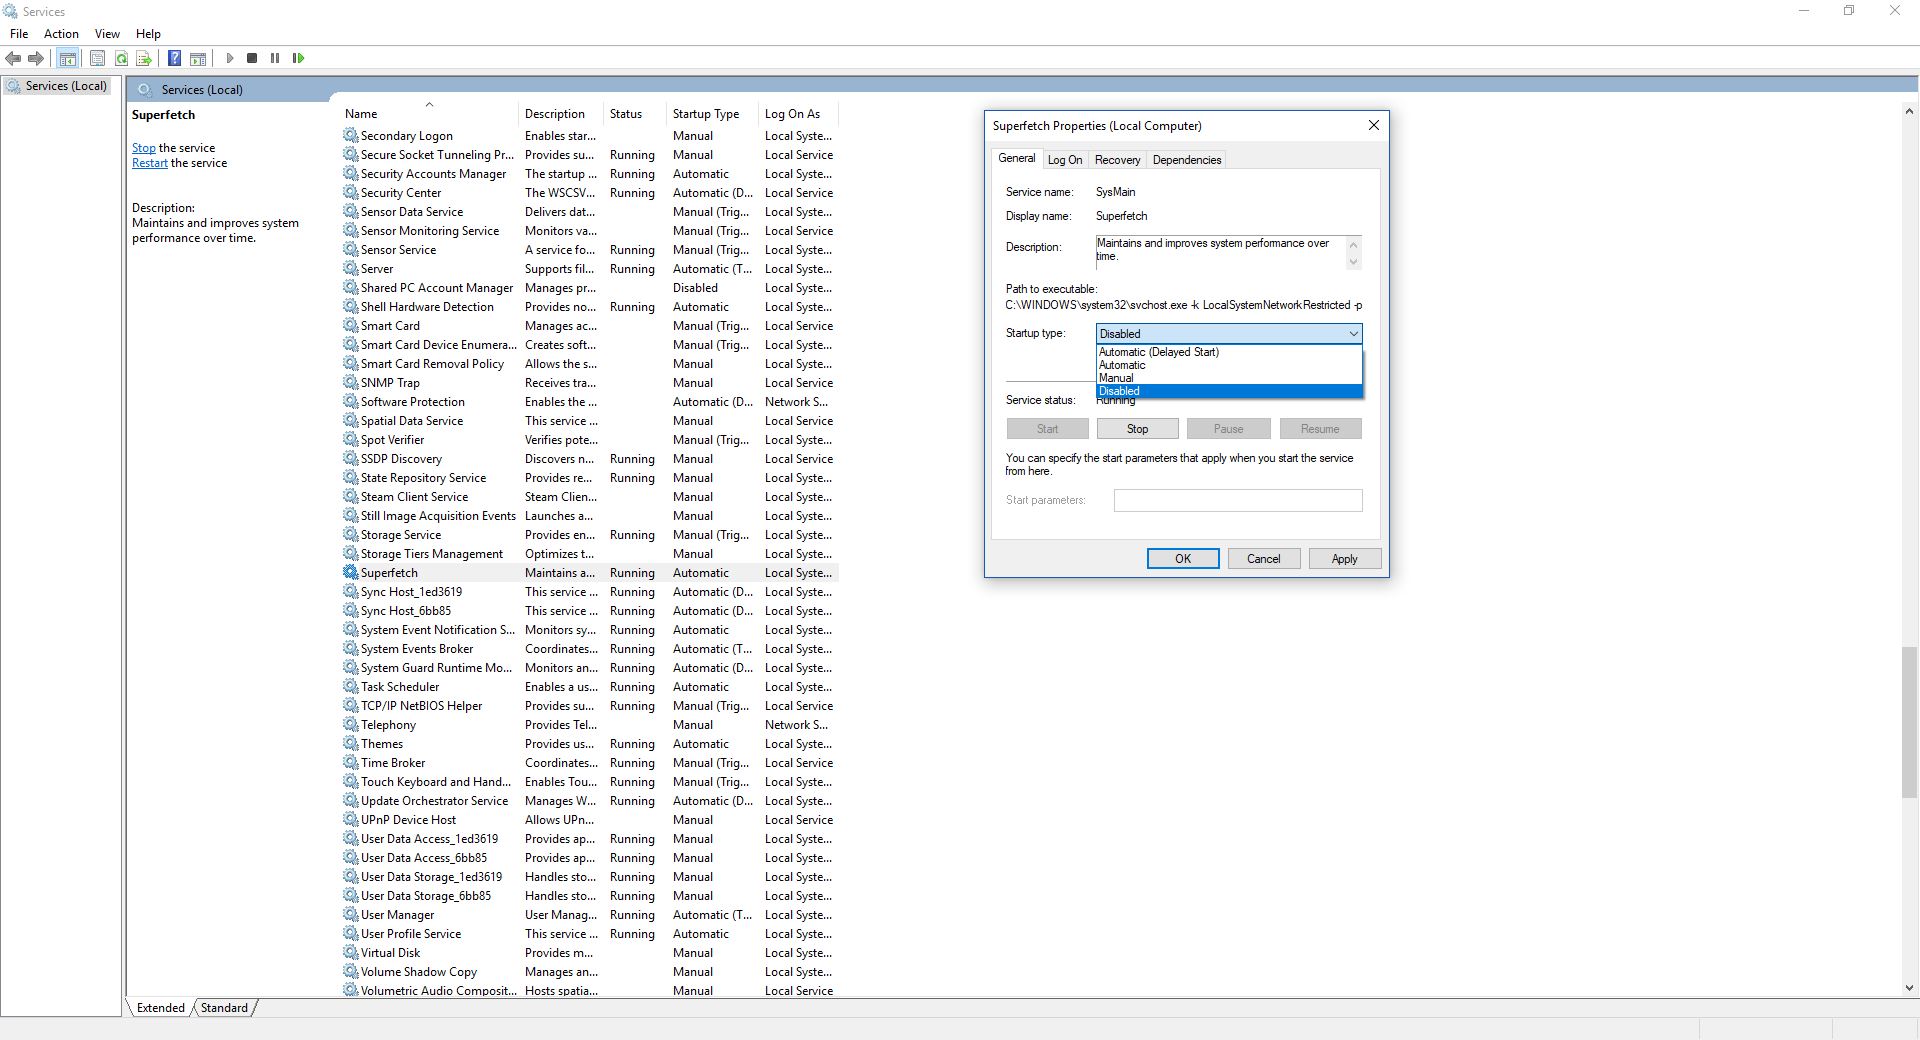
Disable Windows 10 SuperFetch Using Services Snap-In

- Search for “Services” in Windows Search and open it
- Look for a service called “Superfetch” and double-click on it
- On the Superfetch properties ⇒ Choose “Disabled” under the Startup Type drop-down menu.
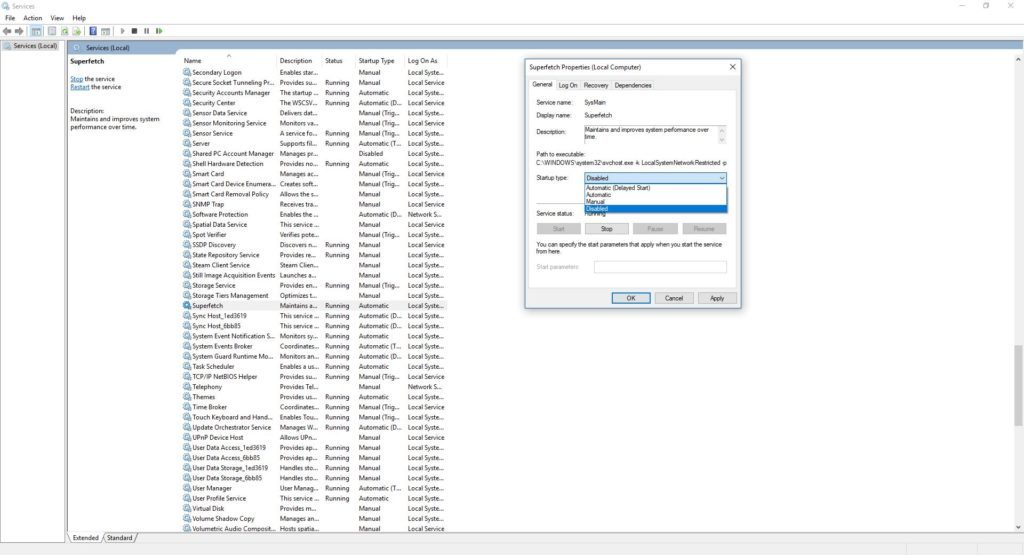
- Click on Stop. Restart your Windows.
Other process causing high disk usage in Windows 10
Sadly, for a few, stopping the Superfetch process is only the beginning. Once you restart the PC, other Windows 10 processes might crawl up in Task Manager, feeding on the disk.
As for this one, comment if any of the above methods worked for you. Thank you for reading :)
Also Read:Tips & Tricks To Speed Up Windows 10 And Make It Faster