How To Install Windows 7 Apps On Windows 10?
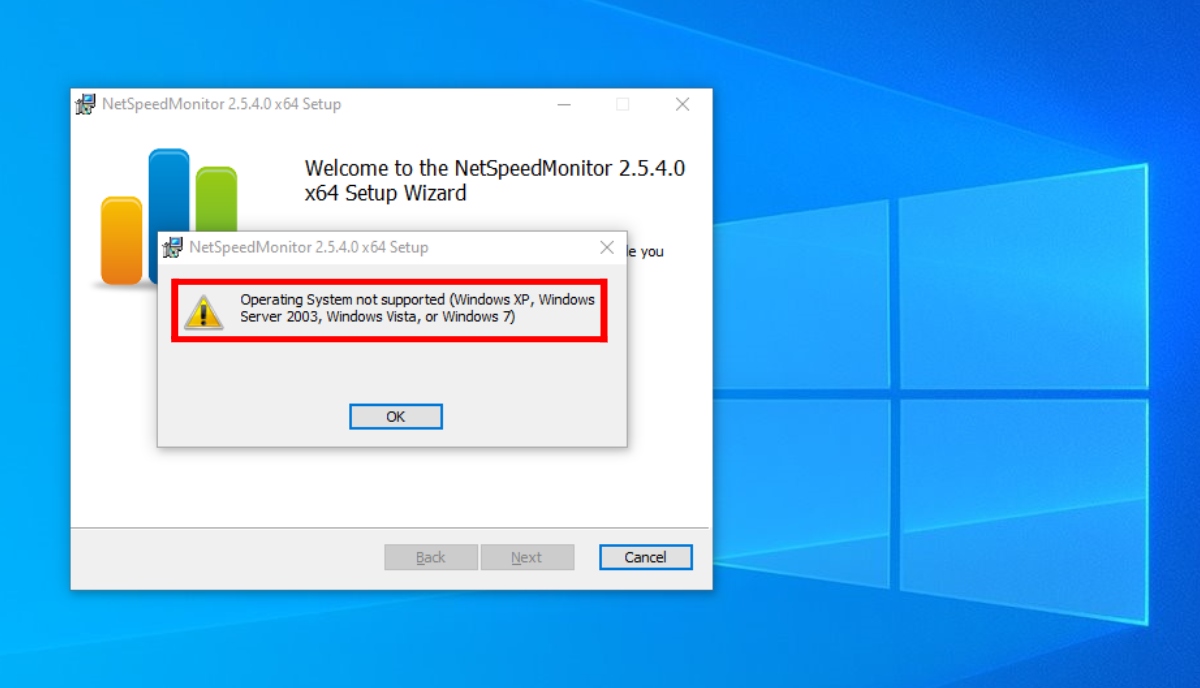
Regardless of whether you like Windows 7 or hate it, the good old operating system reached the end of life last month. In other words, no more security updates for any new threats discovered in the wild.
Excluding a few who will keep trying out several Windows 7 alternatives, users would take the obvious road and upgrade to Windows 10 (for free, in some cases).
Now, one big problem people might encounter is app compatibility. What if your old Windows 7 apps don’t run on the newer Windows version? While it may sound absurd, backward compatibility (which we take for granted) is the reason you find ATMs still running Windows XP.
Recently, Microsoft confirmed that Windows 10 supports almost 99% of Windows 7 apps, so switching to the new OS should be no problem. But if you’re facing problems installing the left out legacy Windows app on your PC, then keep reading.
How to install Windows 7 apps on Windows 10?
You may know that Microsoft preloads the Windows compatibility mode for older versions. This is to make sure that software and apps designed for ancient systems work correctly on the newer OS.
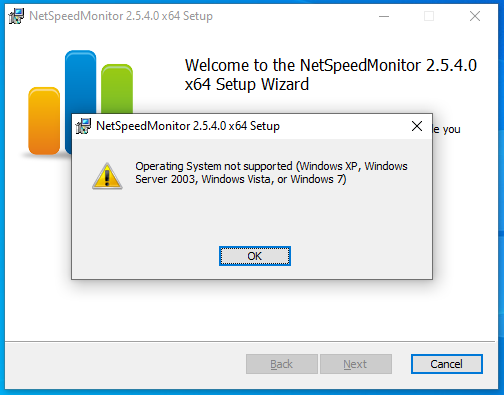
For example, I use this app called NetSpeedMonitor, which shows network stats in real-time. But since it’s meant for Windows 7, it causes issues during the installation process.
If you are dealing with such apps, then follow the steps mentioned below:
- Right-click on the setup (.exe or .msi) file of the app.
- Go to Properties > go to the Compatibility tab.
- Here, tick the checkbox that says “Run this program in compatibility mode for” and choose the desired Windows version from the drop-down menu.
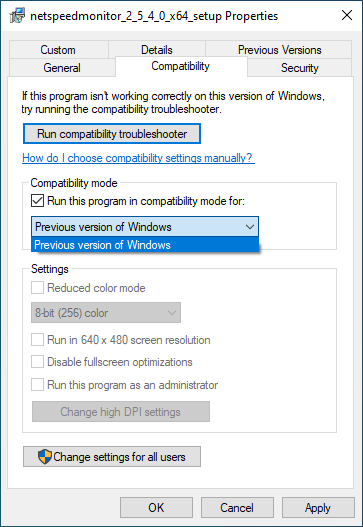
- Depending on your app, it will either show “Previous version of Windows” as an option or display a list of different Windows versions.
- Choose your desired option and click on Ok.
Now, you can install the app like you usually do by double-clicking on it. It shouldn’t cause any problems.
If you can’t figure out the correct Windows version under the compatibility mode, then click on “Run compatibility troubleshooter” and Windows will automatically detect the compatibility settings.
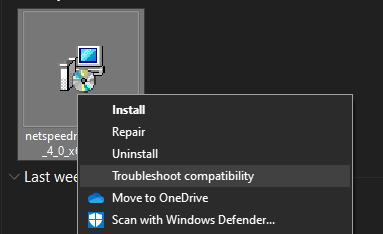
You can also right-click on the app and click on the “Troubleshoot compatibility” option in the context menu, which does the same thing.
Users can opt for manual options as automatic troubleshooting can take a lot of time at times.
Not just Windows 7, Microsoft has added compatibility modes for Windows 8/8.1, Windows XP, and all the way to Windows 95. So, it has got yourself covered in most cases.
In addition to legacy software, you can take the help of Windows 10 compatibility mode to run all those nostalgic PC games that kept you glued to your computer in the early days.

