How to Turn On System Restore in Windows 10 to Protect Against Bad Windows Updates

Short Bytes : The important feature of System Restore in Windows 10 is disabled by default. This feature protects your PC from the adversaries of bad Windows updates and app installs. Enable this feature to roll back your PC to an earlier and healthier state.
If you’ve upgraded your PC to Windows 10, you would be surprised to notice that one of the important features of any Windows OS, System Restore, may not be active. This feature creates restore points before changes like new app installs, or Windows update. So, this helps you to go back to the previous state of the OS if things didn’t turn out to be as expected.
Also read: How to Stop Windows 10 From Spying on You
Some of you might be seeing this feature enabled after Windows 10 upgrade. But, it won’t take much time to check for its status. fossBytes advises you to go through the following steps and find out:
How to Turn On System Restore in Windows 10 For Protection from Bad Updates?
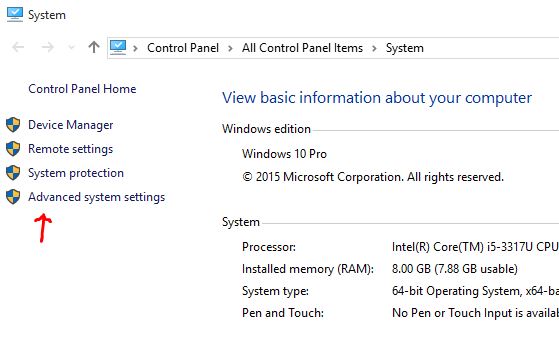
System Retore in Windows 10 could be found in the Control Panel and it’s the heart of any Windows operating system. To access Control Panel quickly, type Control Panel in your desktop search bar and click on the relevant result. Control Panel is now open in front of you, locate System and click on it. This will open the System window with information about your Windows 10 PC.
On the left side, locate Advanced system settings. Click on it to open the System Properties window.
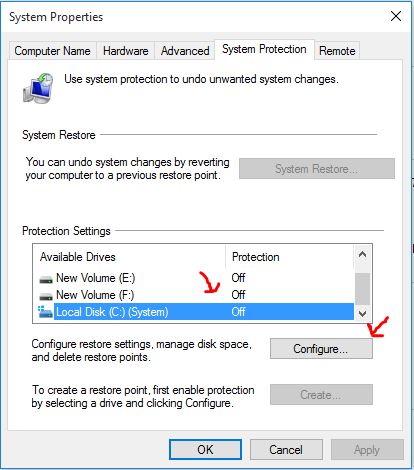
It’s possible that your PC has the System Restore function disabled. Under the Protection Settings table, look for your system drive (C: in the picture) and see its protection status. If it’s ON, you don’t need to read ahead, and you can go back to your routine.
If you spot the OFF status, this means that System Restore in Windows 10 is disabled. To save your Windows 10 PC from the risk of bad updates or app installs, you need to click on your system drive and hit the Configure button as shown in the picture.
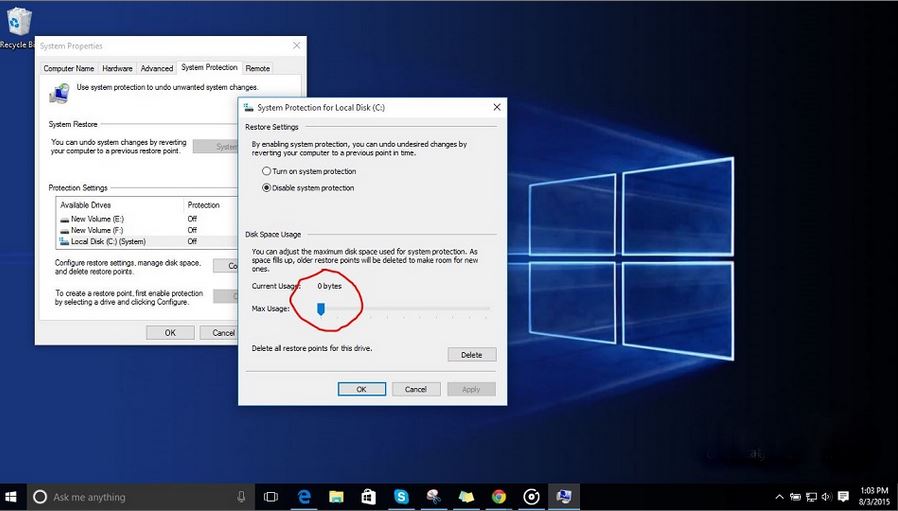
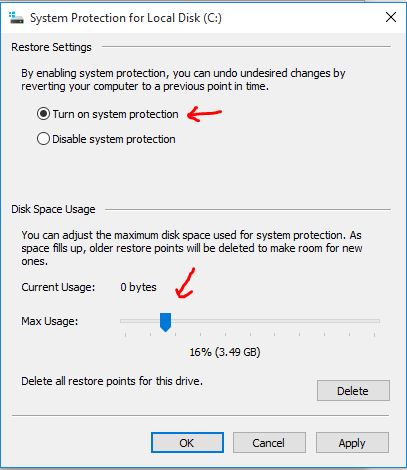
Now, you can see the System Protection for Local Disk window. To turn on the system protection, you need to tick the Turn on system protection button.
Below it, you can spot an adjustment bar that decides how much disk space is reserved for System Restore. You can adjust it according to you need and Apply the settings to save them.
Now System Protection is enabled in your Windows 10 PC and it’ll be useful to restore your PC to a healthier and earlier state.
Did you like this quick tip? Tell us in the comments below.
Read Next: How to Stop Windows 10 From Sharing Your WiFi Password
For more updates and Windows 10 tutorials, subscribe to fossBytes newsletter. [newsletter_signup_form id=1]