Windows 11 Virtual Desktops: Here’s Everything You Can Do With It
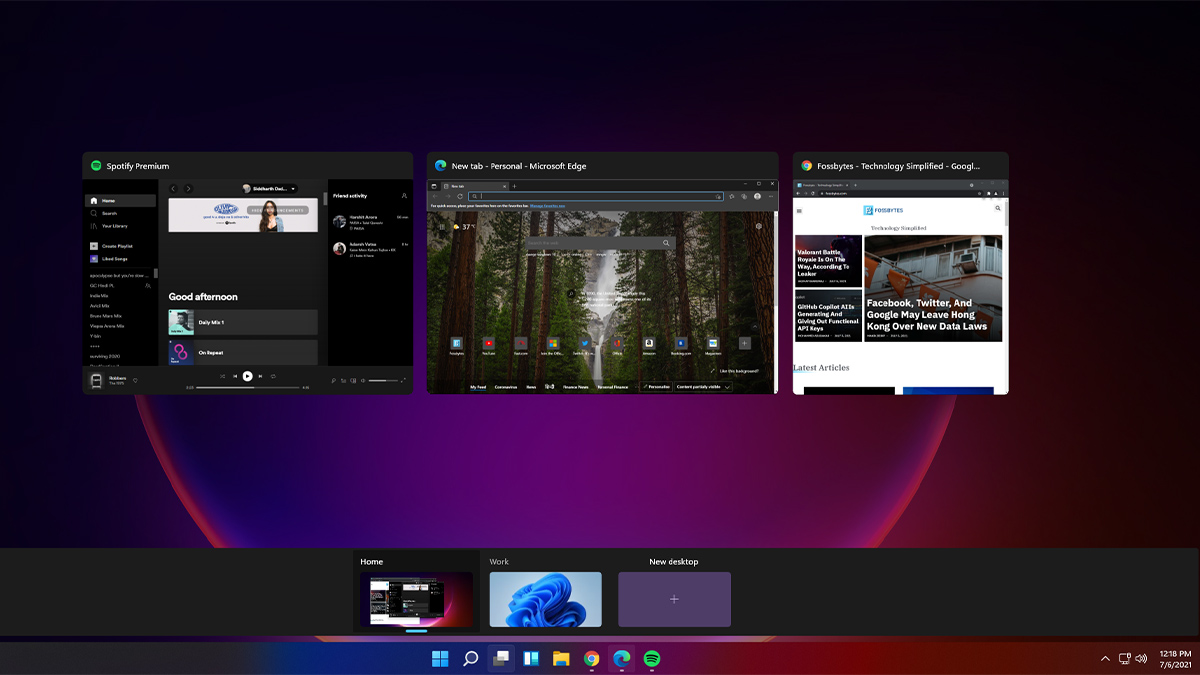
With everything we’ve seen since Windows 11 came out, it’s clear that Microsoft paid special attention to multitasking. Virtual Desktops have existed since Windows 10, but they weren’t fully equipped. Earlier, the Task View button opened the Timeline and Virtual Desktops screen.
With Windows 11, Task View offers a chance at better multitasking. Let us see what you can do with the all-new Virtual Desktops.
The Idea Of Using A PC At Different Places
Windows 11’s Virtual Desktops were created with the idea that a user uses their computer at different places. Meaning, a user should have a different workspace at home and another for work.
Rename the Virtual Desktops
Initially, you can rename your virtual desktop as per your liking. Here’s How:
1. Hover over the Task View icon.
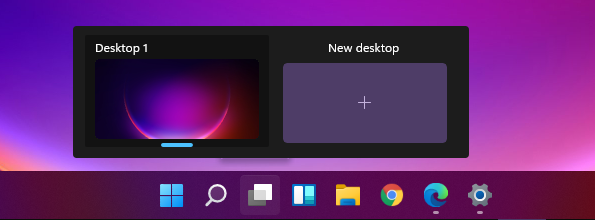
2. Then, right-click on the virtual desktop and click Rename to name it as per your liking.
3. To sum up, you can have different names for each active desktop, e.g., Work, Home, School, etc., to create an environment for everything you do.

Choosing Different Backgrounds For Separate Desktops
A newly added feature lets you have different backgrounds set for active desktops. For instance, you can have a different wallpaper for your work desktop and another for your home desktop. This, in turn, can lead to smoother multitasking. Let’s see how.
1. Hover/click on the Task View button, and right-click on your desired Desktop.
2. Secondly, choose the option that reads “Choose a background from the context menu.”
3. Further, Windows will open the Settings app. Choose a background from the pre-installed ones or use your own image.
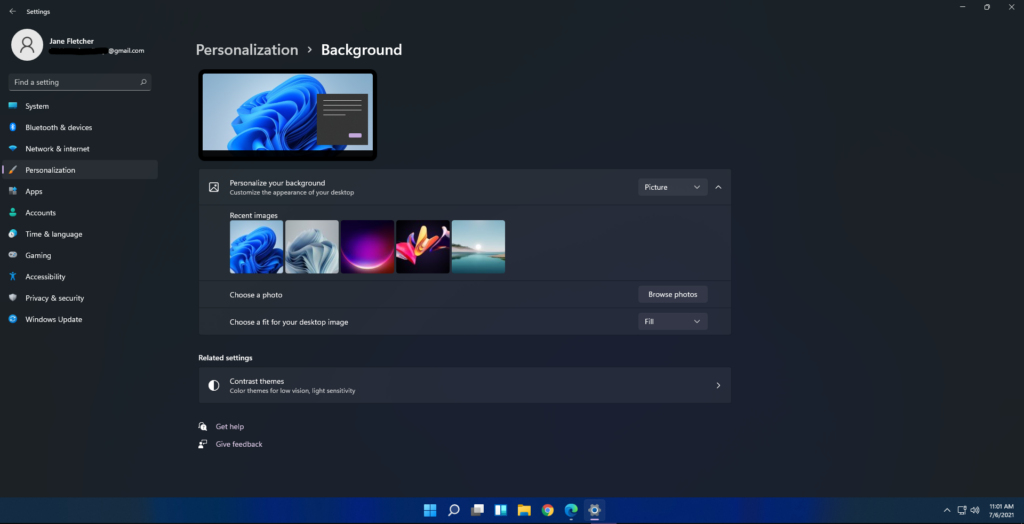
Note: You can also rearrange the virtual desktops by moving them left or right in the Task View screen. All these new features are introduced to maximize productivity.
Once you’ve set up your Virtual Desktops, this is what it will look like:

Do you like the new Windows 11 Virtual Desktops? Would you use them? Let us know in the comments below.
Also, make sure to check our in-depth Windows 11 coverage and Windows 11 guides.

