How To Dual Boot Ubuntu 20.04 With Windows 10? [Using Bootable USB]
![How To Dual Boot Ubuntu 20.04 With Windows 10 [Using Bootable USB]](https://fossbytes.com/wp-content/uploads/2020/03/How-To-Dual-Boot-Ubuntu-20.04-With-Windows-10-Using-Bootable-USB.png)
Ubuntu 20.04 LTS is one of the most feature-rich and high-performance versions among the Ubuntu family. v20.04 is the current long-term support iteration that was released on April 23, 2020.
You can read our well-curated article on v20.04 “Focal Fossa” release date and upcoming features. However, if you’re more interested in installing Ubuntu 20.04, follow the detailed five steps given below in the article.
So, let’s talk about the installation. In this article, I will guide you to dual boot Ubuntu 20.04 with Windows 10 by creating a bootable USB. This is an in-depth article, so sit back and read every step to install Ubuntu Linux alongside Windows.
Dual Boot Ubuntu 20.04 And Windows 10
Follow the step-by-step instructions to download Ubuntu ISO and install using the bootable Ubuntu USB stick. Here’s a brief list of steps:
- Create free space for installation in Windows
- Make an Ubuntu bootable USB on Windows
- Install Ubuntu 20.04 with Windows 10
- Create a partitioning scheme for Ubuntu Linux
- Configure general settings and finish the installation
Are you ready to install? Well, without wasting any time, let’s dive into the Ubuntu installation guide.
Step 1: Create A New Partition Drive In Windows
This is a preliminary step to create a separate free space in Windows 10 for Ubuntu installation. We’ll use the pre-installed Windows disk management software to make a dedicated partition on the hard disk drive. However, you’re free to use any third-party tool.
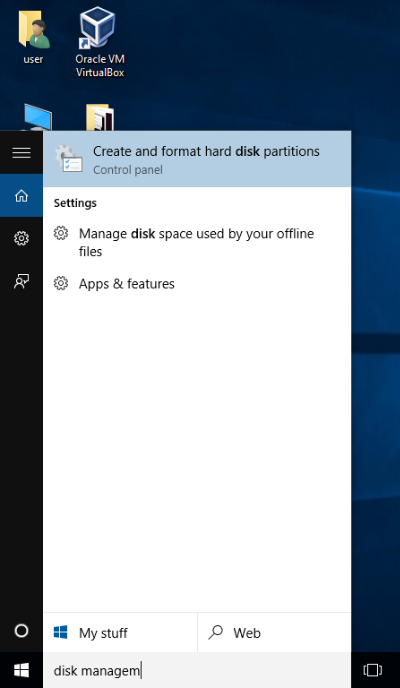
Search in your windows for “Disk Management” and open the software with subtitles as “Create and format hard disk partitions.”
Now, select the volume to extract and allocate space for installing Ubuntu. Right-click on the selected drive and choose “Shrink Volume.” Here, if you don’t have any other volume, you can also use “C drive.”
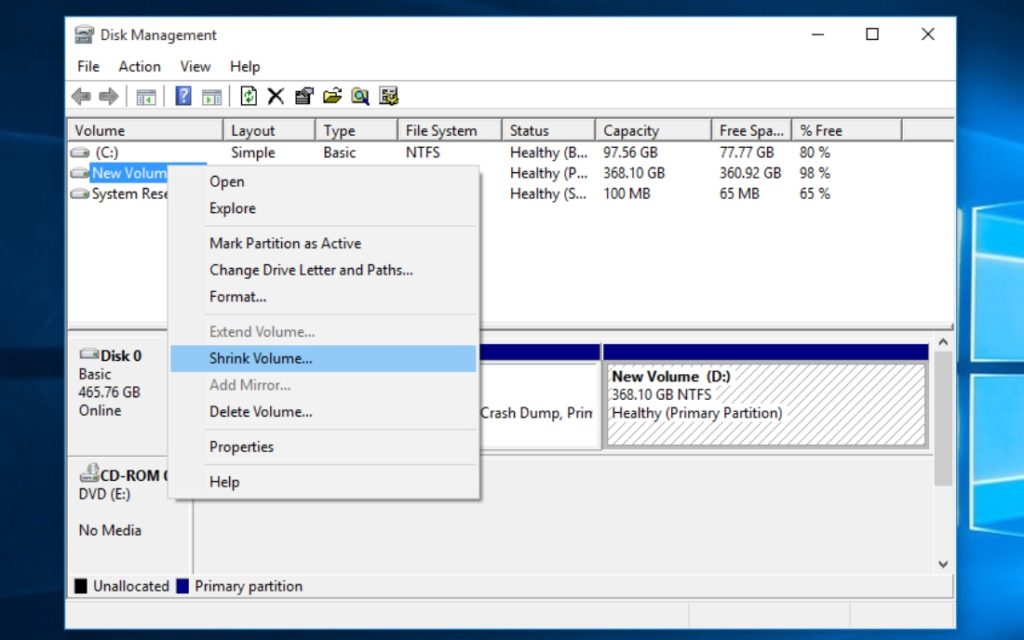
Next, enter the space for Ubuntu OS in the prompt window. For smoother and better performance, Ubuntu always recommends at least 25GB of free space. Hence, I would also suggest that you assign more than 25GB. I have a 500GB hard drive on my laptop, so I selected 100GB.
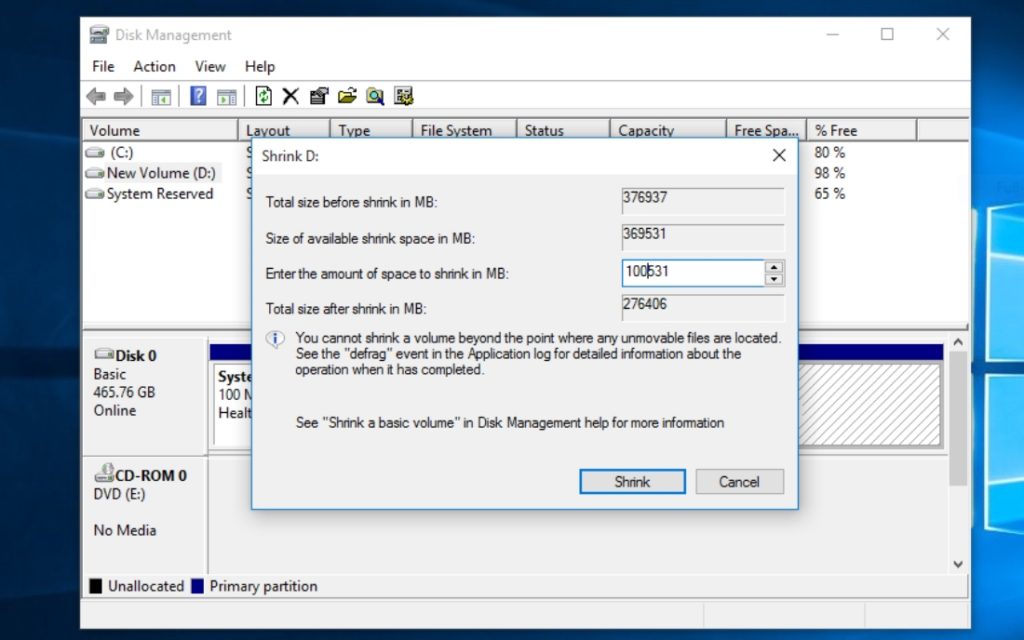
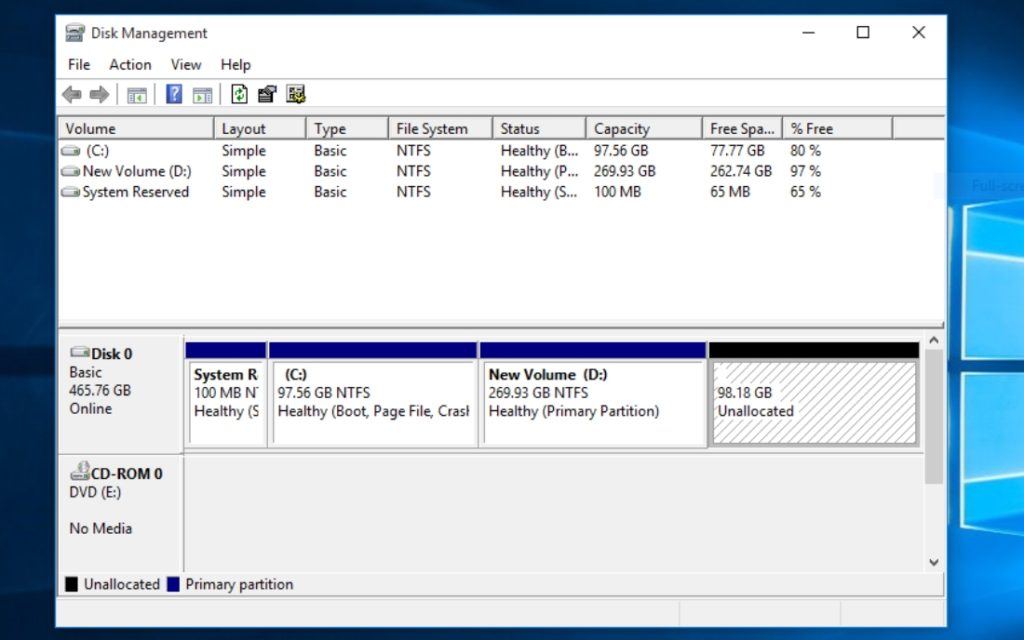
After filling in the space amount, click on “Shrink” and you’ll notice a new unallocated space created where we’ll now install Ubuntu 20.04.
Step 2: Create A Bootable USB On Windows
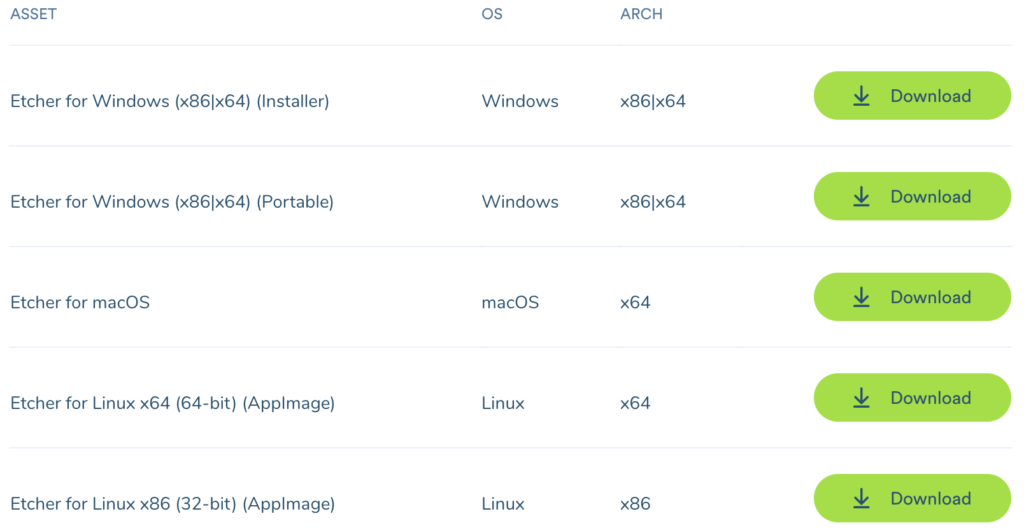
Before heading toward the Ubuntu installation, we also need to download Ubuntu ISO images and make a bootable USB from ISO. Hence, download the Ubuntu 20.04 desktop from the official site here.
But to create a bootable USB on Windows 10, we require image writing software to burn Ubuntu ISO. For the same, I’m using the Balena Etcher software which you can download from here. You can also choose from the best 5 USB tools available for Windows.
I chose Etcher because it burns ISO into USB without worrying about a partition scheme or file system format. Moreover, Etcher is a cross-platform app available for Windows, macOS, and Linux.
If you wish, you can use the command line to create a Live USB. The path choice is yours but it all leads to one destination.
Finished the download? Then, open the application and you get only three steps to make a bootable USB.
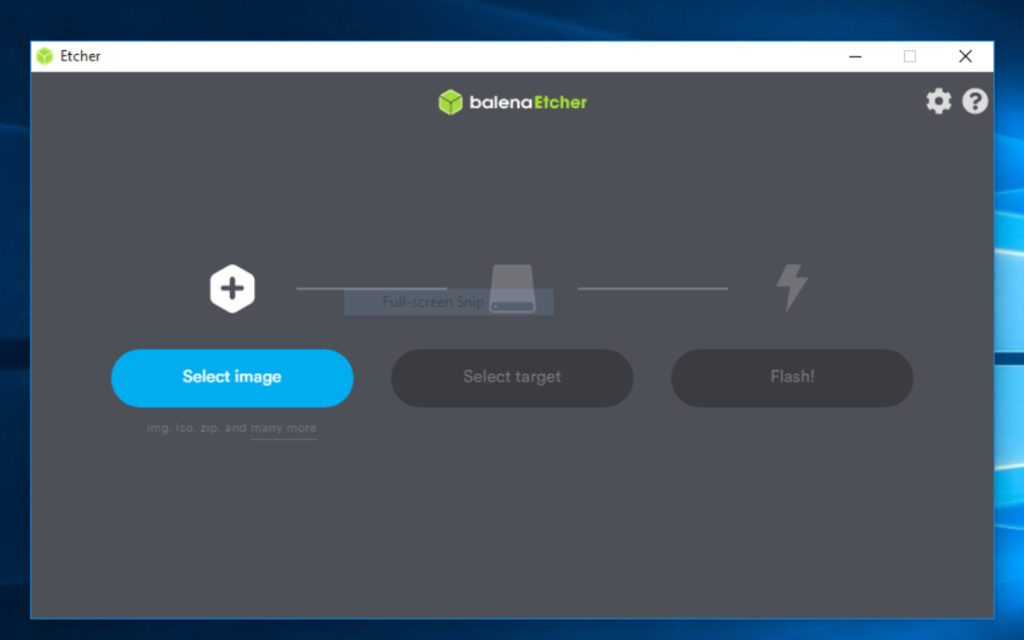
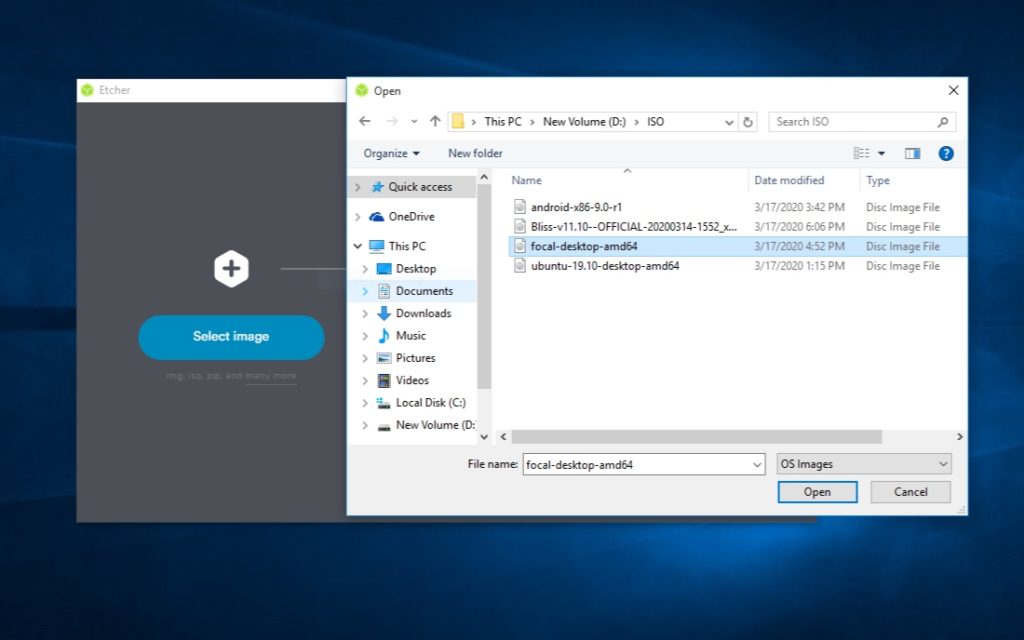
Click on “Select image” and a Windows dialog will prompt. Go to the location where you’ve downloaded the Ubuntu ISO and select that file.
If your USB is already plugged in, Etcher will automatically detect your USB stick. If not, attach your USB to the system and make sure Etcher selects the right device.
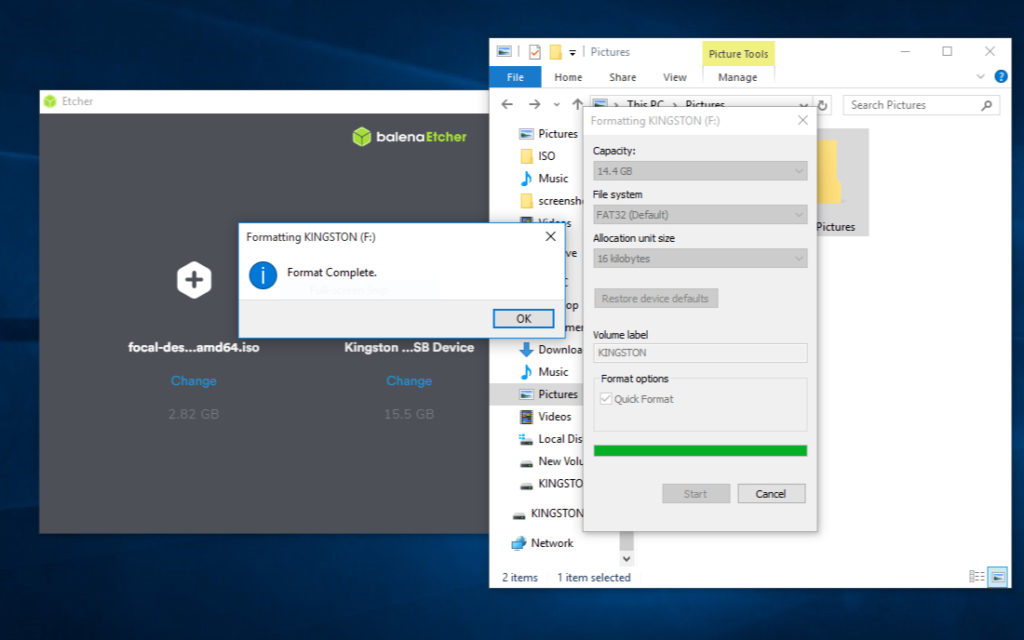
You’re now one step behind in getting your live USB ready. But wait, before you start flashing, you need to delete all files and format your USB.
To do the same, right-click on the USB drive and select the FAT32 file system. Keep the settings as displayed in the picture below and start the process with a quick format.
As you complete the format, click on the last stage “Flashing” and etcher will start burning ISO into USB.
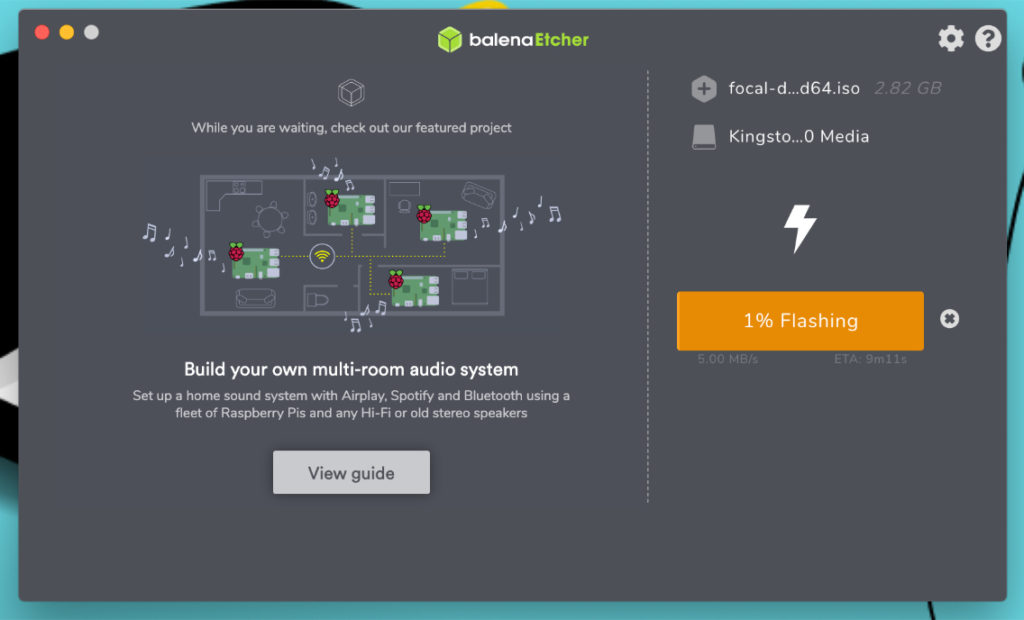
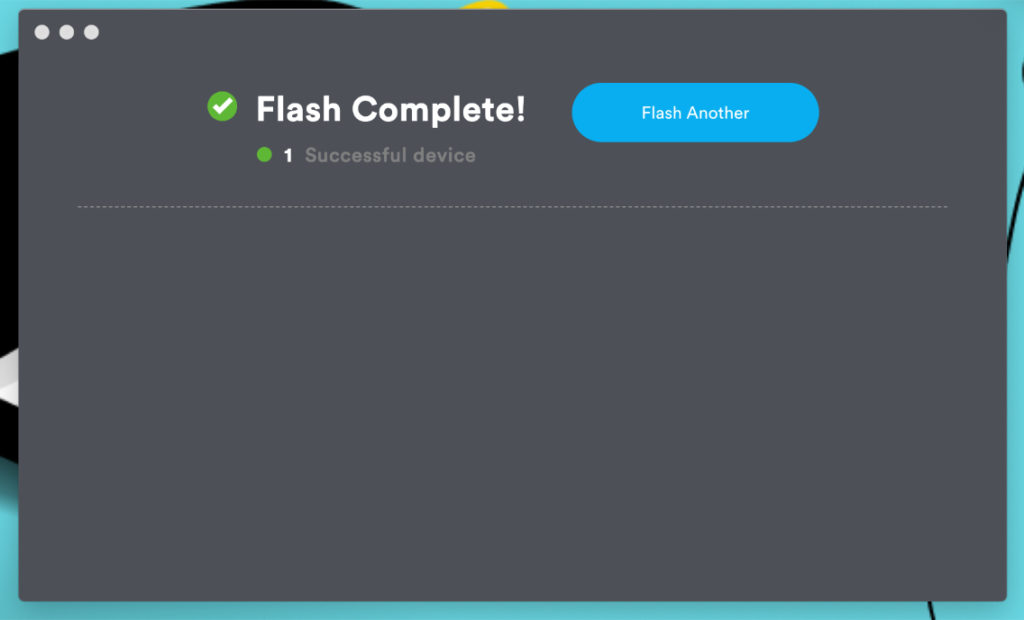
Flashing the Ubuntu image may take at least five minutes. So wait for a while until you get a Flash complete notification!
Step 3: Dual Boot Ubuntu 20.04 And Windows 10
If you’ve successfully created a bootable USB, you can move forward by loading Ubuntu from the Live USB stick.
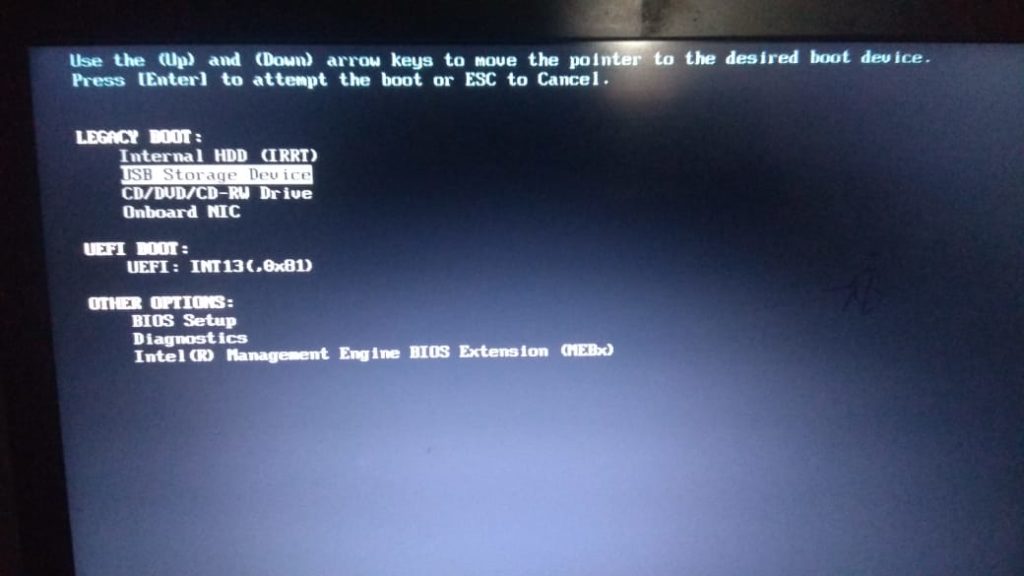
Restart your computer with a plugged-in USB and press F2 or F12 to enter the boot menu. For my Dell laptop, F12 is the key for the boot menu. You must use the key specified for your system manufacturer.
Select USB storage from the boot menu in legacy mode. Your boot menu may differ based on the OEM of your PC. If you find any difficulty, read how to boot from USB in BIOS.
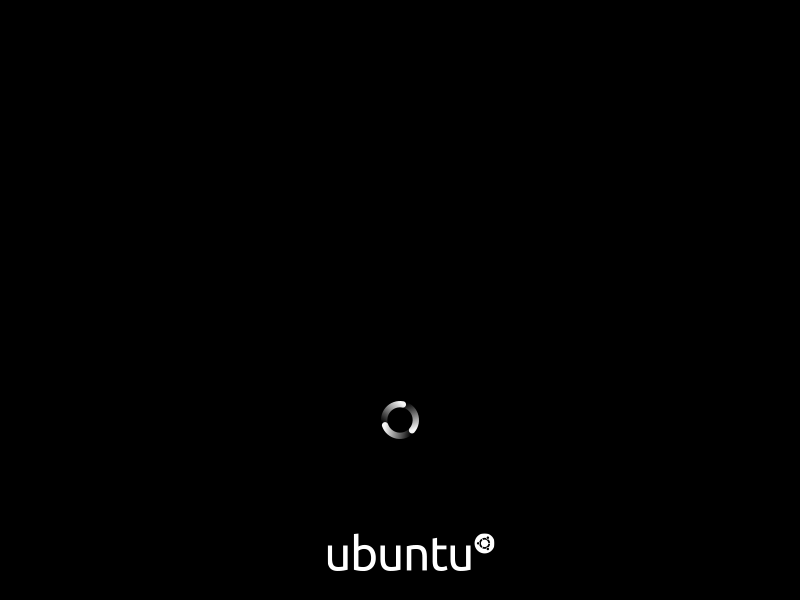
If you hear a beep sound and see a spinning wheel with the Ubuntu logo beneath, you’re good to go.
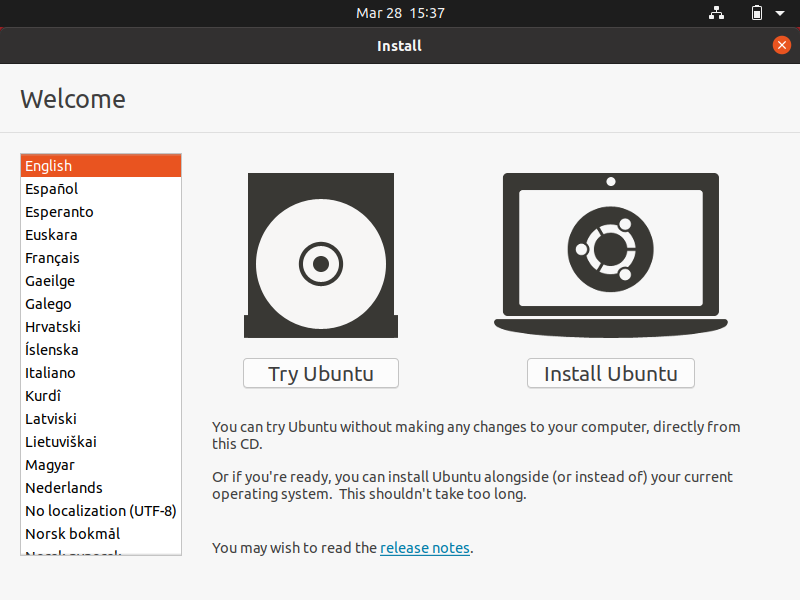
After a few seconds or a minute, the Ubuntu installer will start and display two options to proceed further.
Choose “Try Ubuntu” to enter the Ubuntu desktop without installing it and get a sneak-peek. But we’re here to install Ubuntu permanently, so click on “Install Ubuntu”.
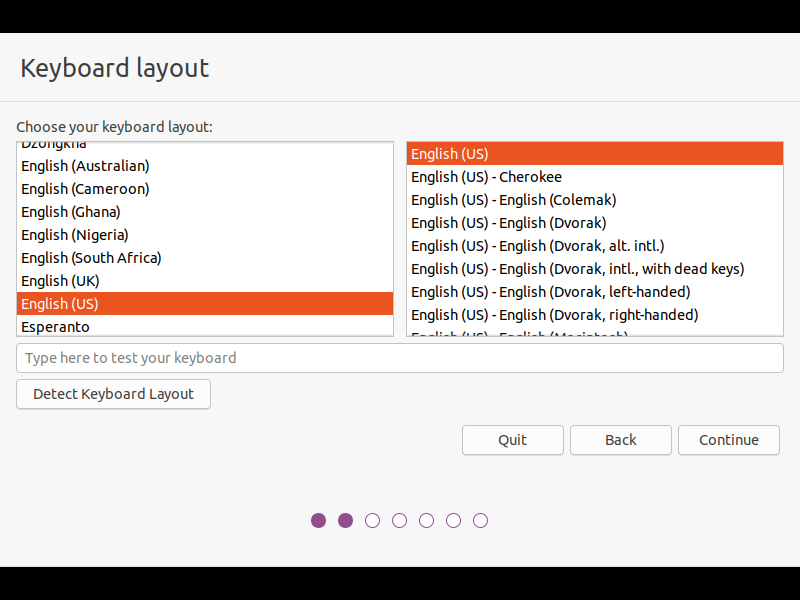
Select the Keyboard settings as per your native language.
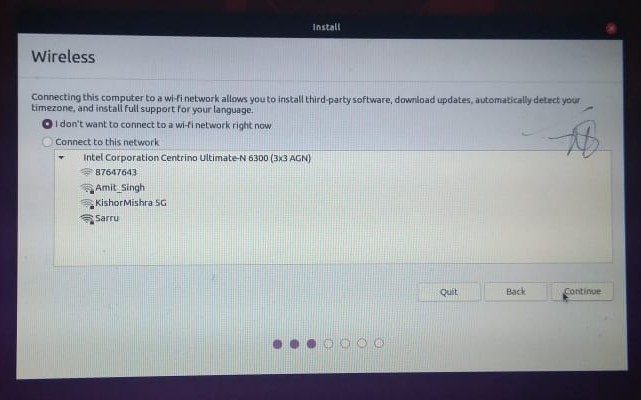
If you want to install third-party software in the upcoming step, connect to your Wi-Fi network or you can skip continuing further.
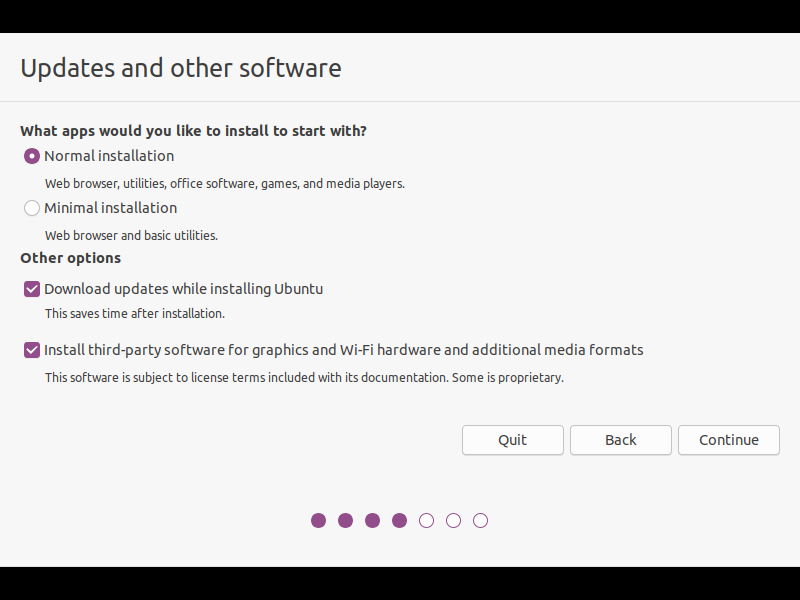
The next window gives options to choose the method of the software installation. If you have memory constraints, choose a minimal installation to pre-install a few softwares.
But if you want to preload various applications such as games, office, and browsers, choose the normal installation.
Also, make sure to check both other options to download updates and install third-party software during installation.
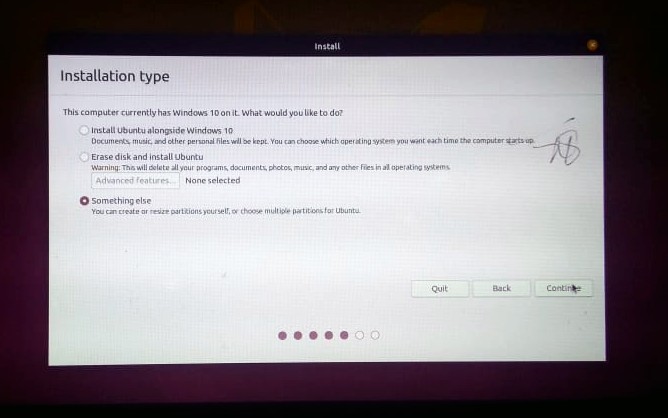
The above process may take some time to load. As soon as it is finished, you now enter into the important window where you need to be very cautious.
Since we want to dual boot Ubuntu and Windows 10, choose “something else” to create a partition table manually.
Though you can also select “Install Ubuntu alongside Windows 10,” I would not advise you to do so because “Something else” gives you more control to manage the space for each partition.
Step 4: Creating A Partitioning Scheme For Ubuntu
Partition schemes for Ubuntu can be a confusing part for beginners as it follows a different approach than Windows — that’s why I’ve created a dedicated step for the same.
As you continue, you will notice the NTFS type device that belongs to your installed Windows OS. If you want to keep Windows running alongside Ubuntu, don’t touch any NTFS type device until you know how partition works.

Moving forward, we will create three partitions for Ubuntu — /root, /home and /swap. You can also create other partitions like /mnt. But these three are the most important that are required for Ubuntu installation.
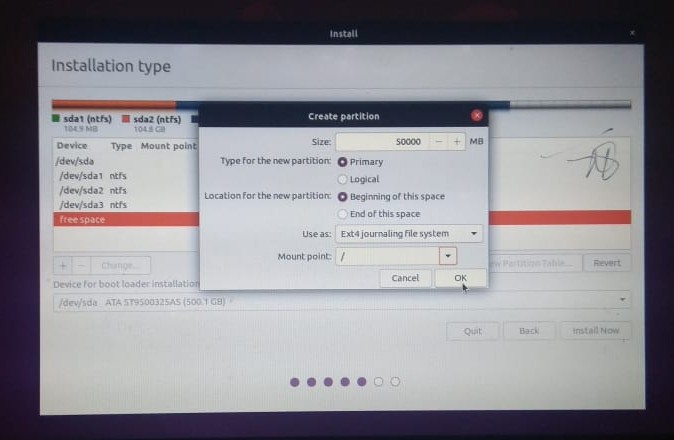
Select the free space option and click on the “+” to add a new partition. Then, fill out the input field with values as displayed in the picture below.
I also want to clarify that for each partition, I’ve chosen a standard size. You’re completely free to change the partition size based on the space you’ve allocated for Ubuntu.
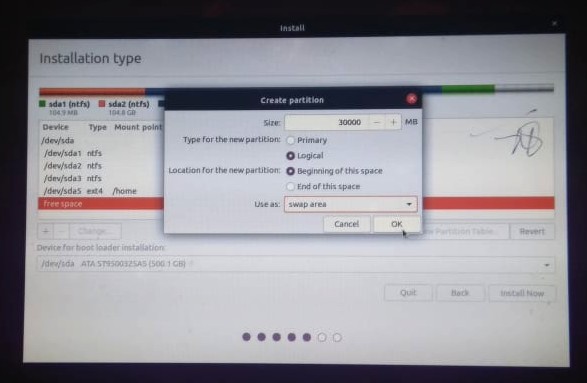
Again, select the free space and create a swap area that acts as a virtual RAM memory. I gave 30GB of space for the swap area based on my 100GB total space for Ubuntu. The least space you can allocate for swap must not be less than your system RAM size.
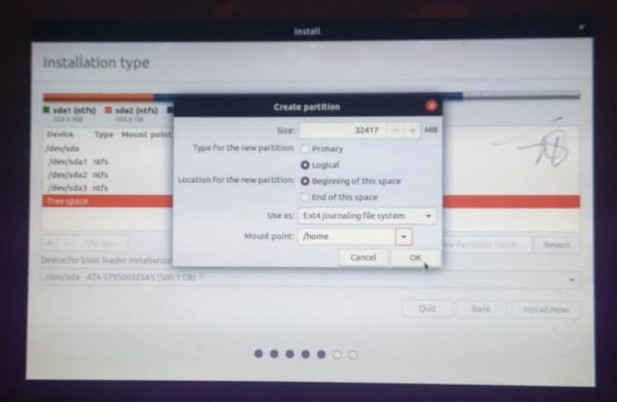
Lastly, create a home partition which will be your personal directory to store files and folders. The picture may look hazy, hence, I’m listing the values:
- Size: 32417MB
- Partition Type: Logical
- Location: Beginning
- Use as: Ext4 journaling file system
- Mount Point: /home
Finally, we’re done with the partition table. Wait, do you want to modify or resize the partition? If yes, click on “—” to drop the misconfigured partition and use “+” to initiate again.
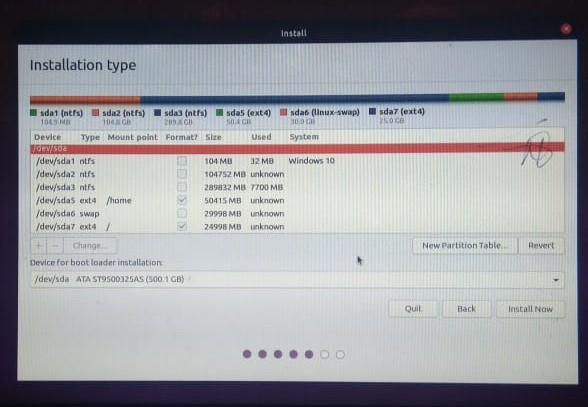
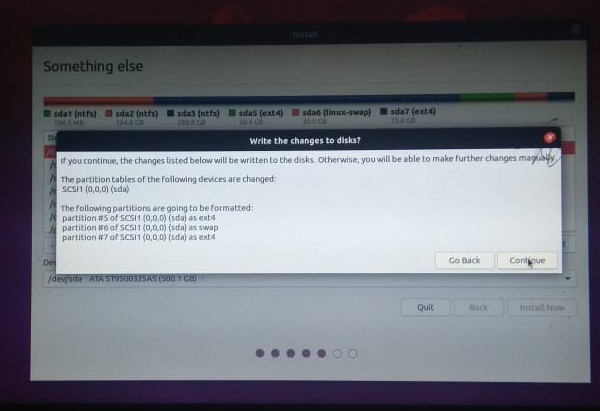
Take a closer look over the final configuration and click on “install now” to start writing changes to disks.
Step 5: Configure Settings And Finish The Installation
We’ve now reached the final step and we only need to set up our basic configuration for Ubuntu OS. So, let’s finish it.
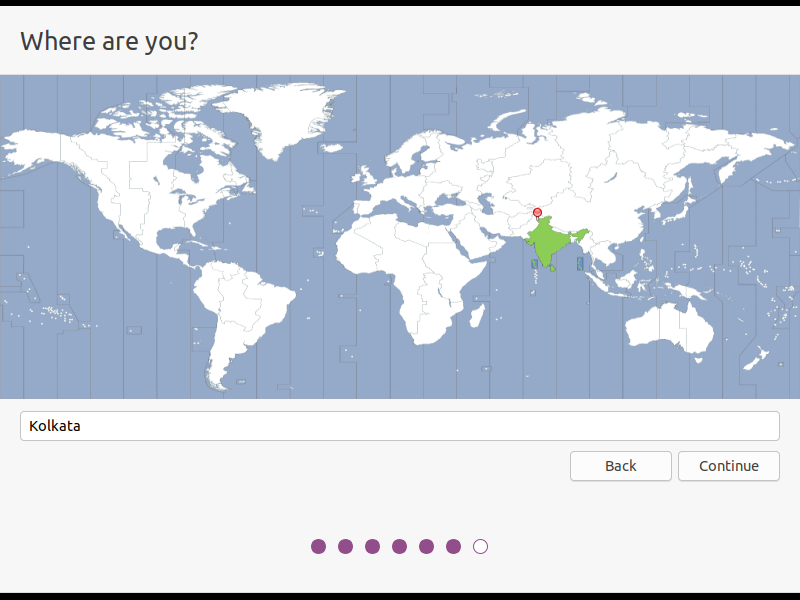
In the second last window, set your location using a map or dropdown field. Luckily, if you’re connected to the internet, the Ubuntu installer will automatically detect and set your location.
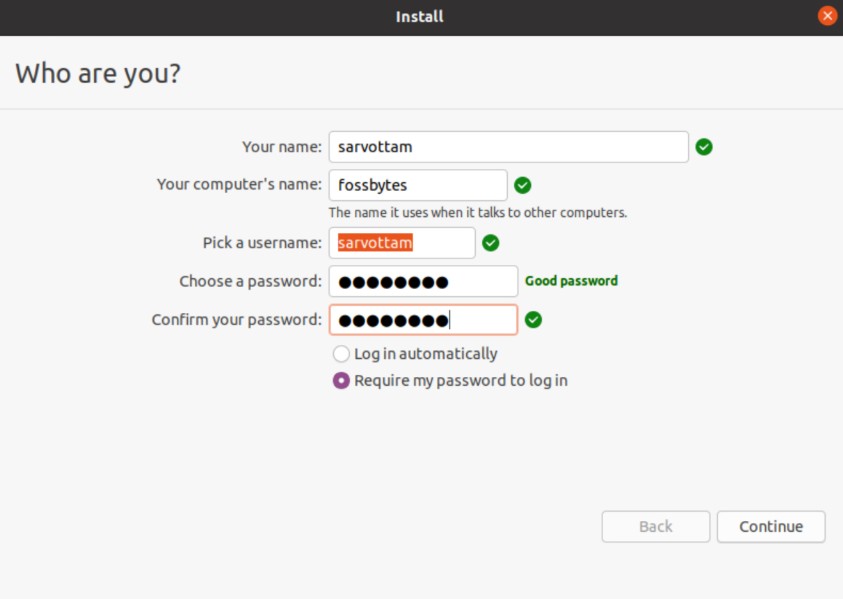
At last, set up your username and password that you’ll use to login to the system. Always choose a strong password with alphanumerics and symbols.
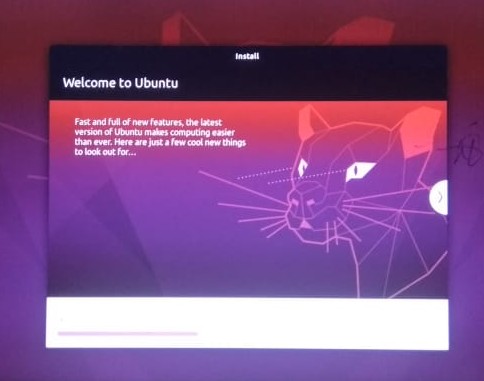
Click on continue and the installation process starts. It may take around five minutes until you can look over the slideshow displaying all software tools and applications.
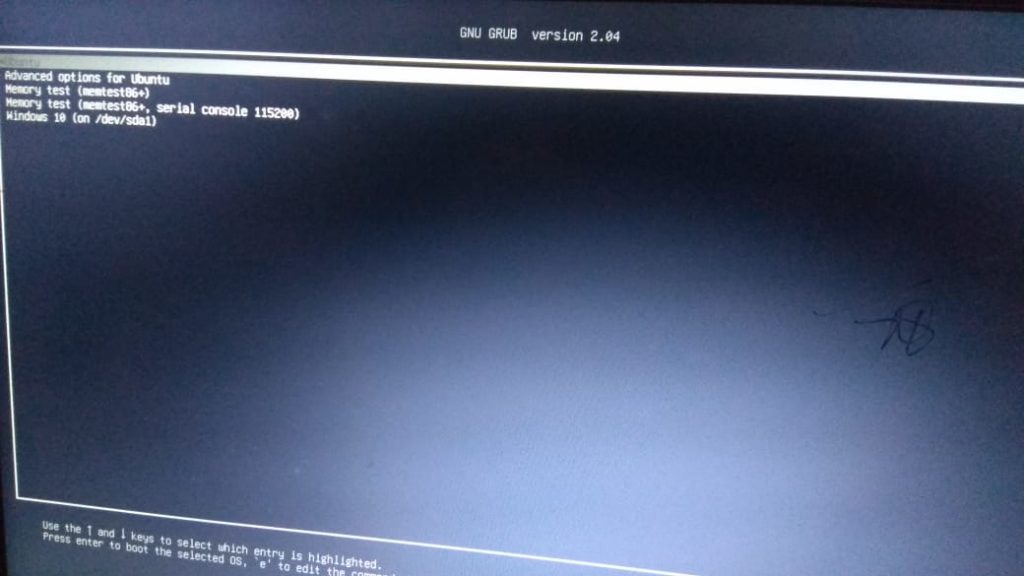
When the installation is finished, restart your system. The moment your system reboots, you’ll be directed to a bootloader with multiple options to boot with your installed OS.
Since we have dual boot Ubuntu 20.04 and Windows 10, you have two main options. The rest is just a testing menu which you can ignore.
Now select Ubuntu and log in with the credentials you set in the last step.
Enjoy Ubuntu 20.04 LTS with Windows 10!!!
Moreover, you can also check out our detailed article on How To Create Bootable USB Media From ISO In Ubuntu Linux here!