How To Use UTM SE: Retro PC Emulator And Run Windows On iOS?
Last week, we reported that PC emulators won’t come to iOS because Apple only allows emulators that emulate a console, not an entire operating system. However, after initially rejecting the two PC emulators, Apple has had a change of heart and allowed the UTM SE: Retro PC Emulator on the iOS App Store. This article will help you set it up and play your favorite PC games.
What is UTM SE: Retro PC Emulator?
Like Delta, UTM SE is emulation software, but instead of emulating a single console, it can emulate an entire operating system, such as Windows XP. You might wonder what the point of emulating an operating system on an iPhone is. The answer is simple: games. While many remember their childhood with games from consoles like the PS1 or Nintendo DS, a large group of people grew up on DOS games, such as Doom. The UTM SE emulator enables these users to relive their favorite games.
Apple’s initial rejection stemmed from section 4.7 of their guidelines, which mandated software to emulate only a console on the platform. Additionally, Apple highlighted the ban on JIT compilers, which are essential components of PC emulators. However, after working with the AltStore team, UTM made some necessary changes and circumvented the JIT requirement by implementing a new QEMU TCT system.
How to use the UTM SE emulator?
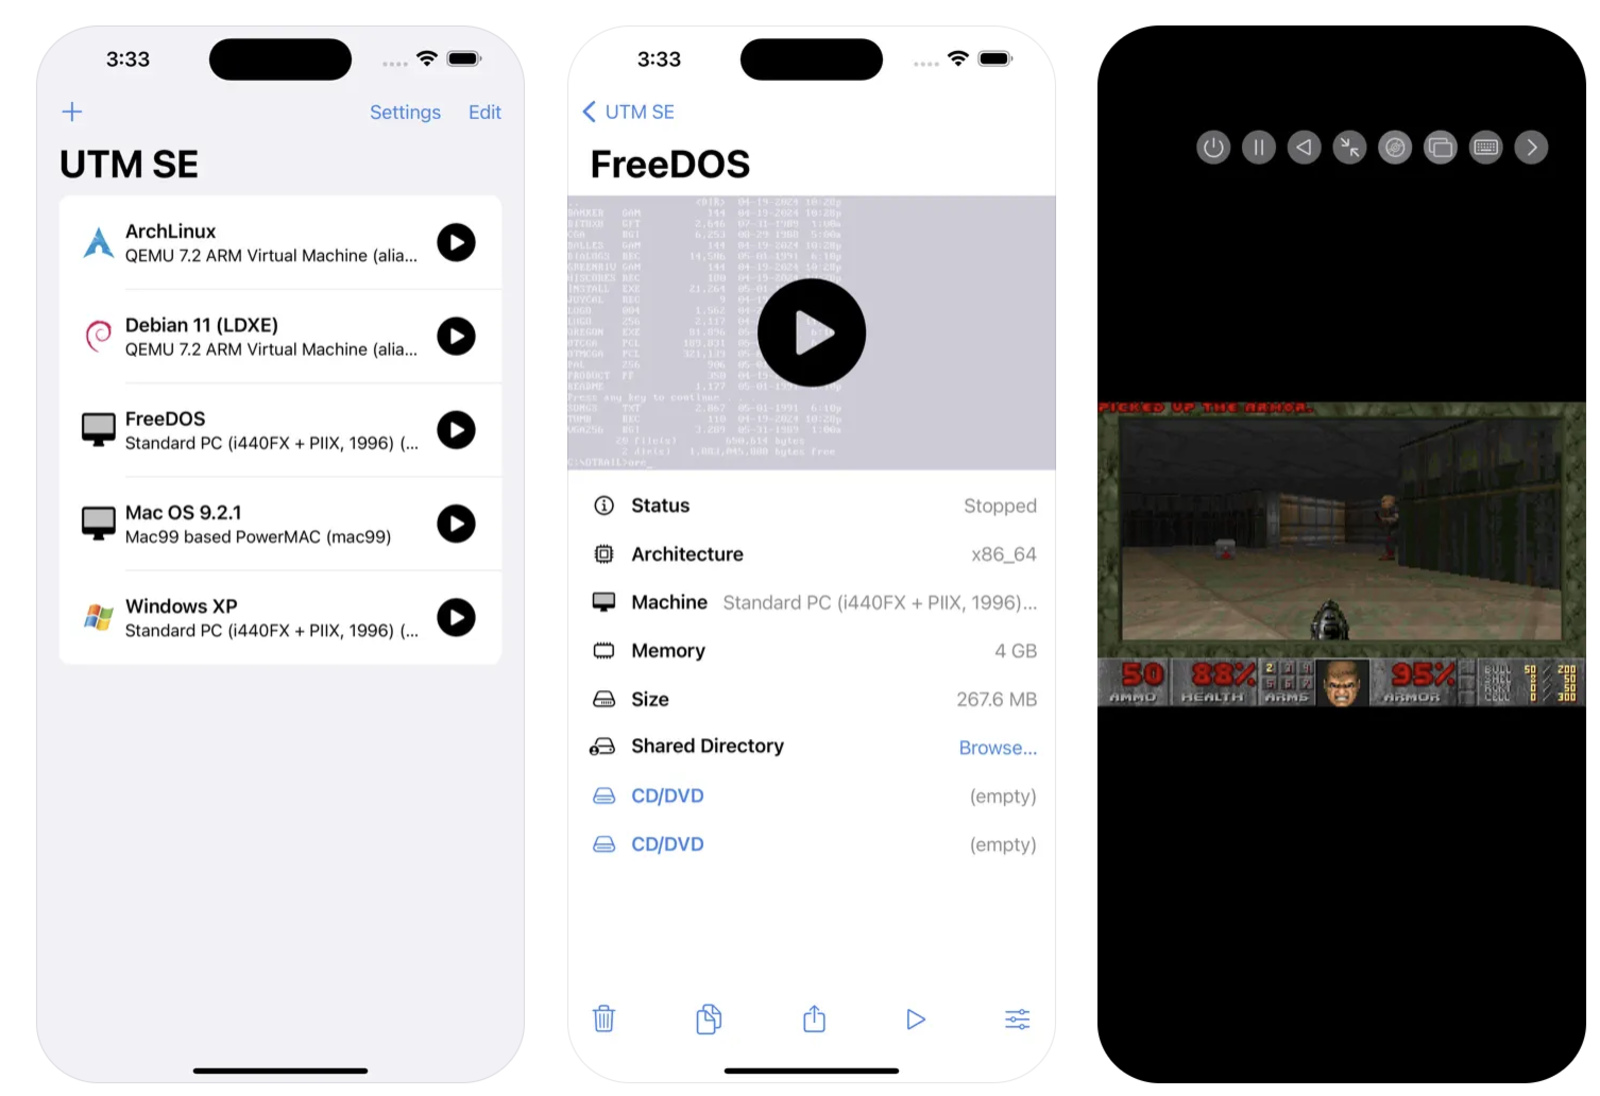
As with any other emulator, the iOS app is pretty basic and doesn’t include any installed virtual machines to protect against copyright violations. In terms of OS compatibility, the software supports almost every operating system, from Windows XP to the latest Windows 11, Linux, and even macOS. This significantly expands the application’s scope from just another gaming emulation platform to a software testing tool as well.
On the topic of operating systems, one of the significant steps in setting up the UTM SE emulator is downloading the OS ROMs. While this process might seem a bit challenging, the developers of UTM SE have made it pretty simple. Here’s how:
- Download the UTM SE app and open it.
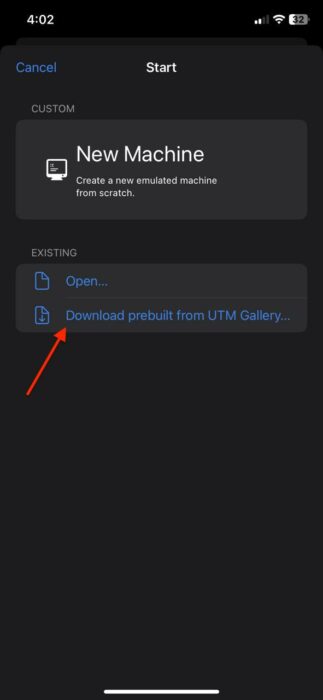
- Click on the “+” icon at the top left.
- Select the “Download pre-build from UTM Gallery” button.
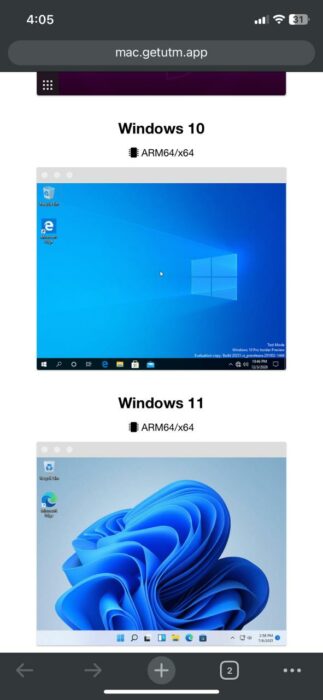
- On the following web page, look for your desired OS.
- Download the file.

After downloading the software, the next step is to import the files into the UTM SE emulator. Here’s how:
- Head back to the UTM SE app.
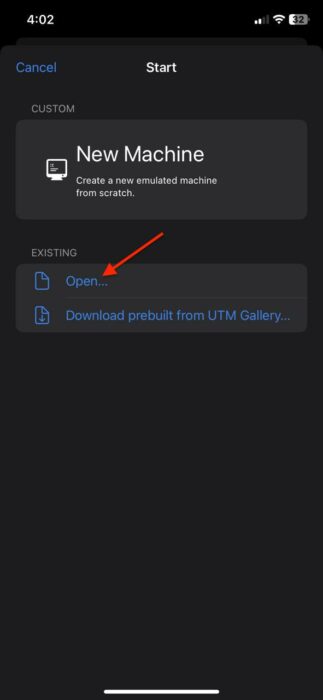
- Click on the “+” icon.
- Select the “Open” option.
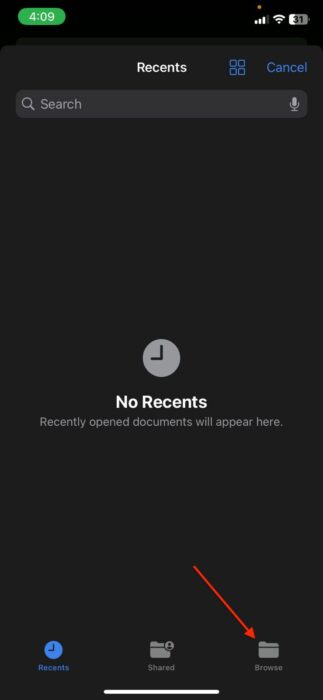
- Tap the “Browse” button and look for your downloaded file.
- Import the software.
Customization Options
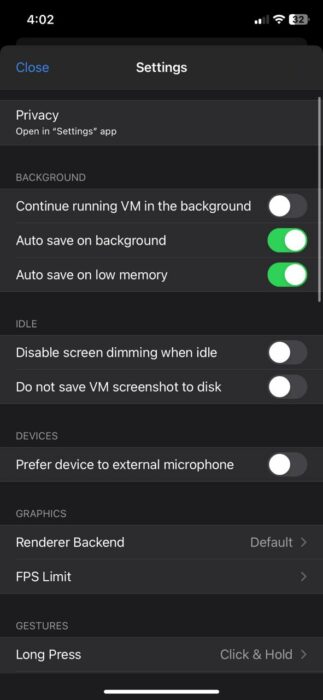
While your virtual machine is up and running, UTM SE also offers a plethora of customization options to enhance your experience. These include:
1. Adjusting RAM Size
Since a virtual machine is effectively its own system, system resources are split between iOS and the virtual machine. You can adjust the allocated RAM to your virtual machine in the Settings menu. However, do not allocate more than 20% of your system memory to the virtual machine since iOS will terminate the application.
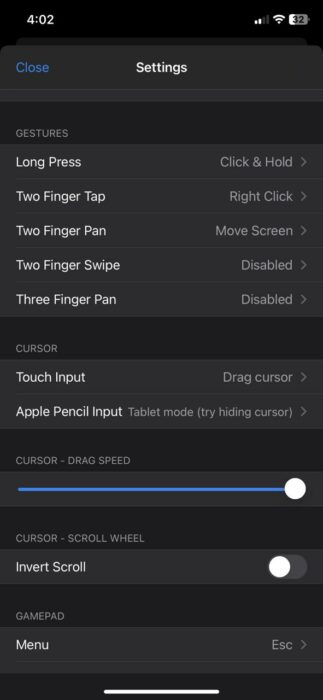
2. Gestures
Navigating an operating system like Windows XP is not easy on an iPhone. While you can connect a keyboard and mouse, UTM SE has several navigation gestures that make this process easier. You can long press to click and hold, tap with two fingers to right-click, pan with two fingers to move screens, and much more. Moreover, you can also customize these gestures to your liking.
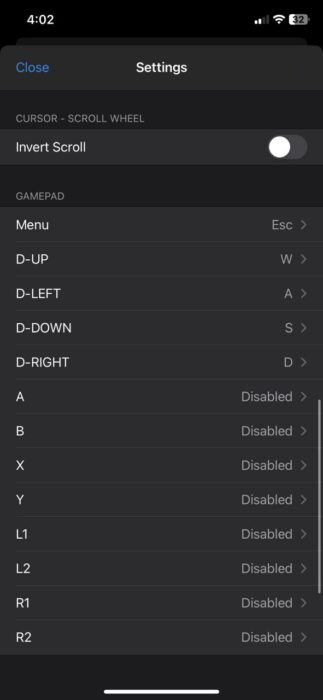
3. Configure gamepad
As most individuals installing the UTM SE emulator would want to play old Windows/DOS games, the developers have also included a gamepad configurator. This allows users to connect their controllers and map each button to their liking.