How To Format Hard Drives Using Erase Feature On iOS 18?
Apple has been marketing its iPads as potential MacBook replacements for professionals for years. However, the limitations of iPadOS, especially regarding the management of external drives, have been a significant drawback.
Fortunately, Apple has taken a big step towards solving this problem by allowing users to erase external hard drives on both iPadOS and iOS 18. Here is everything you need to know about this new feature.
How does the feature work?
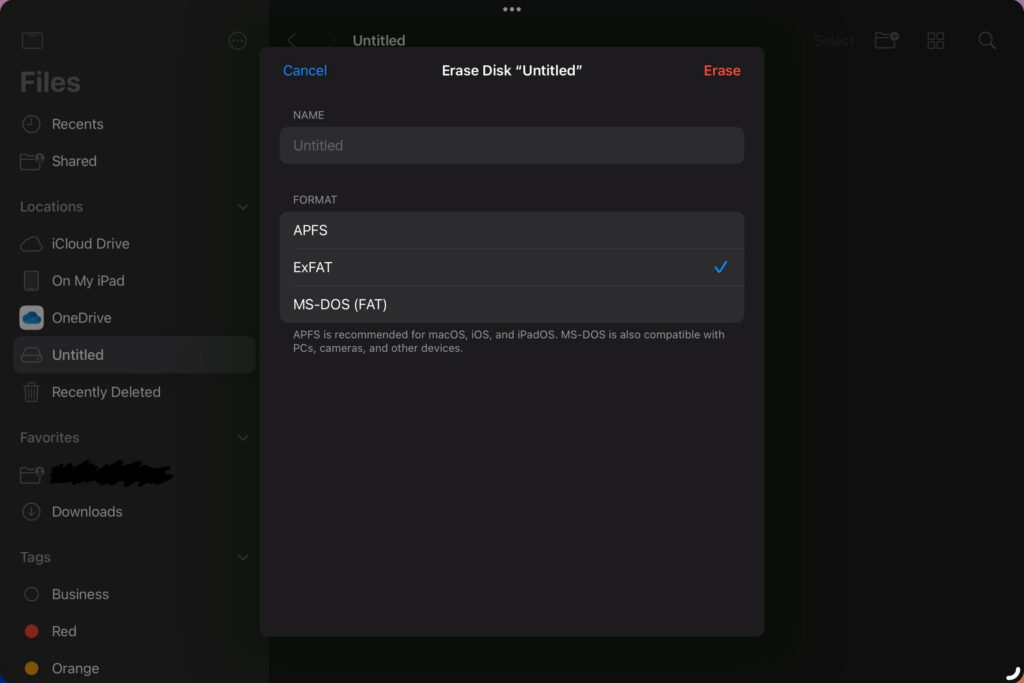
Before this addition, the only way to erase a hard drive was through the Disk Utility app on macOS. This left iPad users without a viable option. First discovered by developer Kaleb Cadle, the new “Erase” feature on iOS 18, which is an extension of the Disk Utility app, solves this issue by providing three different disk cleaning options: APFS, MS-DOS (FAT), and ExFAT. Additionally, it is important to note that the APFS format includes options for case-sensitive and encrypted files.
If you haven’t cleared a drive before, you might be confused about which option to choose. To put it simply, APFS is Apple’s latest file format, and it is used by MacOS 10.13 or later. On the other hand, MS-DOS (FAT) and ExFAT are file formats compatible with Windows.
Now that we have the explanation out of the way let’s get into how you erase hard disks yourself. To do this:
- Connect your hard disk to the iPad or iPhone.
- Open the Files app.
- Right-click or long-press on the hard drive icon.
- Select the “Erase” option.
- Choose your desired format.
- Click on the “Erase” button.
With Apple finally introducing new file options, we are cautiously optimistic that the company will build on this and introduce other Disk Utility features, such as “First Aid” and “Restore,” and finally make the iPad a worthy laptop replacement.