How To Change IP Address in Windows 10: A Visual Guide
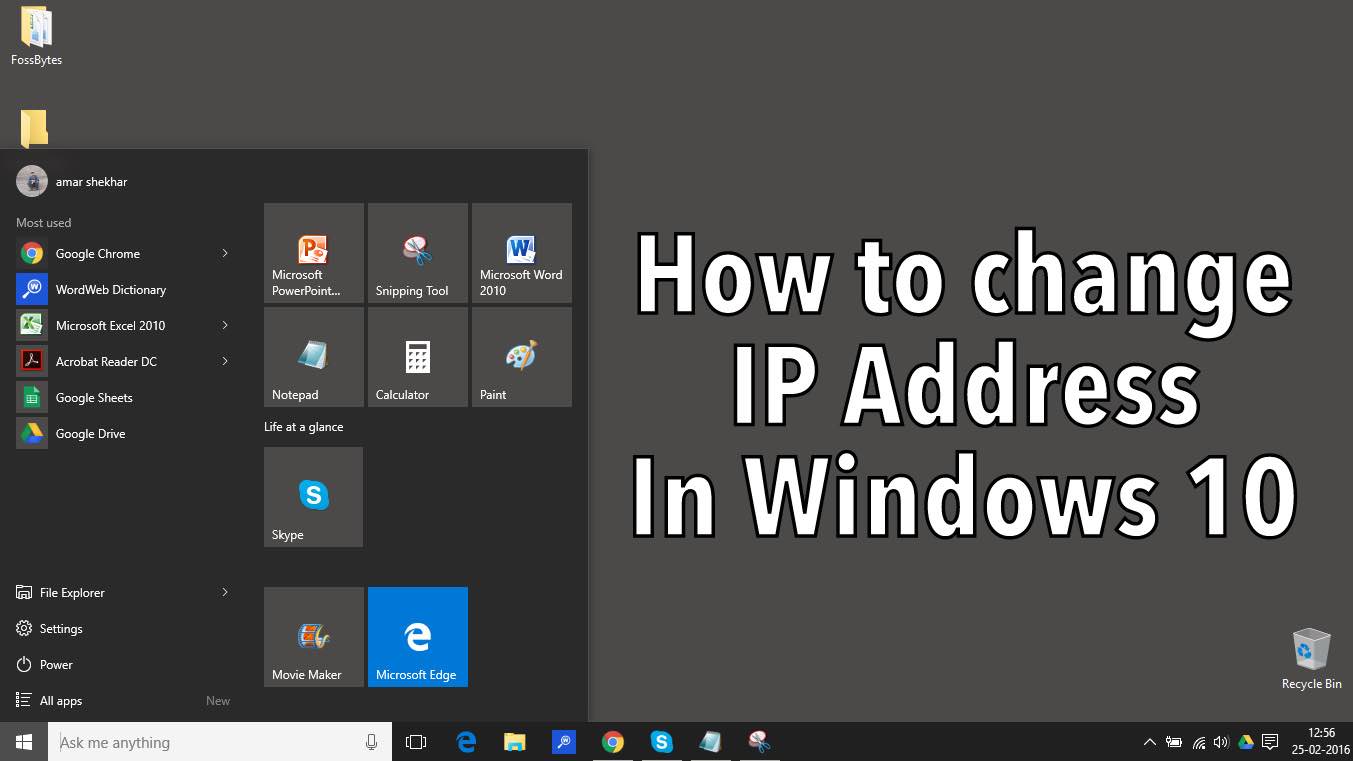

When working in a larger environment, we are often asked to change our IP address. To change IP address in Windows 10, we have come up with a visual guide with really simple and easy steps. Follow this Windows 10 guide and change IP address in Windows 10. Let’s tell you about it in detail.
The need for changing IP address, sometimes, it is needed that we change IP address in Windows 10. This mostly happens when we are a part of a large organization like a college or a company and any change in IP policy might want us to change our machine’s IP address.
So, here are the steps on how to change IP address in Windows 10:
How to change IP address in Windows 10
On the taskbar of your computer, right click on the internet icon and click on “Open Network and Sharing Center”

In the Network and Sharing center, click on the connections
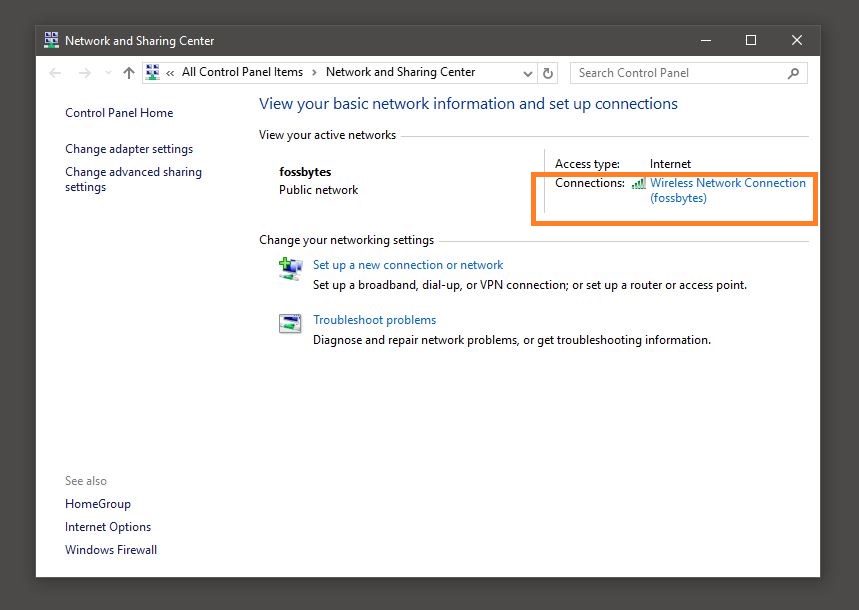
A new Wireless Network Connection Status window will open up. Click on the properties.
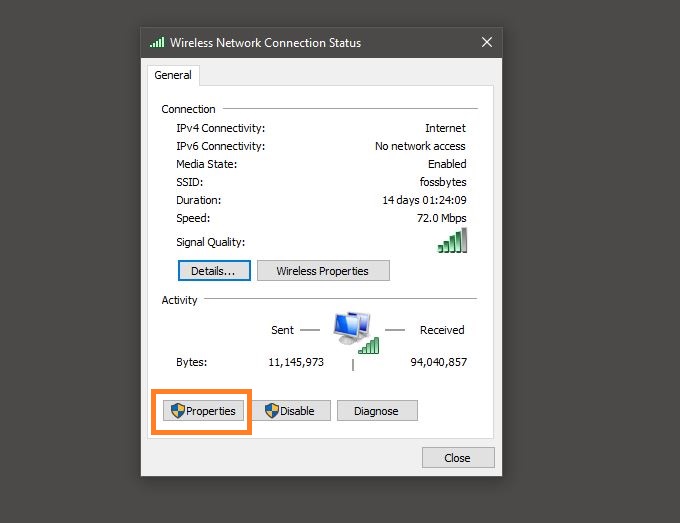
A network connection status pop-up window will open up. Click on Internet Protocol Version 4 (TCP/ IP v4) if you want to change the IPv4 address of your computer.
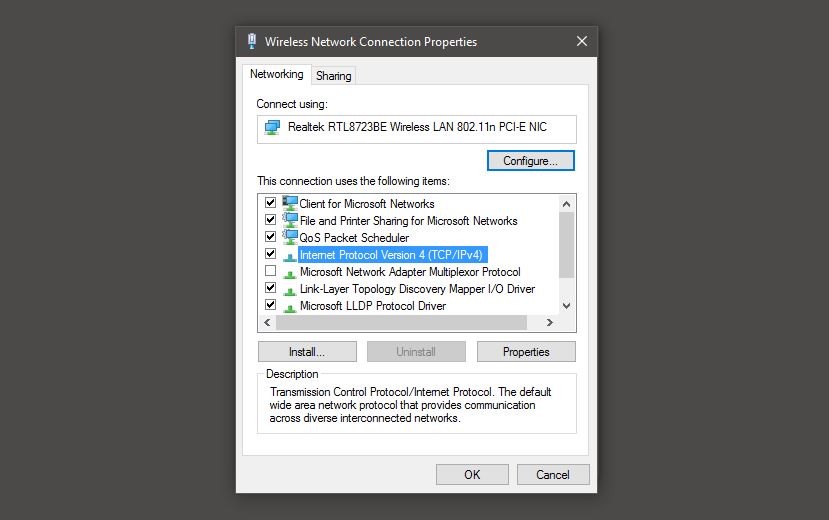
Now fill in the required IP address and press OK.
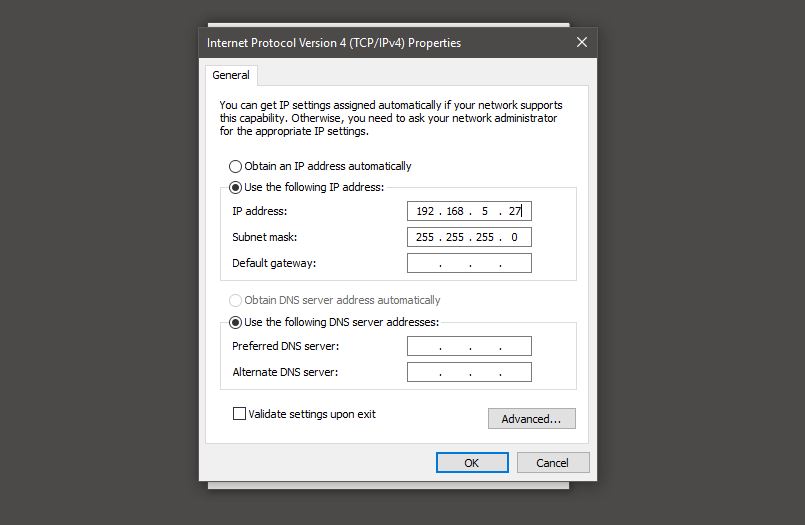
And this is how you change the IP address in Windows 10. Sometimes, along with the IP address, you are also given Subnet mask, Default gateway and DNS Server address by your network administrator. You can use those addresses to fill in the required details.
Also read: How To Set Up A VPN In Windows 10: The Ultimate Guide

