Want To Clip & Download A Twitch Stream? Here’s How You Can Do It
Clipping streams off Twitch is the best way to re-watch your favorite streamers’ moments. Moreover, clipping and saving clips from Twitch further ensures that you can share it with your friends, especially the “no one would believe if they didn’t see it” moment, be it the insane COD kill or some insane clutch. Twitch clips also make for a perfect reel, whether a sick headshot or a funny moment.
Meanwhile, we’re sure you’ve heard your favorite streamer yell out ‘clip that’; however, let’s take a look at how to clip Twitch streams and save and download these videos to your PC. The process is relatively simple and not too hard to follow; with that being said, let’s get to it.
How to clip and save Twitch Streams
To capture a Twitch moment, the best and most feasible way to clip a Twitch stream is to use Twitch’s clipping tool. To use the tool, users can click on the “clip icon” at the bottom right of the stream. Furthermore, if you don’t feel like using the mouse, you can also press “alt + x” to clip the stream. Meanwhile, be mindful that Twitch only allows users to save 60 seconds of clips via the default clipping tool.
After clicking on the ‘clapperboard button’ or pressing “alt + x,” Twitch takes you to a new page where you can choose which 60 seconds of the video you’d like to save. Oh, and in case you’re wondering if this lets you save the clipped Twitch stream directly to your PC, it does not.
Meanwhile, for the lazy ones, here are the simplified steps
- Click on the clapperboard button in the bottom right.
- On the next screen, use the slider to adjust the length of the video.
- Enter the title and click on publish.
How to clip Twitch Streams on mobile
The process of clipping Twitch Stream on a PC or mobile remains the same, irrespective of whether you are an iPhone or Android user. Meanwhile, follow these steps to clip any stream on your mobile.
- Launch the Twitch app and open the stream you wish to clip.
- Click on the clapperboard button in the top right corner of the screen; just beside the settings button.
- Now, in the pop-up menu, click on edit and select the length of the clip.
- Finally, select a title and click on publish.
How to download Twitch Streams
Now for the part that makes sure the clipped Twitch stream moments don’t get deleted from Twitch. To elaborate, the recent growth of DMCAs can sometimes force a streamer to delete a particular stream from their channel. Which further deletes any video or clip associated with the stream from the platform. Turns out, a sure shot way to make sure those moments stay on forever and can be watched anytime is to clip and download Twitch Streams off the platform.
Currently, there are multiple ways to download a clipped Twitch stream. In this article, we’re going to reveal how you can download Twitch clips via a website called “Clipr.” The process is fairly simple; as to how to do it, here’s how.
1. Open the clip you want to download.
2. Now copy the clip’s URL and paste it on ‘Clipr.’

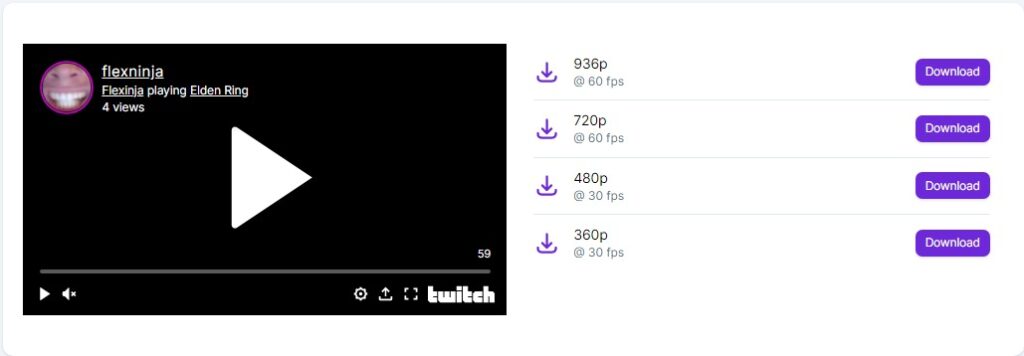
3. Hit the download button and in the next window, select Quality and click on download.
Wrapping up
For now, you must be familiar with clipping a Twitch stream and how you can download the clipped stream. The process is simple, and anyone with an active Twitch account can do it. As for the Quality of the videos, ‘Clipr’ allows users to download the clips in multiple video qualities.
If you wish to download the clips via Google Chrome, there’s an extension that allows users to download Twitch clips. Which further makes it easier for users to download the clips without the hassle of opening up another website.
Meanwhile, make sure to check out how you can host on Twitch and how you can change your Twitch profile username.

