How To Set Ethernet As Windows Metered Connection? | Set As Metered Connection
Short Bytes: Setting an ethernet connection as metered in Microsoft Windows isn’t any rocket science. Earlier, it was available for WiFi, and the process was a little bit tedious, but Microsoft introduced Set as metered connection feature for Ethernet in Creators Update. The feature restricts the machine from downloading OS updates, live tile updates, etc.
You might be familiar with the set as metered connection option in Microsoft Windows. Other than preventing you from losing extra money due to your limited data plan, it also stops Windows from downloading updates automatically.Probably, it’s one of the must have Windows features because, with Windows 10, Microsoft doesn’t even allow us to pause updates like it was the case till Windows 8.1. A feasible way out is to cut off the internet connection from your machine physically.
Also Read: How To Backup Data In Windows 10 Using File History?
What Is Metered Connection?
You are browsing the web on a metered connection if your ISP charges extra money after you consume the specified bandwidth. And believe me, internet providers surpass every level when it comes to roping cash from customers who are careless about their internet connection.
That’s why Windows allows you save some bucks on your data bills by restricting system apps and services like Windows Update, Live Tiles, or OneDrive from connecting to the internet when it’s set as metered connection.
Earlier, the Set as Metered Connection options was only available for WiFi and mobile network connections. It took years for Microsoft to realize that people’s ethernet connection could also have a data cap. With the launch of the Windows 10 Creators Update in April, the functionality was extended for ethernet connections.
How To Set Ethernet As Metered Connection In Windows 10 Creators Update?
If you want to prevent your Windows 10 machine from sucking valuable bandwidth out of your ethernet connection, it’s necessary that your system should be running the Creators Update. If you haven’t received the Creators Update yet or you’re running an older Windows, an alternative method to set an ethernet connection as metered is described below. Follow these steps:
- On your Windows 10 machine, open Settings > Network & Internet.
- Click Ethernet on the left-hand side of the screen.
- Now, click the on the name of your ethernet connection.
- On the next screen, you’ll find the Set as metered connection toggle button.
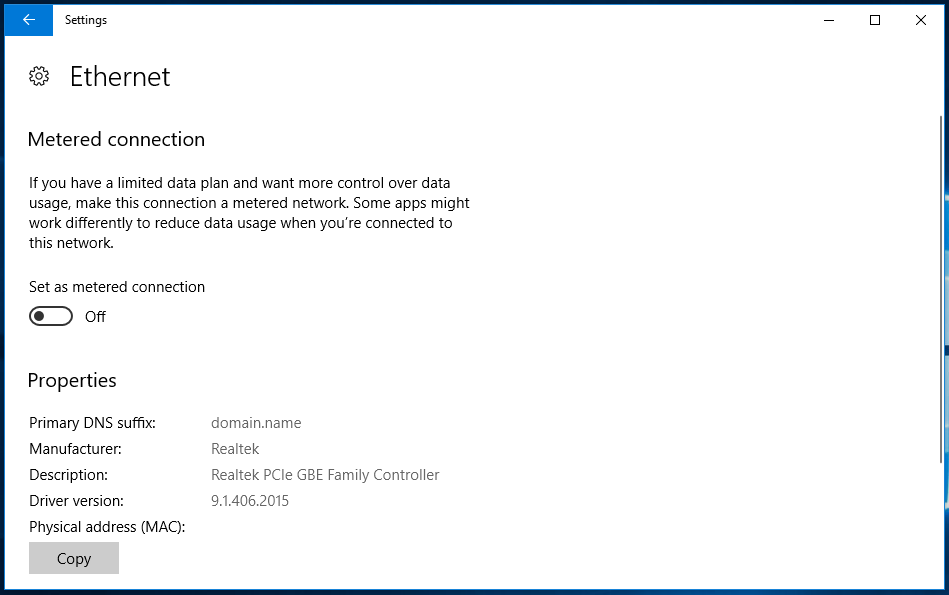
After you turn on the Set as metered connection option, your Windows PC will start cutting off its data needs for the wired connection also.
Also Read: How To Enable Virtual Touchpad In Windows 10?
How To Set Ethernet As Metered Connection In Windows?
For the machines which haven’t been on Microsoft’s radar while it’s pushing the Creators Update, a longer method exists. Please note that it involves tweaking Windows Registry, so be extra careful while changing the entries. Also, it would be quite tedious if you want to switch from metered to non-metered and vice-versa on a regular basis. Don’t forget to backup your important data.
As explained by Mauro Huculak, you can follow the steps mentioned below:
- Go to Start (or press Windows + R) and type regedit. Open the Windows Registry utility.
- Navigate to:
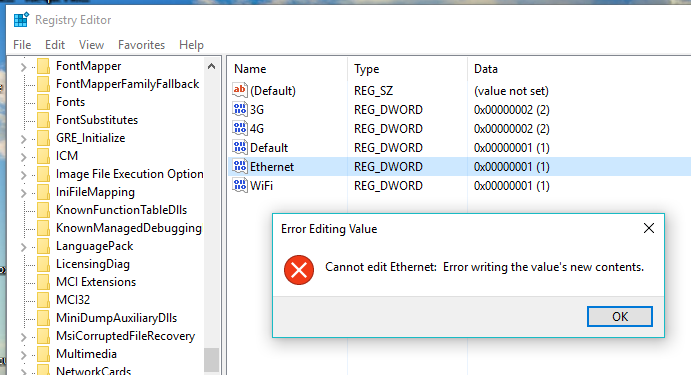
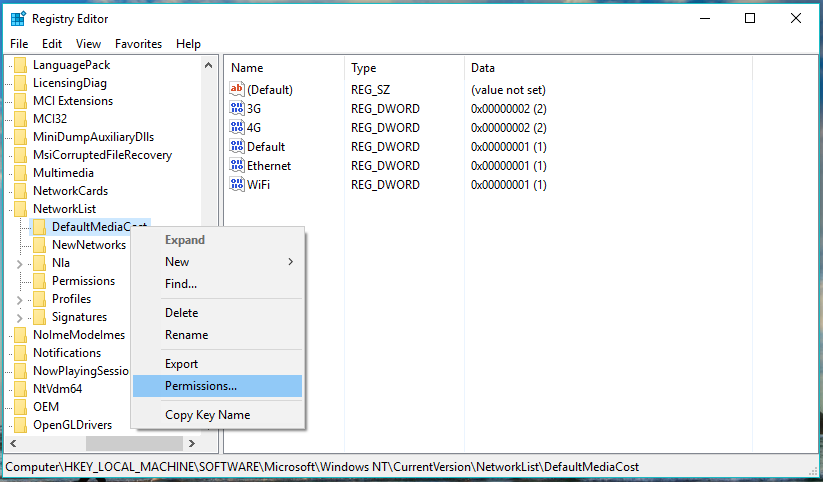
HKEY_LOCAL_MACHINE\SOFTWARE\Microsoft\Windows NT\CurrentVersion\NetworkList\DefaultMediaCost
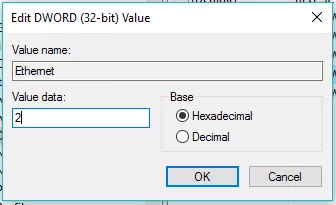
For DefaultMediaCost, you will see multiple registry entries. You need to change the value of Ethernet to 2 (means metered) from 1 (means non-metered). It’ll show an error if you don’t have the permission to edit the value.
- To get the control, right-click on the DefaultMediaCost and click on Permissions.
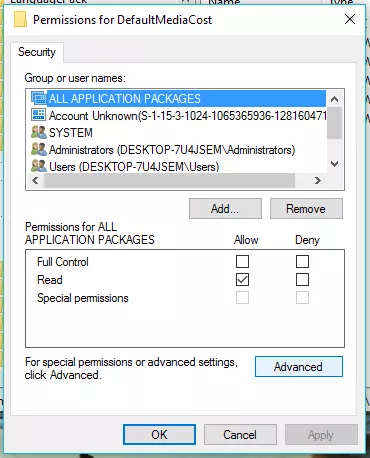
- Under the Security tab, make sure ALL APPLICATION PACKAGES is selected, click Advanced.
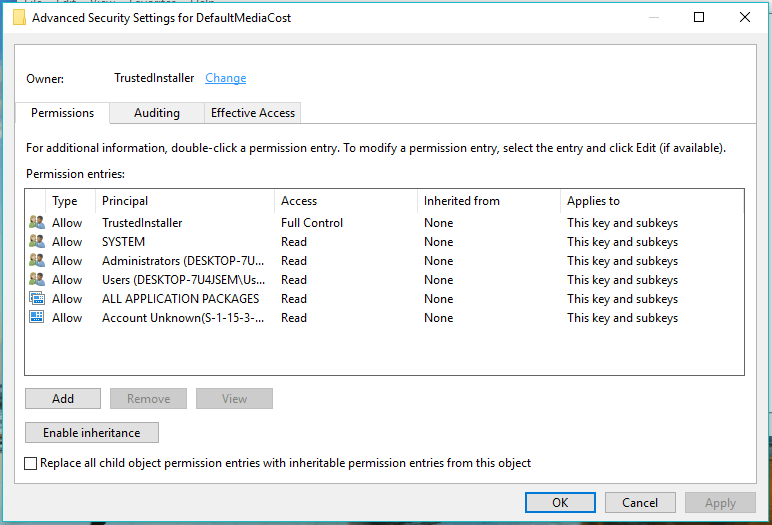
- Click Change option placed next to TrustedInstaller.
- In the empty text field, type Administrators and click Check Names to verify and display the correct name.

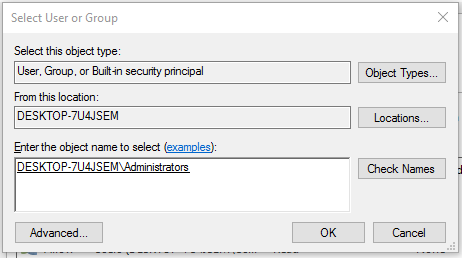
- Click Ok to save and continue.
- Now, in Advanced Security Settings for DefaultMediaCost, tick the Replace owner on subcontainers and objects options.
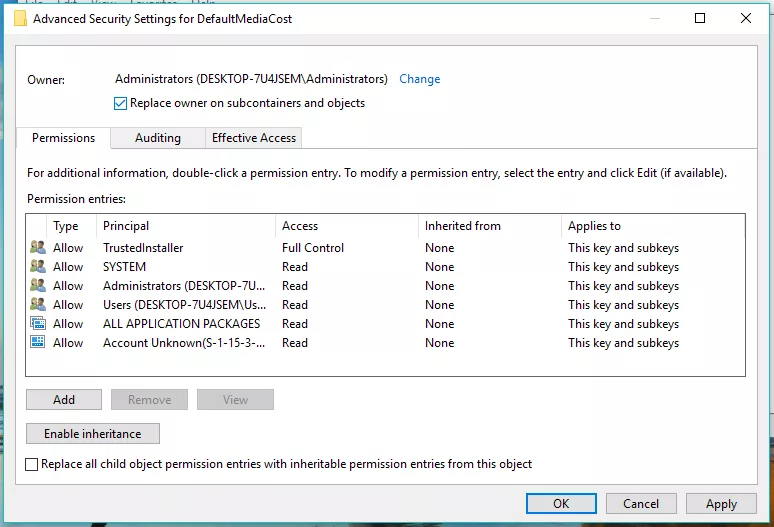
- Click Ok to save and continue.
- Now, in the Permissions box, select Administrators and tick Allow check box for Full Control.
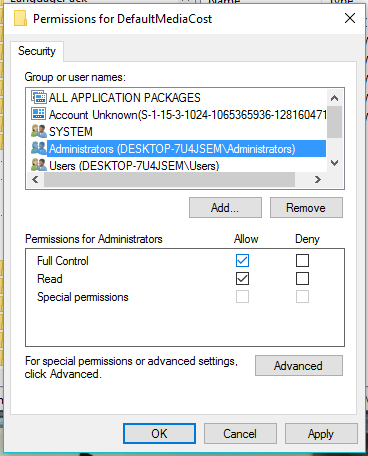
- Click OK to save and continue.
- Now, double-click the Ethernet registry entry and change it’s value to 2. It won’t give an error. Click OK to save and continue.
- Close the registry editor and restart your machine.
Your ethernet connection is now set as metered. The method can work for older Windows, 8 and above. If you want to revert the changes, just change the registry value back to 1 and restart your computer. It doesn’t require you to follow the whole permissions process again and again.
Got something to add? Drop your thoughts and feedback.
Also Read: How To Use RAM As Hard Drive? How To Create RAMDisk?