Explained: How To Optimize Windows 11 For Gaming?

Microsoft showed that it had paid special attention to Gaming when the tech giant launched Windows 11. With Windows 11, gamers expect to get more performance because it’s an upgrade and comes with new features like Auto HDR and Direct Storage.
Sarah Bond, Vice President of Xbox, quoted “best PC gaming experience yet.” at the Windows 11 launch event. Moving on, let’s have a look at how to optimize Windows 11 for gaming using various methods.
Using Windows 11’s Game Mode
Firstly, with the all-new Settings app with Windows 11, there’s a dedicated Gaming tab.
1. Click on the Start Menu icon and open Settings.
2. From the left sidebar, navigate to Gaming > Game Mode.
3. On the Game Mode screen, turn on the toggle.
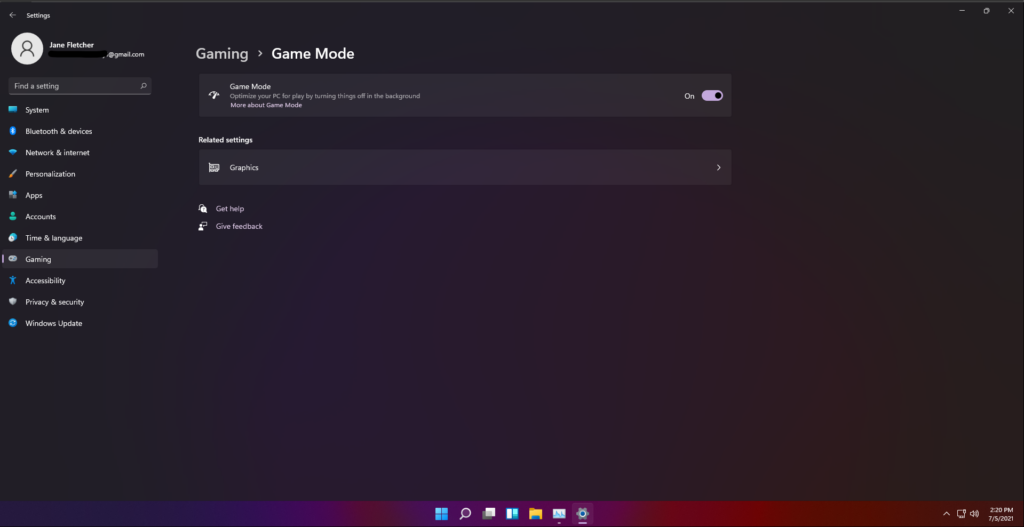
The said option is expected to improve the efficiency of games running on a system.
Using Dedicated Softwares for Nvidia and AMD GPUs
If you’re gaming on an Nvidia or AMD GPU, you can use the OEM software, Nvidia’s GeForce Experience, and AMD’s Radeon Software. You can download both of the software from Nvidia and AMD’s websites.
Using this software, you can tweak the graphics settings per game and adjust GPU performance. Moreover, the right tweaks can get you the most FPS in every game.
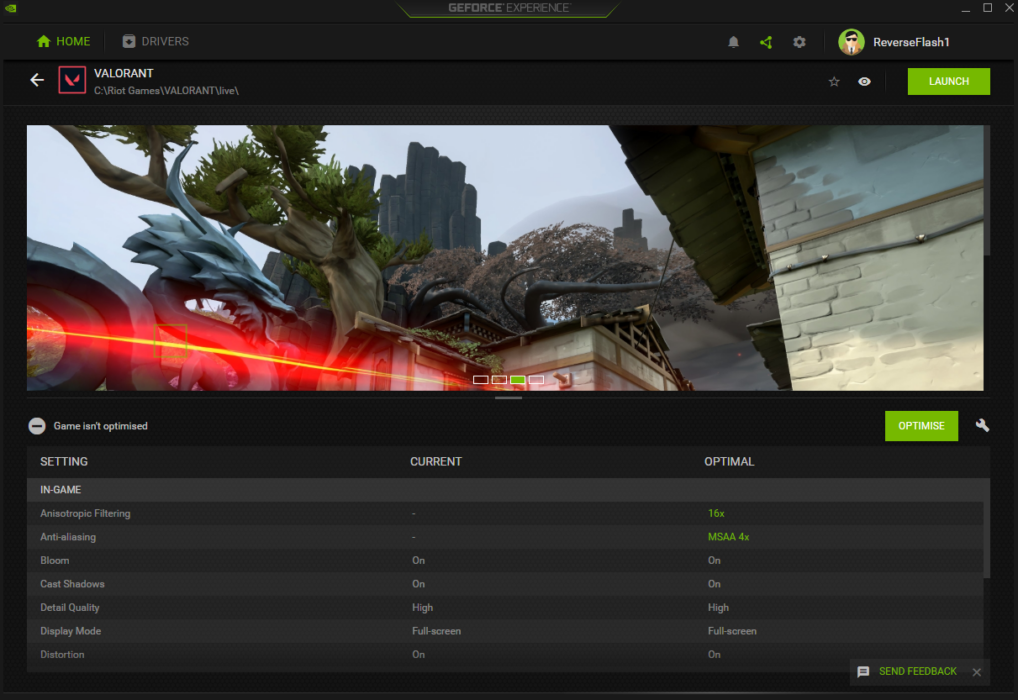
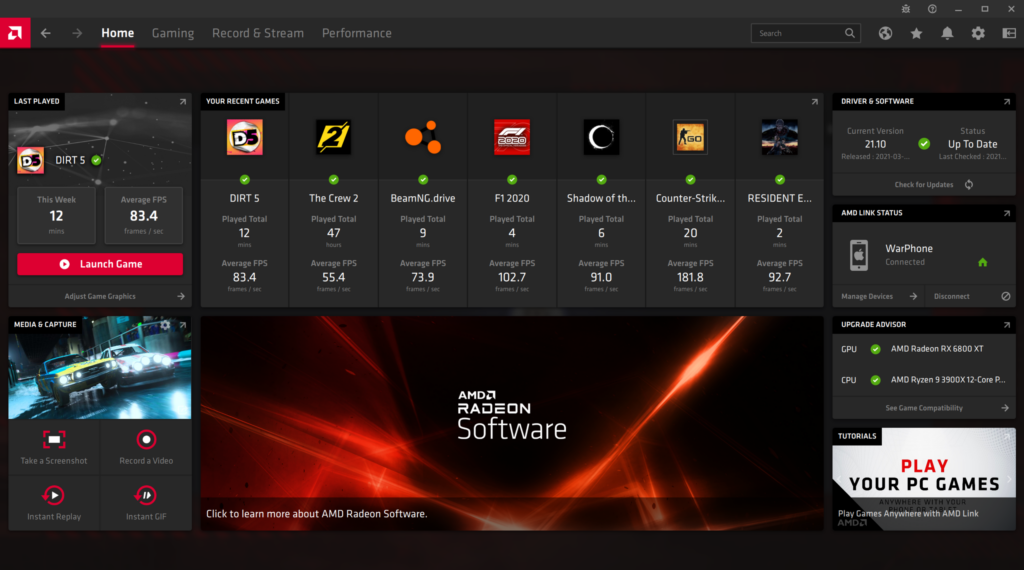
Once you’ve set up and optimized your games, you can get the best gaming performance on your system.
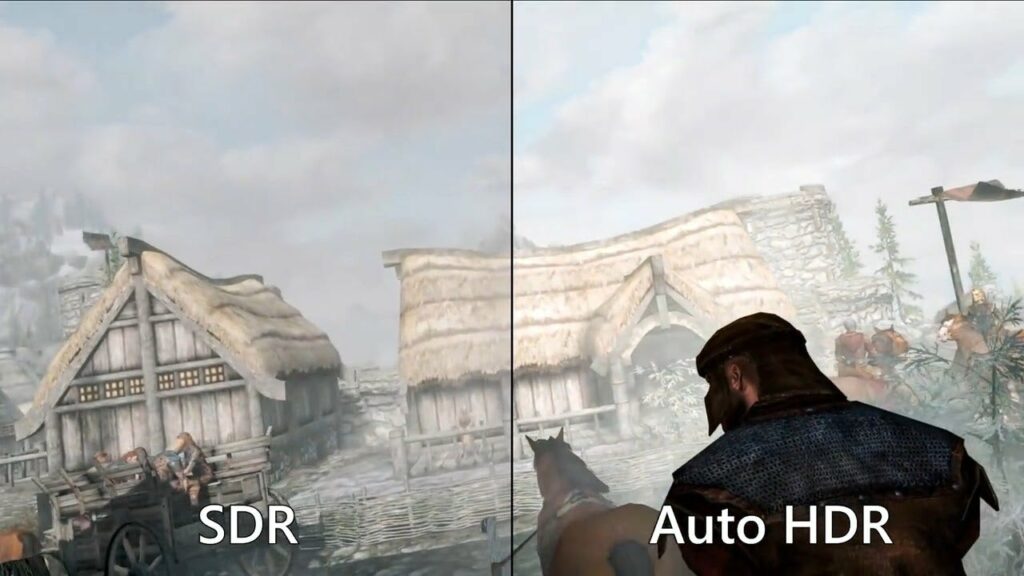
Using The Auto HDR Feature
Microsoft’s ace in the hole, Auto HDR, is something that the company is quite proud of. The newly announced feature that comes with Windows 11 will make the colors of a game more vibrant on HDR-supported displays.
You can only spot the difference between SDR and HDR if you have an HDR-supported monitor. Although, the below screenshot is a representation of the difference that it makes.
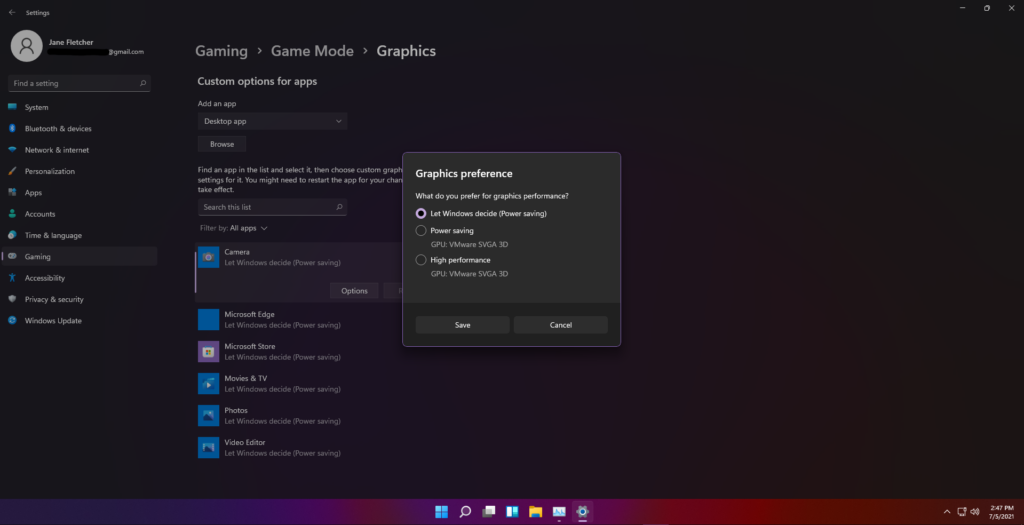
Using Per-App GPU Selection Settings
If you own a gaming laptop, you’re bound to have two GPUs – an iGPU (integrated GPU) and a dGPU (dedicated GPU). With Windows, you can choose which app uses which GPU. If you want a specific game that isn’t using your dGPU by default to use it, you can do so. Let us see how.
1. Click on the Start Menu icon and go to Settings.
2. Secondly, from the left sidebar, navigate to Gaming > Game Mode.
3. Under Related Settings, click on Graphics.
4. On the Graphics Performance page, you can choose the GPU for your apps and add new apps to the list.
5. By default, Windows automatically assigns a GPU to each app. But, you can change it manually.
6. The Power Saving option should be allotted to the apps that don’t require graphics performance and the High-Performance option for games and GPU-centric apps.
And, that was it! These optimizations should get you the best performance out of your games on Windows 11. We’ll keep adding more tweaks as they come.
Meanwhile, make sure to check our detailed coverage on Windows 11.
Do you expect better gaming scores on Windows 11? Let us know in the comments below.