How To Update A Chromebook?
Like any OS, Chromebooks receive security and weekly/monthly updates. Hence, you need to keep your devices updated to combat any software vulnerabilities that may be out there. If you’re new to Chromebooks, in this article, let’s look at how to update your Chromebook.
Before we begin, here’s a quick and interesting fact. Unlike Windows, Chrome OS doesn’t annoy you with update pop-ups and automatic restarts. If auto-update is enabled, Chrome OS will check for updates and download and install them the next time you restart. Pretty cool, right?
How to update a Chromebook
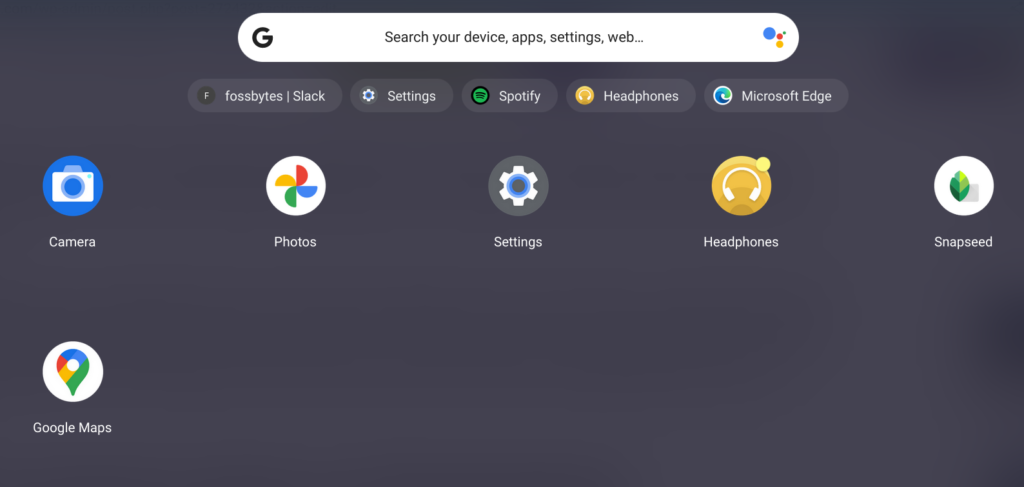
1. Open the app menu by swiping up from the taskbar twice.
2. Find and click on the gear icon to open the Settings app.
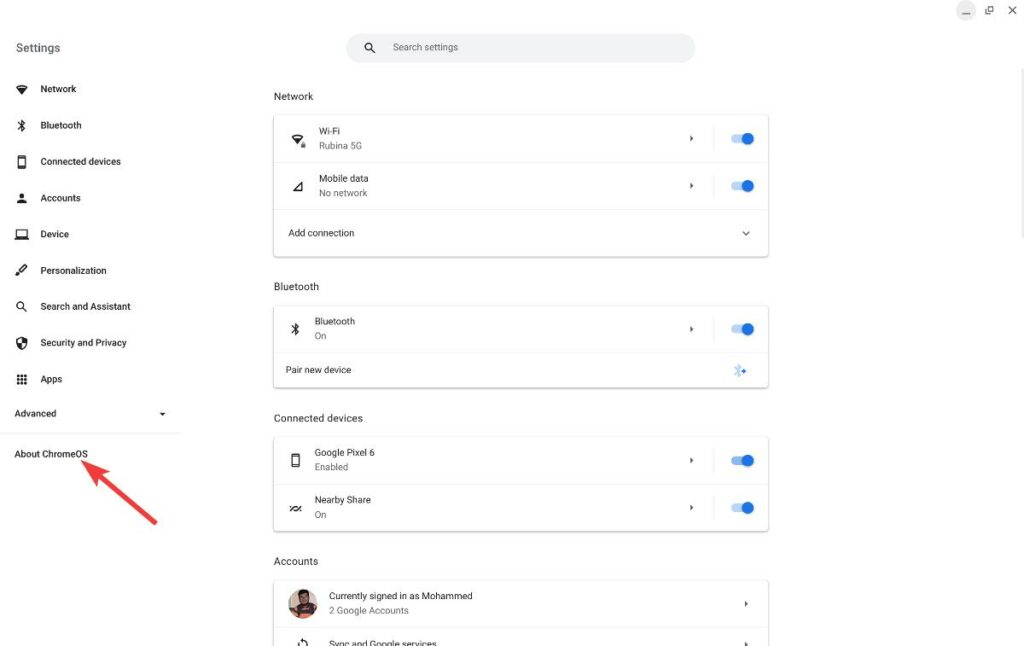
3. Click on “About ChromeOS.”
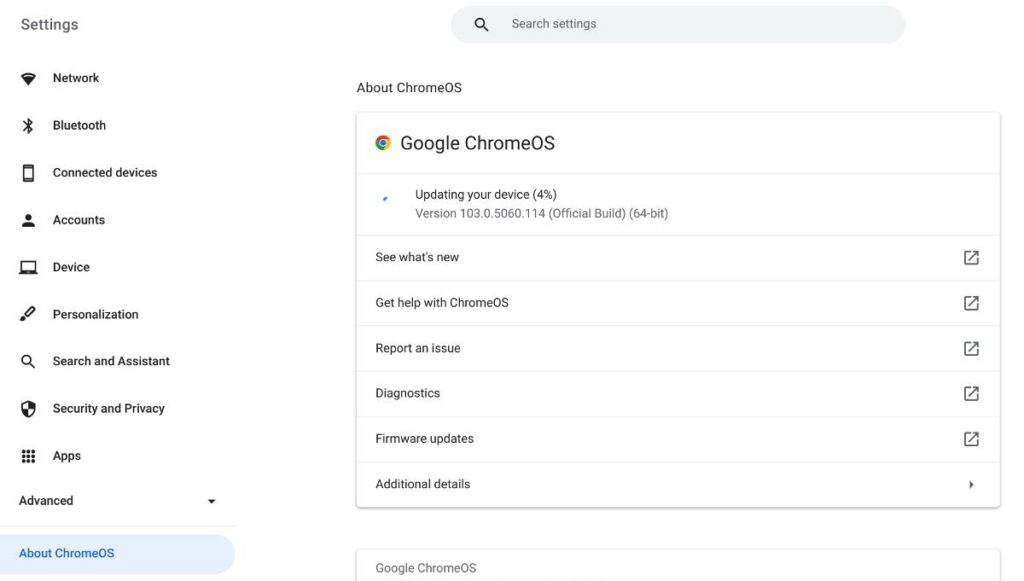
4. Click the “Check for updates” button to see if an update is available.
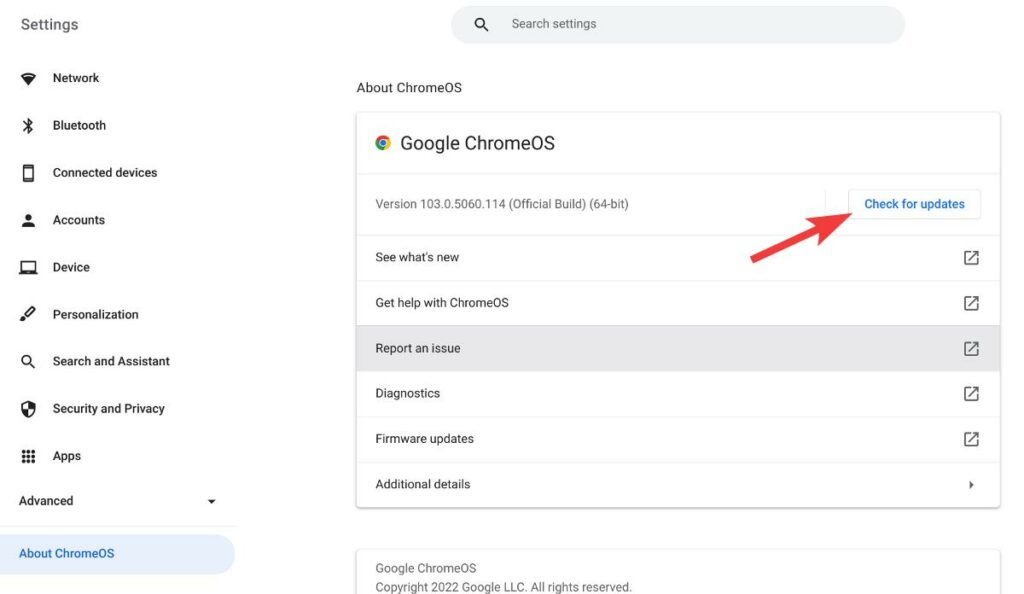
5. The update should start downloading automatically. In the end, you’ll be asked to restart your Chromebook.
When will the support end for my Chromebook?
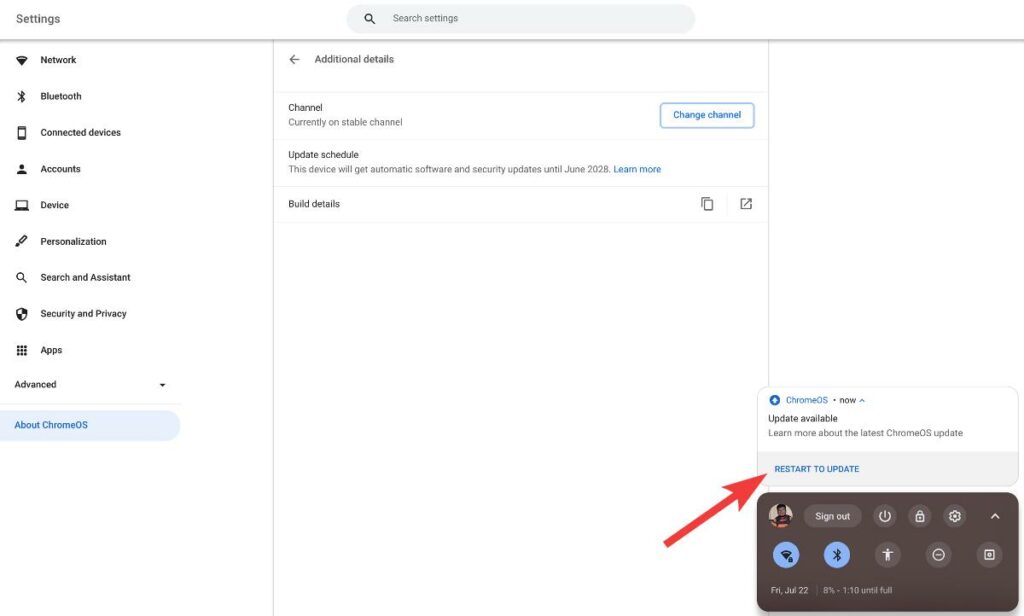
According to Google’s updated policy, Chromebooks launched in and after 2020 will receive eight years of major and security updates. However, if you’re unsure when your Chromebook was launched, you can check the update schedule by going to About ChromeOS > Additional Details. Here’s what it will look like.
How to shift to Beta/Dev channel from Stable
1. Go to About ChromeOS > Additional Details.
2. Click on “Change channel.”
3. Select Beta or Dev to start receiving updates in the respective channels.
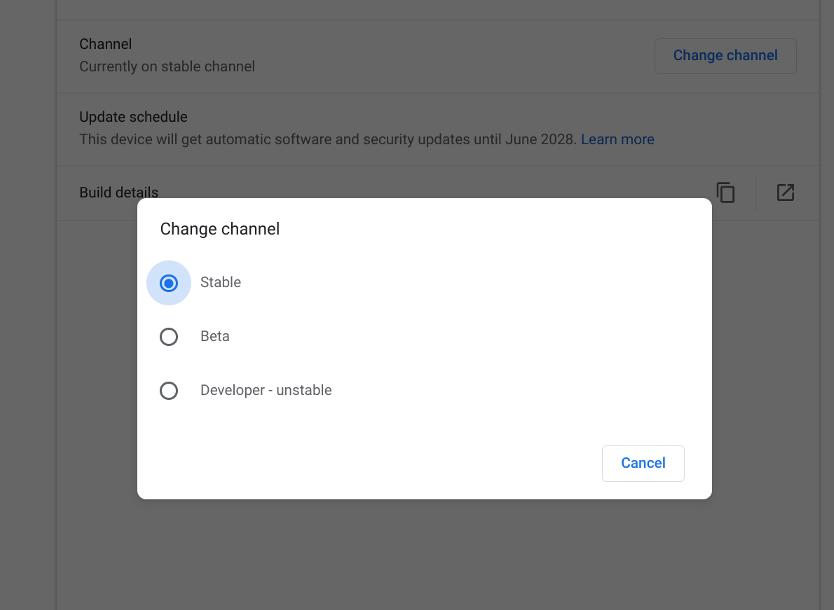
Remember that Beta and Dev channels could be unstable, and you may not have the best experience switching to them. Hence, we recommend staying in the Stable channel. Also, switching from the Beta/Dev channel to Stable will Powerwash your Chromebook.
And that’s everything you’ll need to know about updating your Chromebook. Have you got any questions? Make sure to leave them in the comment section below.

