How To Take A Screenshot On A Mac: Hidden Tricks Included
If you’re wondering how to take a screenshot on a Mac, we have some amazing tricks for you to explore. You can screenshot Mac using the tools and hotkeys within macOS.
Whether you have a Mac or a MacBook, the screenshot shortcuts remain the same. Though you have a bonus screenshot shortcut for MacBook Pro users, we’ll get to it towards the end. All these shortcuts run on macOS Big Sur, Mojave, and Catalina.
Mac Screenshot Shortcuts
One thing about having a Mac is that you don’t need anything else. From Word processing tools to screenshots and basic video editing, everything is already there. All you have to do is be curious and you’ll be surprised at the number of shortcuts in a Mac.
Just like everything else, there are dedicated Mac screenshot shortcuts that let you take a screenshot and also record screen on Mac. Let’s dive in and talk about these shortcuts.
If you’re using Windows, check out the best windows screenshot tools.
Capture Entire Screen: command + shift +3
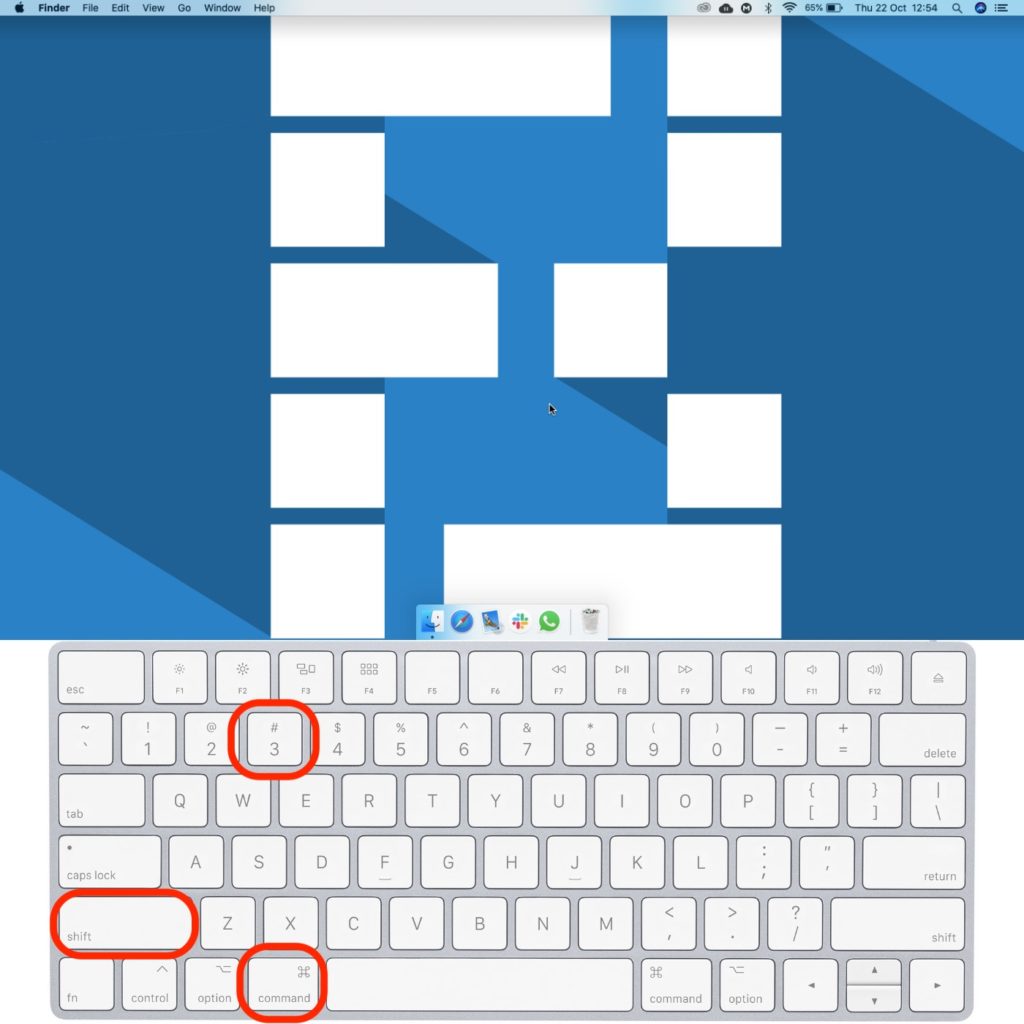
The simplest and quickest way to screenshot a Mac is command + shift + 3. This Mac screenshot shortcut captures the entire screen. It’s good for the times you want to grab a quick screenshot from a live stream.
Capture a Window/Part Of The Screen: command + shift + 4

This is where mac screenshot shortcuts show their versatility. When you use command +shift + 4, the mouse pointer changes into a crosshair. You can click and drag the crosshair to capture the desired area of the screen.
There’s more to this particular shortcut. You can quickly fine-tune your screenshot using the following shortcuts:
- Press command+ shift + 4 and then tap space, the mouse pointer changes from a crosshair to a camera. Now you can capture a window on your Mac.
- Select a part of the screen using command + shift + 4, and then hold down the space key to move the selection window around the screen.
- Go for command + shift + 4 and hold down the shift key while selecting an area. This will let you change the height without mistakenly changing the breadth, and vice-versa.
Master Screenshot Shortcut On Mac: command + shift + 5
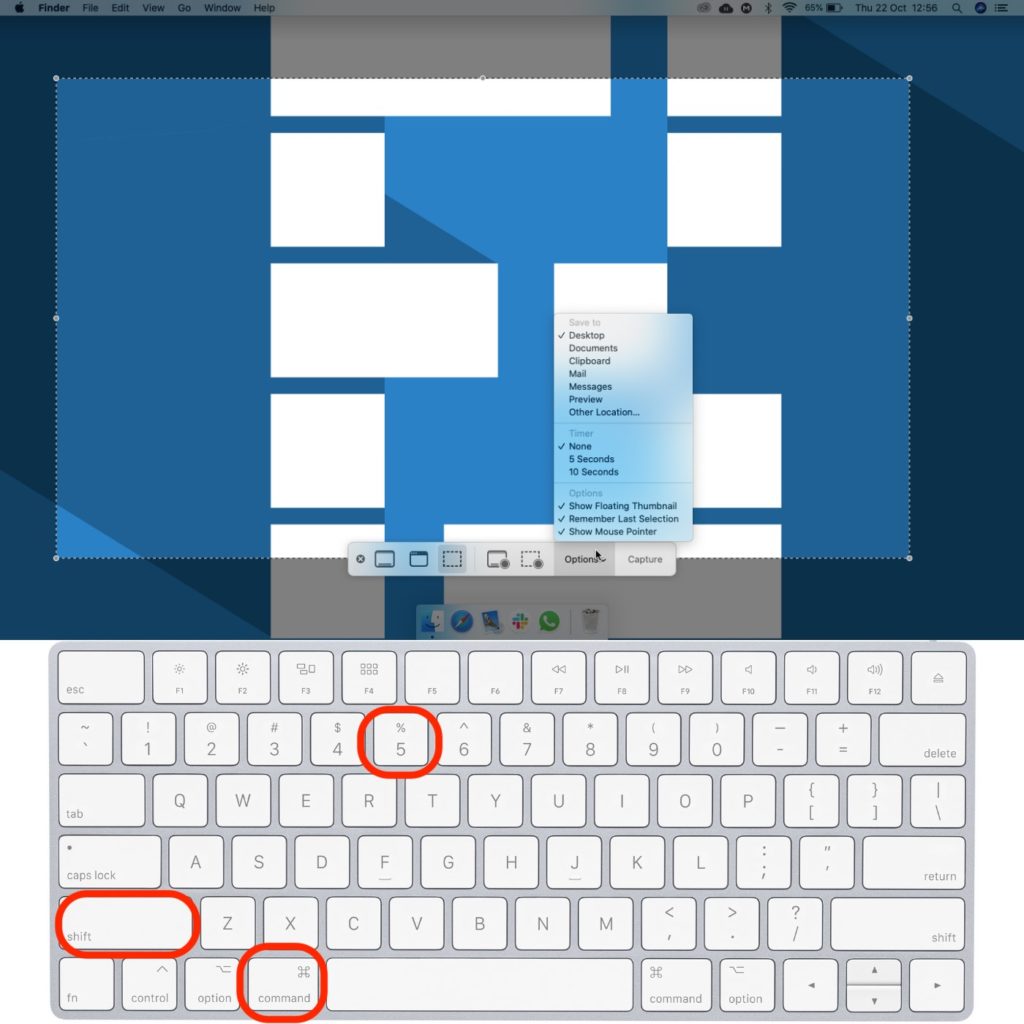
If you want to set custom dimensions for a screenshot, select where it’s saved, decide whether you want the mouse pointer in the screenshot, and much finer things, this is the shortcut for you.
The command + shift + 5 shortcut summons a screenshot control panel to screenshot Mac. You can select to capture the entire screen, a selected part of the screen, or a selected window from this panel.
Click on “Options” and you can decide where to save your screenshot, set a timer for taking a screenshot, decide whether you want a floating thumbnail after taking a screenshot on Mac, and so forth.
You can also record the screen using this shortcut. There are two shortcuts that let you record the entire screen or a part of it. You can also use an external microphone to by selecting it from the options in the screenshot panel.
Pro Bonus: How To Take Screenshot on a MacBook Pro (Touch Bar)

You can capture a screenshot of your Touch Bar using command + shift + 6. This feature is a bonus exclusively for Touch Bar MacBook Pro. It captures a super slim, wide screenshot of the Touch Bar. There are other tricks on how to take a screenshot on MacBook Pro. If you use the Touch Bar, you can set a screenshot command in it to quickly take a screenshot on Mac.
The rest of the shortcuts apply to the entire range of Macs, including the MacBook Air, Mac Mini, and MacBook Pro models.
Bonus: How To Save Screenshots In JPG/PDF Format
Since I have to upload a lot of images to the web, JPG is the preferred format. My Mac thinks otherwise. By default, the screenshots you take on your Mac are saved in PNG format. You can change this using the following command
- Tap command + space to summon spotlight search.
- Type “terminal” and hit enter. This will open the terminal window.
- Copy and paste the following in the terminal window:
defaults write com.apple.screencapture type jpg
Your Mac will now save screenshots in JPG format. If you want to save them in PDF format, replace the “jpg” in the above command with “pdf”.