How To Download Images On Chromebook?
Chromebooks have become pretty capable machines over the past few years. Apart from gaming, they can do pretty much anything. One of the things is downloading images from the internet. Found a funny meme that you want to share with friends? You can do it on your Chromebooks in only a few taps.
In this article, let’s look at how to download images on Chromebook easily. In the end, we’ll also look at how to set a custom download location so that every time you download an image, it will be saved in your preferred file location.
How to download images on Chromebook?
Downloading images on a Chromebook is pretty simple. Here’s how to do it:
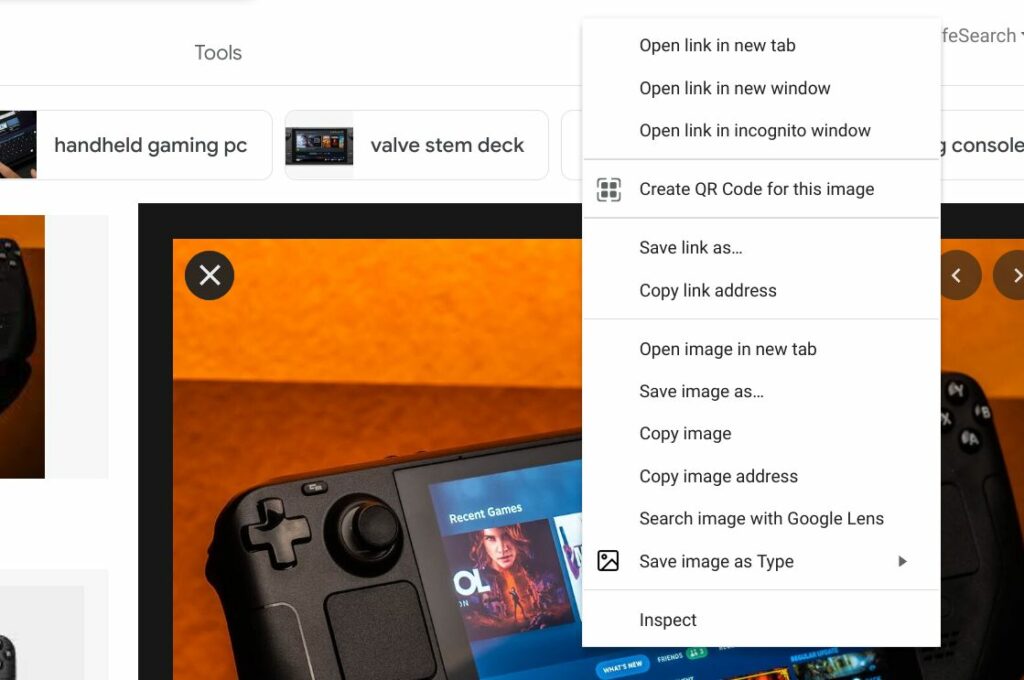
1. Open the Chrome app.
2. Head over to the image that you want to download.
3. Right-click on the image and click on “Save image as”
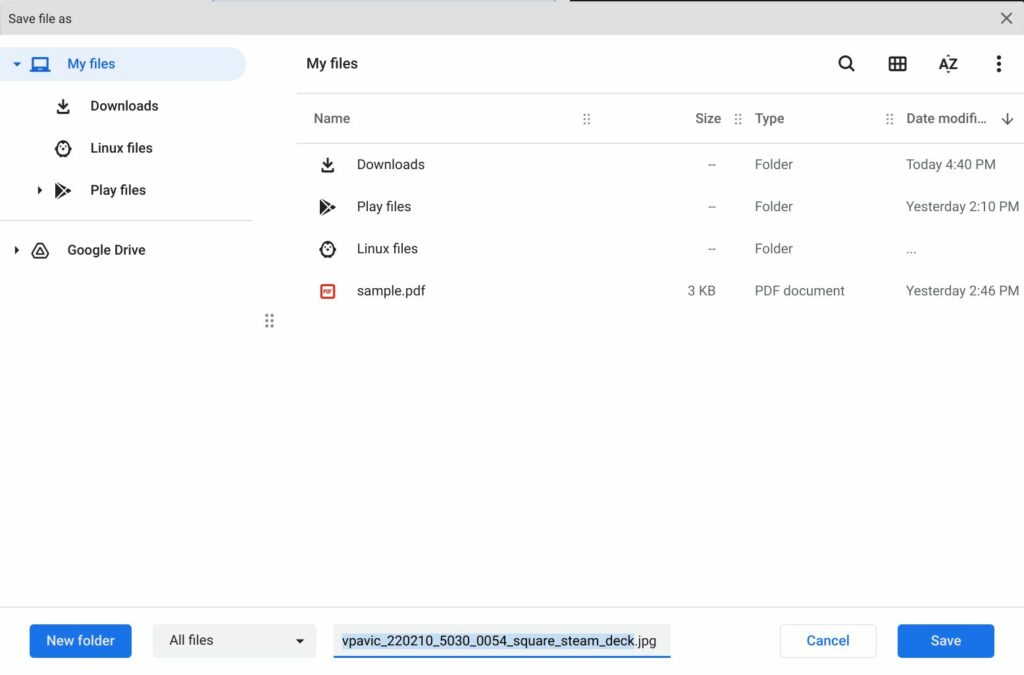
4. Browse the location where you want to save the image. By default, the image will be saved in the “Downloads” directory.
5. Click on the text box if you want to change the name of the image.
5. Once done, click “Save.”
Bonus tip: If you want to save a PNG image as JPEG or vice versa, there’s a neat Chrome extension that lets you do the same. It’s called “Save image as type.”
1. Head over to this link and add the extension to your Chrome browser.
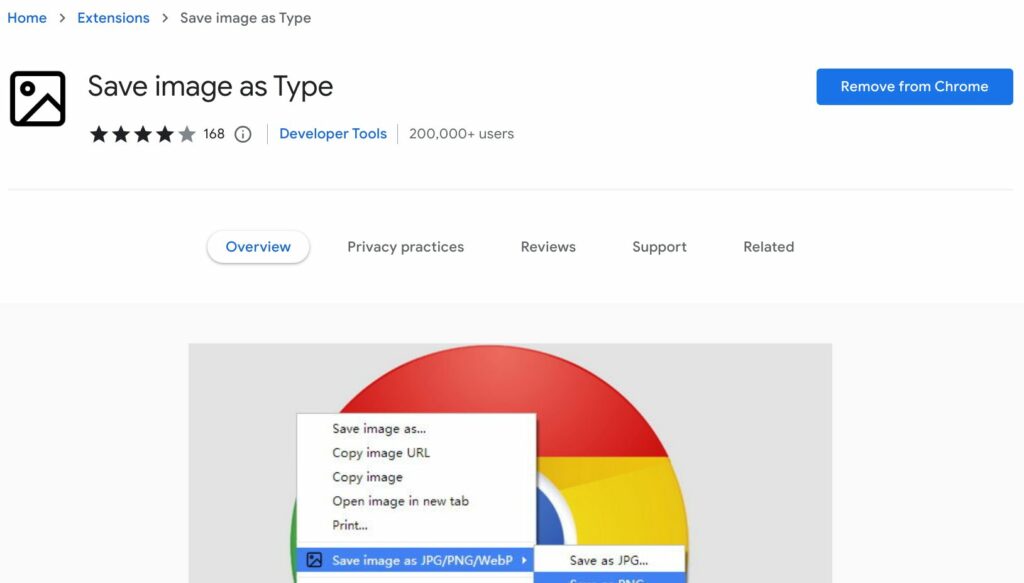
2. Head over to the image that you want to download.
3. Right-click on it and click on “Save image as Type.”
4. Click on the image type (JPG, PNG, WEBP).
4. Click “Save.”
Now that you’ve learned how to save images on your Chromebook, you may want to print them. In which case, here’s how to connect a printer to Chromebook. Got any doubts? Let us know in the comments section below.


