How To Change Margins In Google Docs? | Step-by-step Guide

When it comes to writing, it’s not just the content that matters but also its presentation or formatting. Hence, setting up suitable margins plays a decisive role in some documents. Today, we will tell you how to change margins in a Google Docs file.
For the uninitiated, margins are the spaces that border all four sides of a page. At first, these margins might not seem that important; however, they can help your content look neater if you use them well. Moreover, certain official documents have it as a requirement to use specific margin sizes.
You can customize the margins of your Google Docs document in two ways. While these methods are available on the PC, they aren’t rolled out for mobile users. Below, we show you how to change margins in Google Docs using both methods.
Changing margins in Google Docs
Change margins using the ruler
- Open a document in Google Docs.
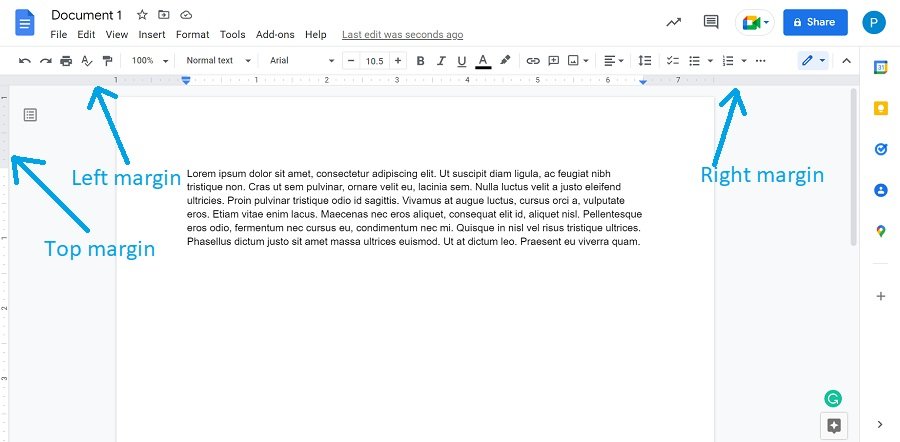
- The scale with numbers you see on the top and left edge is called the ruler. Hover your cursor over any greyed-out area on this ruler to change that particular margin.
Note: You can find the bottom margin after scrolling to the end of the document.
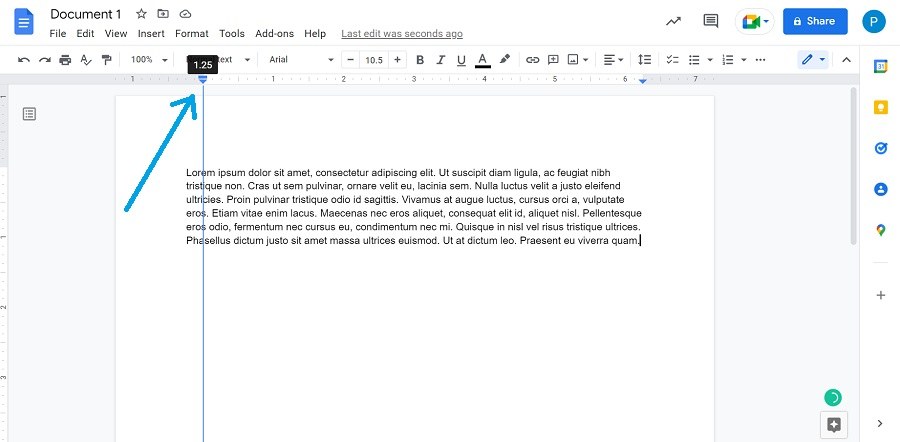
3. Once the cursor icon changes, click and hold the left mouse button on the grey area and drag it to change the margin as per your liking. When you are done, leave hold of the mouse button.
Change margins using Page Setup
- Open a Google Docs file.
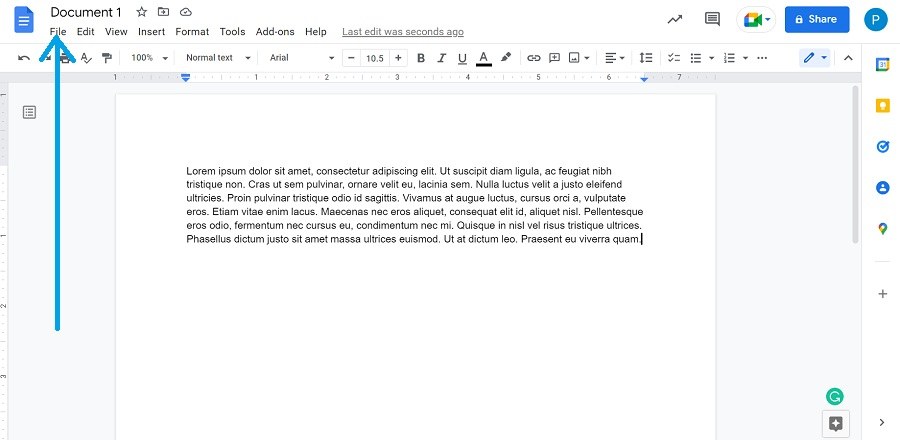
- Click on “File” from the ribbon menu near the top.
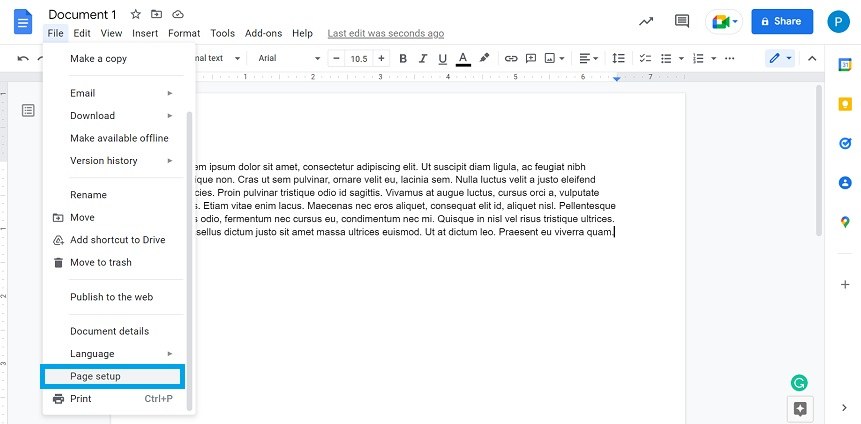
3. Scroll down and select “Page setup.”
4. In the Page setup window that opens, enter the preferred values of the document margins.
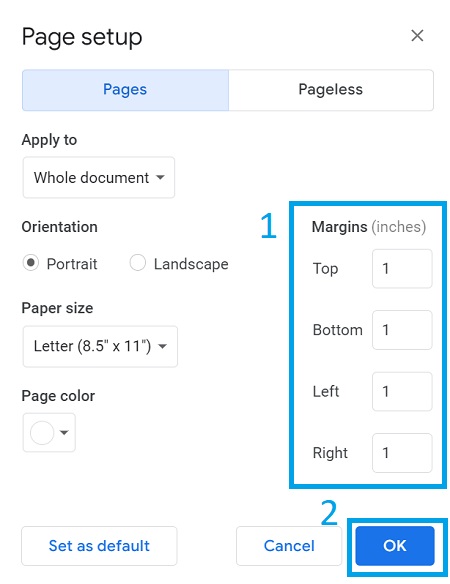
5. Click on “OK” to confirm the changes. Alternatively, if you want to keep the new values as the default setting, click on “Set as default” before clicking on “OK.”
There you have it! That’s all there is to defining custom margins in Google Docs. Besides this particular Google service, if you want to know how to get the best out of Gmail, check out our Gmail Guide section.


