Apple’s Hide My Email Feature Explained: How To Use It?

Among Apple’s privacy updates at the WWDC, we also get the Hide My Email feature. It lets you choose if you want to keep your email address hidden from a website or app while signing up for it using Apple ID.
You can set up an Apple ID in a few easy steps. Once that is done, you can use Apple’s Hide My Email feature to securely sign up for other apps. It also helps to keep hidden trackers away from your inbox. Combined with the recent iCloud Private Relay, it makes for a powerful privacy solution.
How To Start Using Hide My Email?
1. Sign Up For Apps Using Apple ID
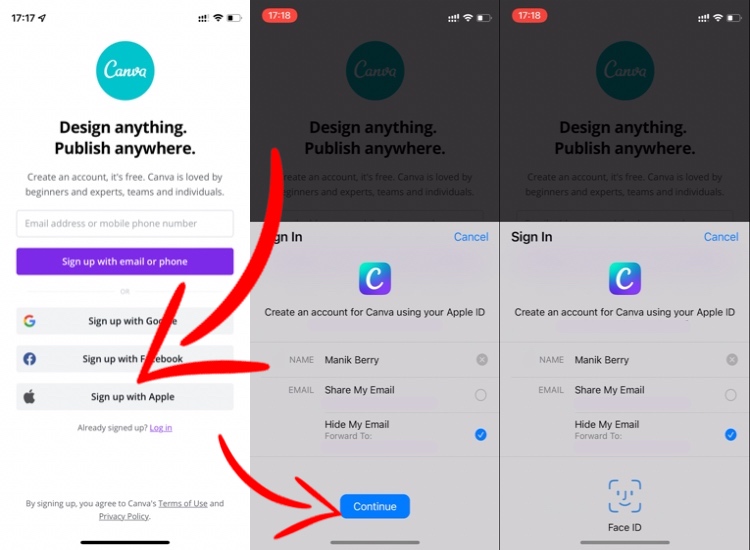
We’ll be using Canva app for this demonstration. Tap on Sign up with Apple and select Share My Email or Hide My Email. Tap Continue, and you’ll be signed up after Face ID authentication.
2. Set Preference And Stop Receiving Emails From Apps
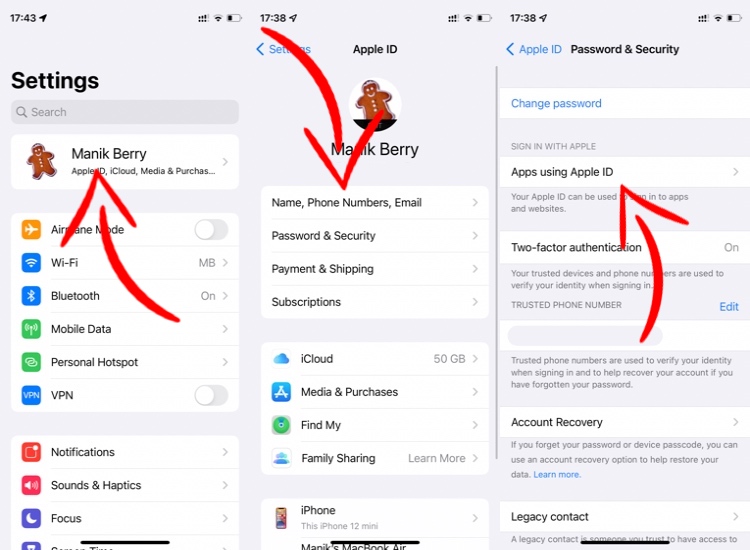
To stop receiving emails from Canva or check email preferences on your iPhone, go to Settings > Tap on [Your Name] > Password & Security > Apps Using Apple ID.
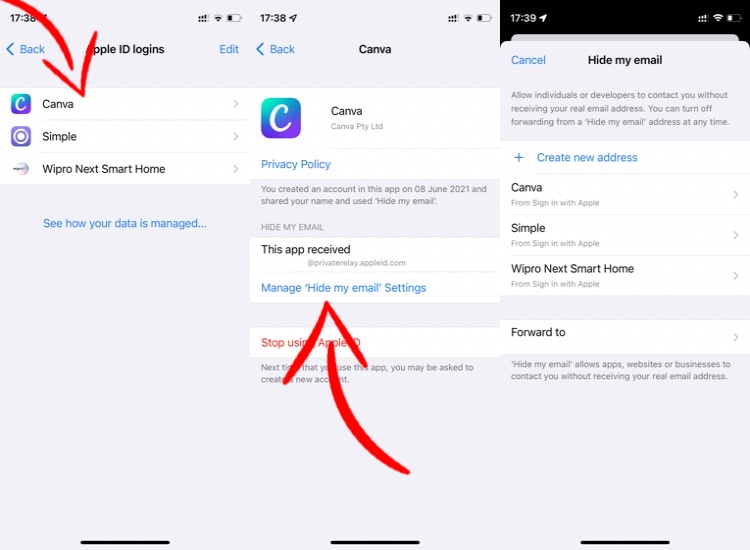
From here, tap on the app you want to check. Here, you can see the random email address that Apple Hide My Email has given to the app. You can also Stop using Apple ID from this page and change your forwarding email address.
How Does Hide My Email Work?
Hide My Email works by letting you choose whether you want apps or developers to see your email address. It does so by generating a random email address to share with the developer.
So when the developer or an app wants to send you an email, it’ll be sending it to that random email ID. Then Apple will forward it to your real email address. This way, you can receive emails from an app if you want, but you also have the option of keeping your email address hidden from it.
Apple will create a separate alphanumeric email for every app you sign up for using Apple ID. This way you can also stop using Apple ID or change settings for every app separately.