How To Open BIOS in Windows 11?

Let’s face it: Windows 11 has a lot of options to help users get the maximum performance from their devices. But, despite all these options, several settings, such as overclocking and XMP support, are hidden in the BIOS. Considering that tinkering with these settings can significantly improve your PC’s performance, you might want to enter the BIOS and change some settings. If you’re one of those individuals, here are three ways to open the BIOS in Windows 11.
Note
The BIOS is a powerful tool, and if you’re not sure about the changes you want to make, do not mess with the settings, as it can cause your computer to malfunction.
1. Using the F2 Key
The easiest way to open the BIOS in Windows 11 is by using the F2 key. However, it is important to note that while most laptop makers use the F2 key, some have a different shortcut. You can check the shortcut key by visiting your laptop maker’s website. Once known:
- Shut down your laptop.
- Press the power button.
- When the manufacturer’s logo appears, repeatedly press the F2 key.

2. Using the Settings menu
If the F2 key doesn’t work, another easy way to enter the BIOS is through the Settings app. Here is how:
- Open the Settings app.
- Navigate to System > Recovery.
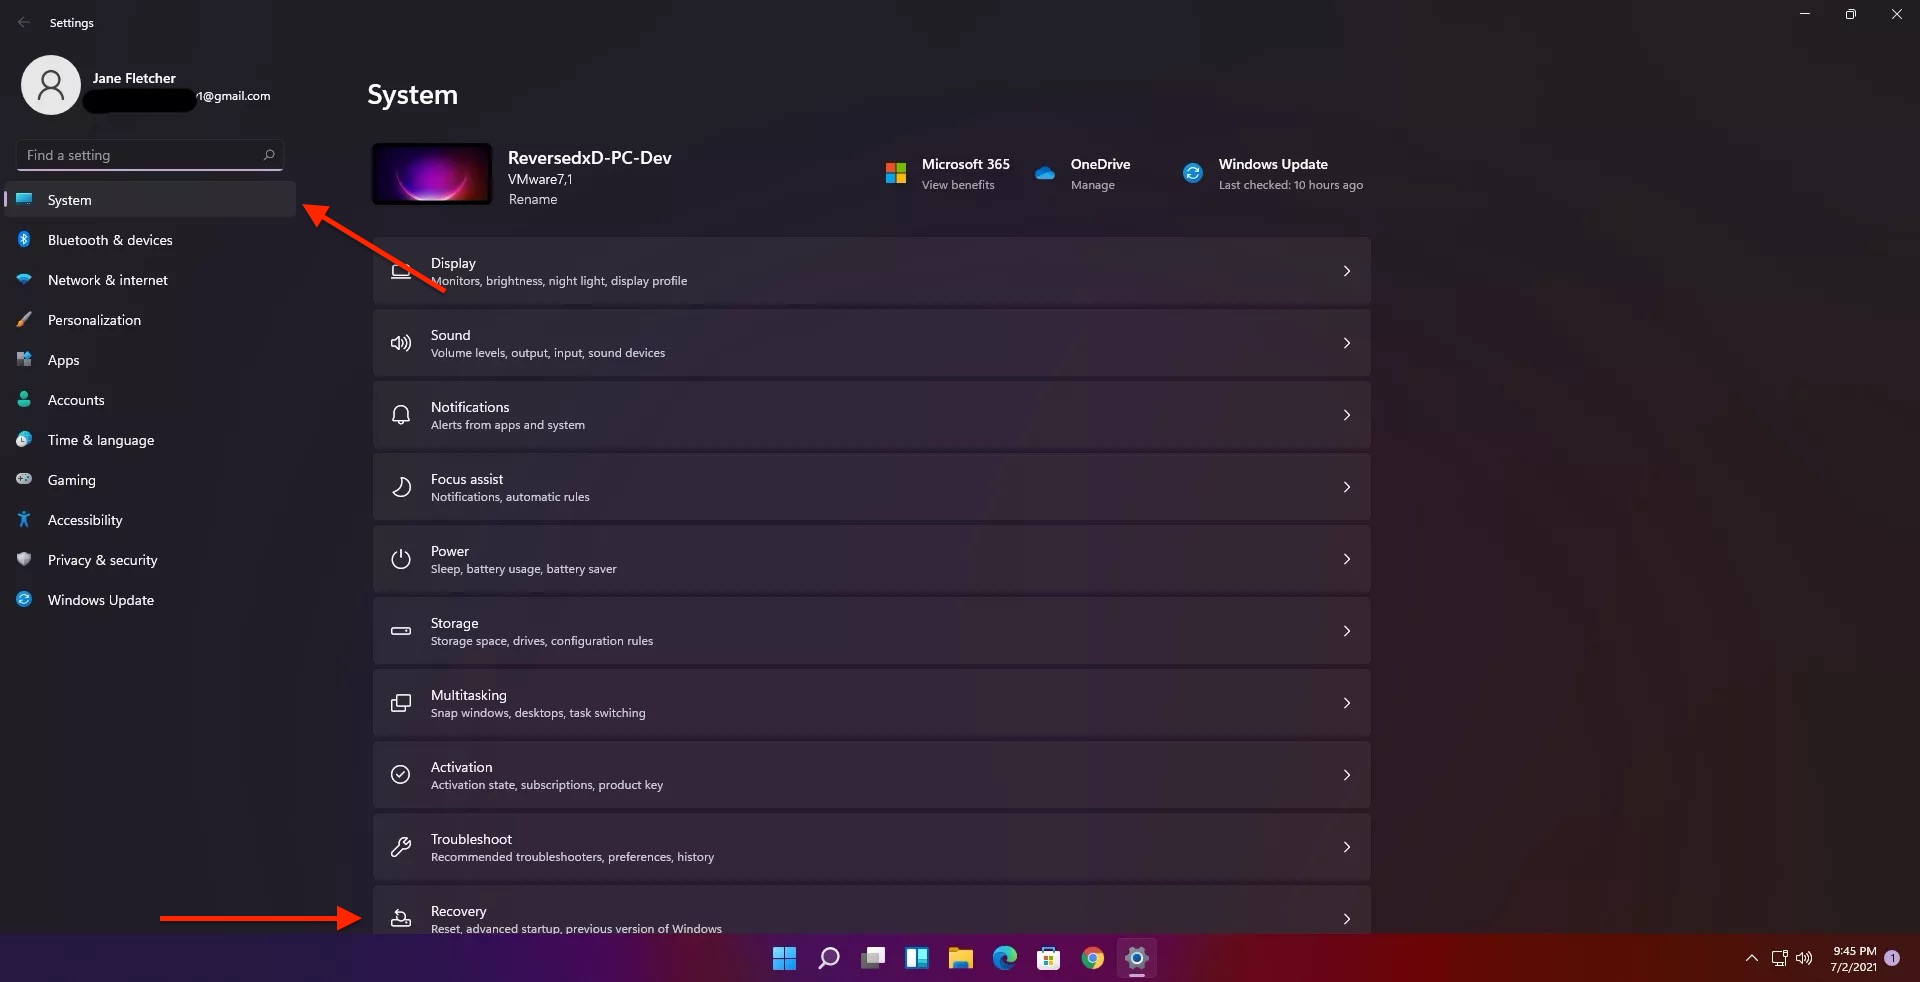
- In the Advanced Startup section, click the Restart Now button.
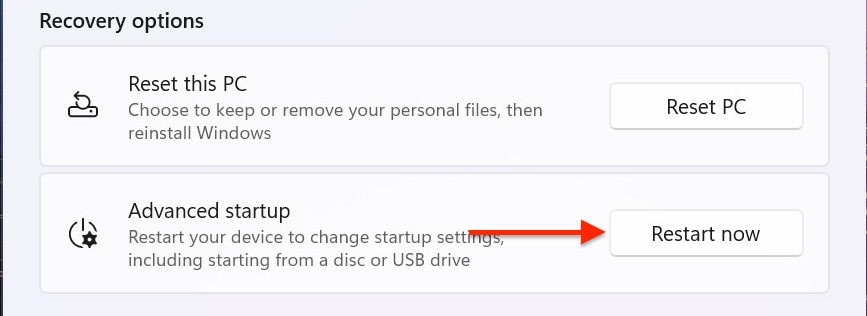
- Click the Restart Now button again in the “We’ll Restart Your Device So Save Your Work” popup.
- On the following screen, navigate to Troubleshoot > Advanced Options > UEFI Firmware Settings.
- Finally, click Restart.
3. Using the Command Prompt
For those who like to do things a different way, you can also enter the BIOS using the command prompt in Windows 11. To do this:
- Open the Search menu.
- Search for the Command Prompt.
- Paste the command below and hit Enter.
shutdown /r /o /f /t 00 - On the following page, click Troubleshoot > Advanced Options > UEFI Firmware Settings.
- Click Restart.

