How To Install Chrome OS Flex On Any Computer? [Complete Guide]
If we ask which operating system has grown immensely in the last two years, your answer would probably be Windows or macOS. But what if we told you it’s neither of them but Chrome OS? It shouldn’t come as a surprise, but due to the COVID-19 pandemic, Chromebooks witnessed a whopping 275% YoY growth in 2021.
What makes Chrome OS special is its ease of use for students and seasoned Windows users. It’s fast, light, and efficient. If your computer has recently started giving up on you and runs slow thanks to Windows, you can try Chrome OS Flex, which can be installed on most PCs. In this article, let’s look at how to install Chrome OS on any computer.
Important! Installing Chrome OS on a PC will delete all your data. Hence, make sure to backup all important files before proceeding.
A few things to remember before installing ChromeOS Flex
One of the issues with ChromeOS, at the time of writing this article, is compatibility. While I could install it on my HP Envy x360, the OS failed to boot on my PC with NVIDIA graphics. Furthermore, ChromeOS Flex has no Android app support, which is a huge bummer.
One of the other huge dealbreakers is that you cannot install ChromeOS Flex alongside other operating systems. However, Google has said that most of these elements will be addressed in the future versions of ChromeOS Flex. So, fingers crossed.
How to install ChromeOS Flex On Any PC
Unlike other OSes that can be installed directly onto the USB using flashing tools, ChromeOS Flex has its flashing tool called Chromebook Recovery Utility.
Prerequisites:
- A 16GB USB flash drive
- A PC that launched after 2010
- 4GB RAM
- 16GB Internal storage
- A 64-bit processor
- Patience (The most important thing).
Getting ChromeOS Flex on USB
1. Plug the USB flash drive into your laptop.
2. Open your browser, head over to Chrome extensions, and install the Chromebook Recovery Utility.
3. Once installed, go to extensions and click on the Chromebook Recovery Utility to open it.
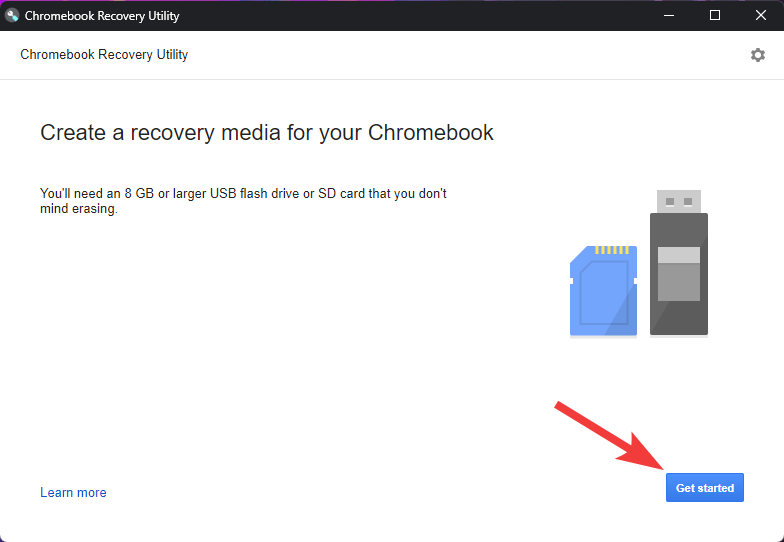
4. Click “Get Started” and “Select a model from the list.”
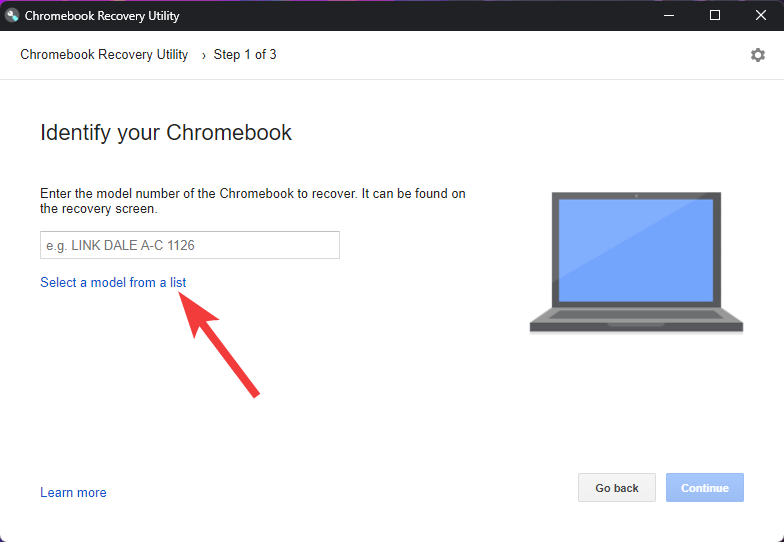
5. In the “Select Manufacturer” dropdown, select Google ChromeOS Flex, and in the “Select a product” dropdown, select ChromeOS Flex.
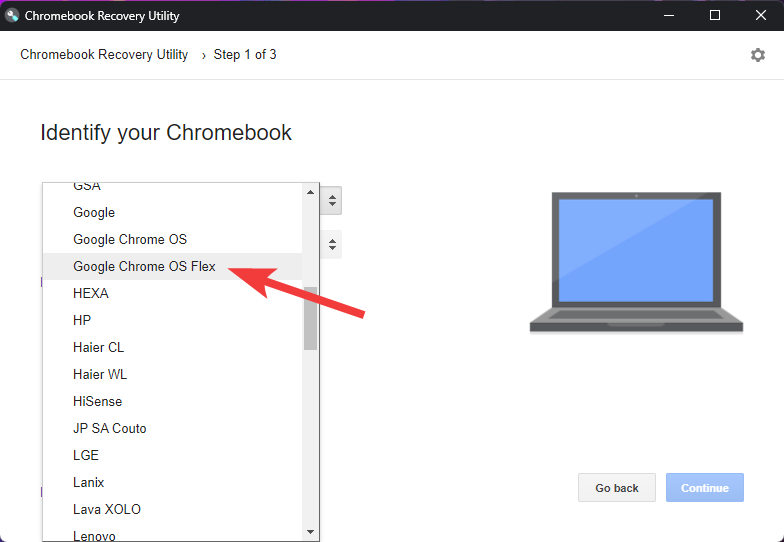
6. From the dropdown, select your USB flash drive.
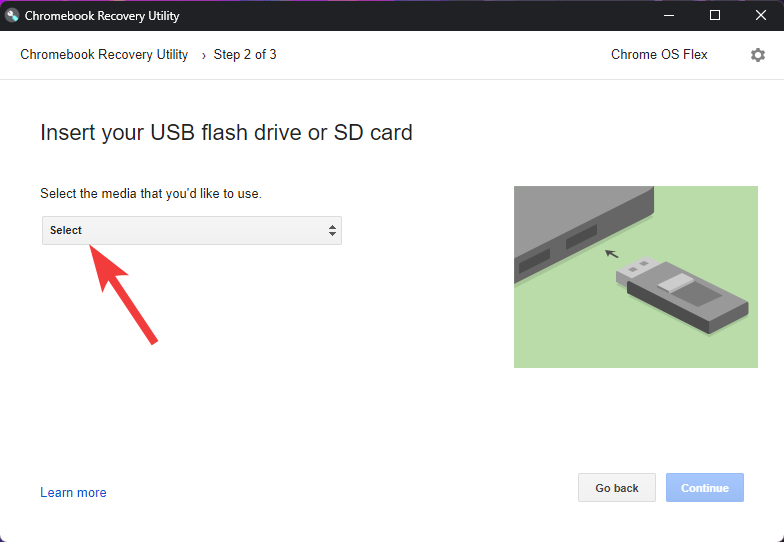
7. Finally, click on Create Now to start the flashing process.
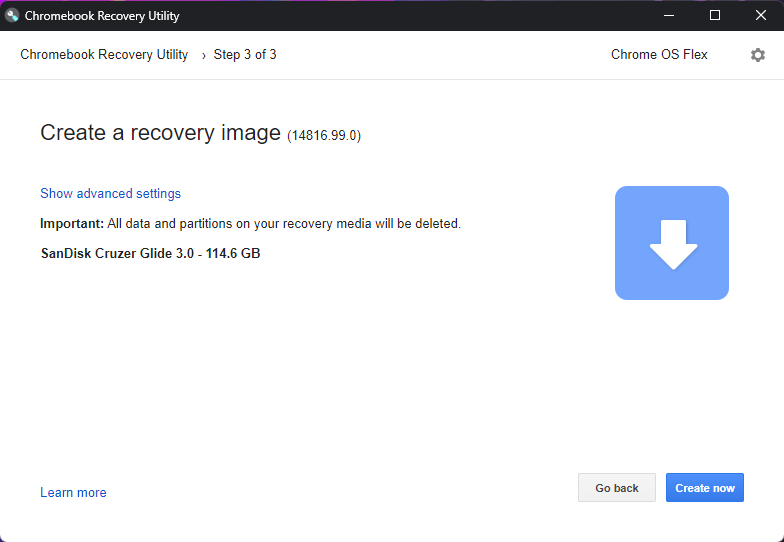
8. Once done, your bootable ChromeOS Flex media should be ready.
Installing ChromeOS Flex
1. Shut down your PC.
2. Disable Secure Boot by heading to the BIOS. To do so, refer to the Enable Secure Boot And TPM In BIOS Settings section of our “How To Fix TPM 2.0 Error When Installing Windows 11?” article.
3. Save settings and power on the PC once again
4. Use the Function keys to get into the “Boot order” menu.
The function key to get into the boot order menu differs from manufacturer to manufacturer. These are commonly Esc, F2, F10, or F12. Hence, make sure to do a quick Google search “Boot order function key on <manufacturer’s name>” before proceeding.
5. From the boot menu, select your USB stick and hit enter.
6. You should see the ChromeOS Flex boot screen, and the PC should boot into ChromeOS.
7. Navigate through the setup process until you reach the screen where you see the options “Install ChromeOS Flex” and “Try it First.”
8. Choose the “Install ChromeOS Flex” option.
9. Considering that your Harddrive has no essential files, click on Install ChromeOS, and the installation process should initiate.
10. Wait for 10-30 minutes as the installation speed depends on your PC’s processing power.
11. Once installed, ChromeOS should prompt you to restart your PC. After the restart, you’ll have your fresh install of ChromeOS Flex ready! Voila! You’ve done it—time to pat yourself on the back.
And that’s how you can install ChromeOS Flex on most old PCs. What are your thoughts on the same? Let us know in the comments section below.


