How to Build Your Own Social Networking Website?

Ever thought of building your own social networking website for college, organization or something like Facebook? If yes, then this article is for you. Even if you know nothing about coding, you can still get your social networking site up and running. In “The Cathedral and the Bazaar,” Eric S. Raymond said — “Good programmers know what to write. Great ones know what to rewrite (and reuse).”
The above quote means, if there are already tools available to build a social networking website, why will anyone want to start from scratch? Let’s re-use existing tools, setup your own social network and if you need anything which is not present in it; only then you have to code for it.
As of today, there are quite a good number of social networking platforms — commercial, cloud-based and open source. We will see the list of available platforms and will pick the best one for building our own.
Best platforms to build social networking site:
1. Elgg
Elgg is an award-winning social networking engine — completely open source, PHP based and very powerful. Elgg powers networks for a wide range of organizations including Australian Government, British Government, Wiley Publishing, and many more.
2. CommunityEngine
It’s a free and open-source social network plugin for Ruby on Rails applications. Just drop it into your new or existing application, and you’ll instantly have all the features of a basic community site.
3. SocialEngine
SocialEngine is commercial and very powerful. Available as cloud or self-hosted solution. We will probably not look at this.
4. Ning
Commercial but cheaper than SocialEngine. Built from the ground up for social, Ning’s scalable hosted platform gives you the tools and expertise you need to publish and connect with your community.
5. phpFox [updated]
Commercial and ready to go social network for your business. It is modular based allowing you to easily plug-in or plug-out a feature with a click on a button. This allows developers to easily develop new and awesome features to further extend your communities capabilities.
Okay, enough talk about existing solutions, what we are really interested in is to build our own social networking website and show off to our friends. So let’s begin – and yes as we said, we will always go with the best one instead confusing users with some sort demo of all. From the above list, Elgg is the one for us.
Recommended: How to Build a Website – A Complete Guide
Steps to build your social networking website:
1. Setting Up Website Development Environment
Since Elgg is a PHP-based social networking platform which uses MySQL as back-end, to get started with it; we need to setup a PHP based development environment on our local system. Once you have built and configure the complete solution and you feel that it’s ready to go live, we will point you to our article on how to make it live on internet. Follow the following steps to setup your PHP development environment –
- Download and install XAMPP for your platform from here. It has all required component for setting up PHP development environment.
- Open XAMPP control panel from start menu and enable Apache and MySql services.

- Open https://localhost in your browser. You will see a splash page of XAMPP, select your language and it will open XAMPP web admin panel.
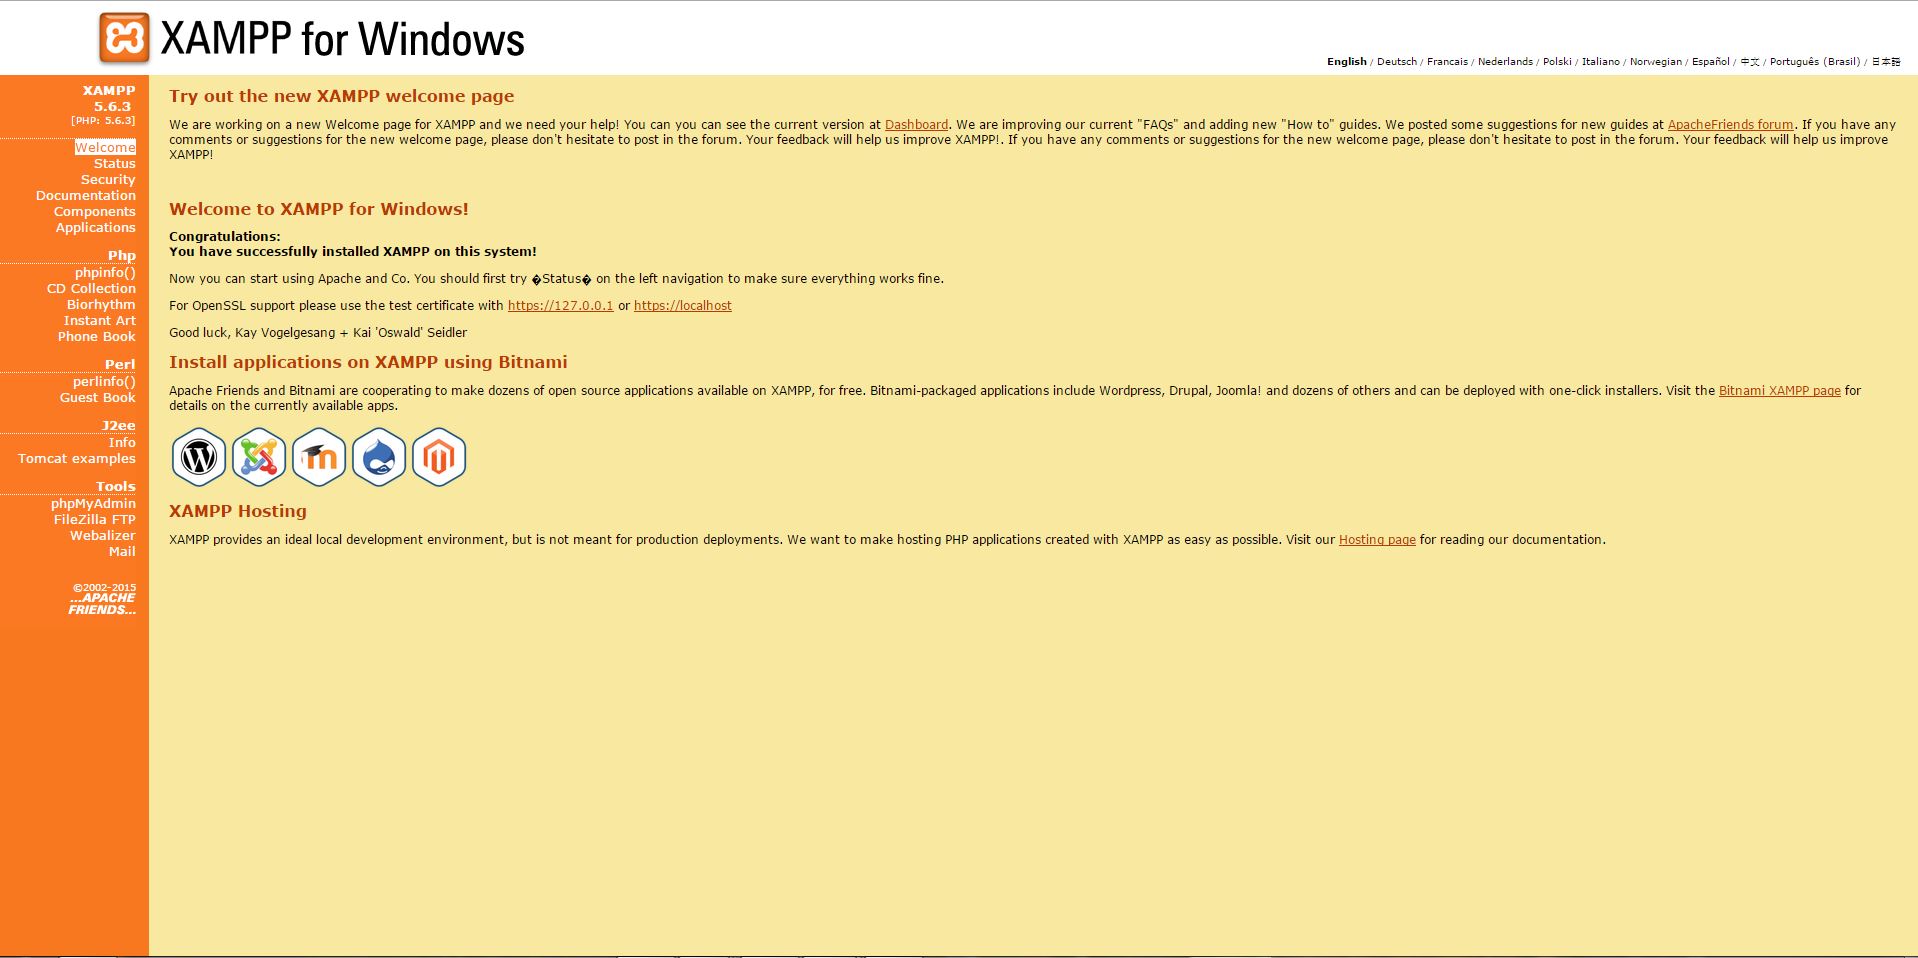
If you are seeing that page than well done you have setup your development environment.
There is one important thing we should never forget to do is to check the security settings. Click on the security link on the left sidebar of the admin panel. You will see that MySQL has root user but no password and hence showing insecure –
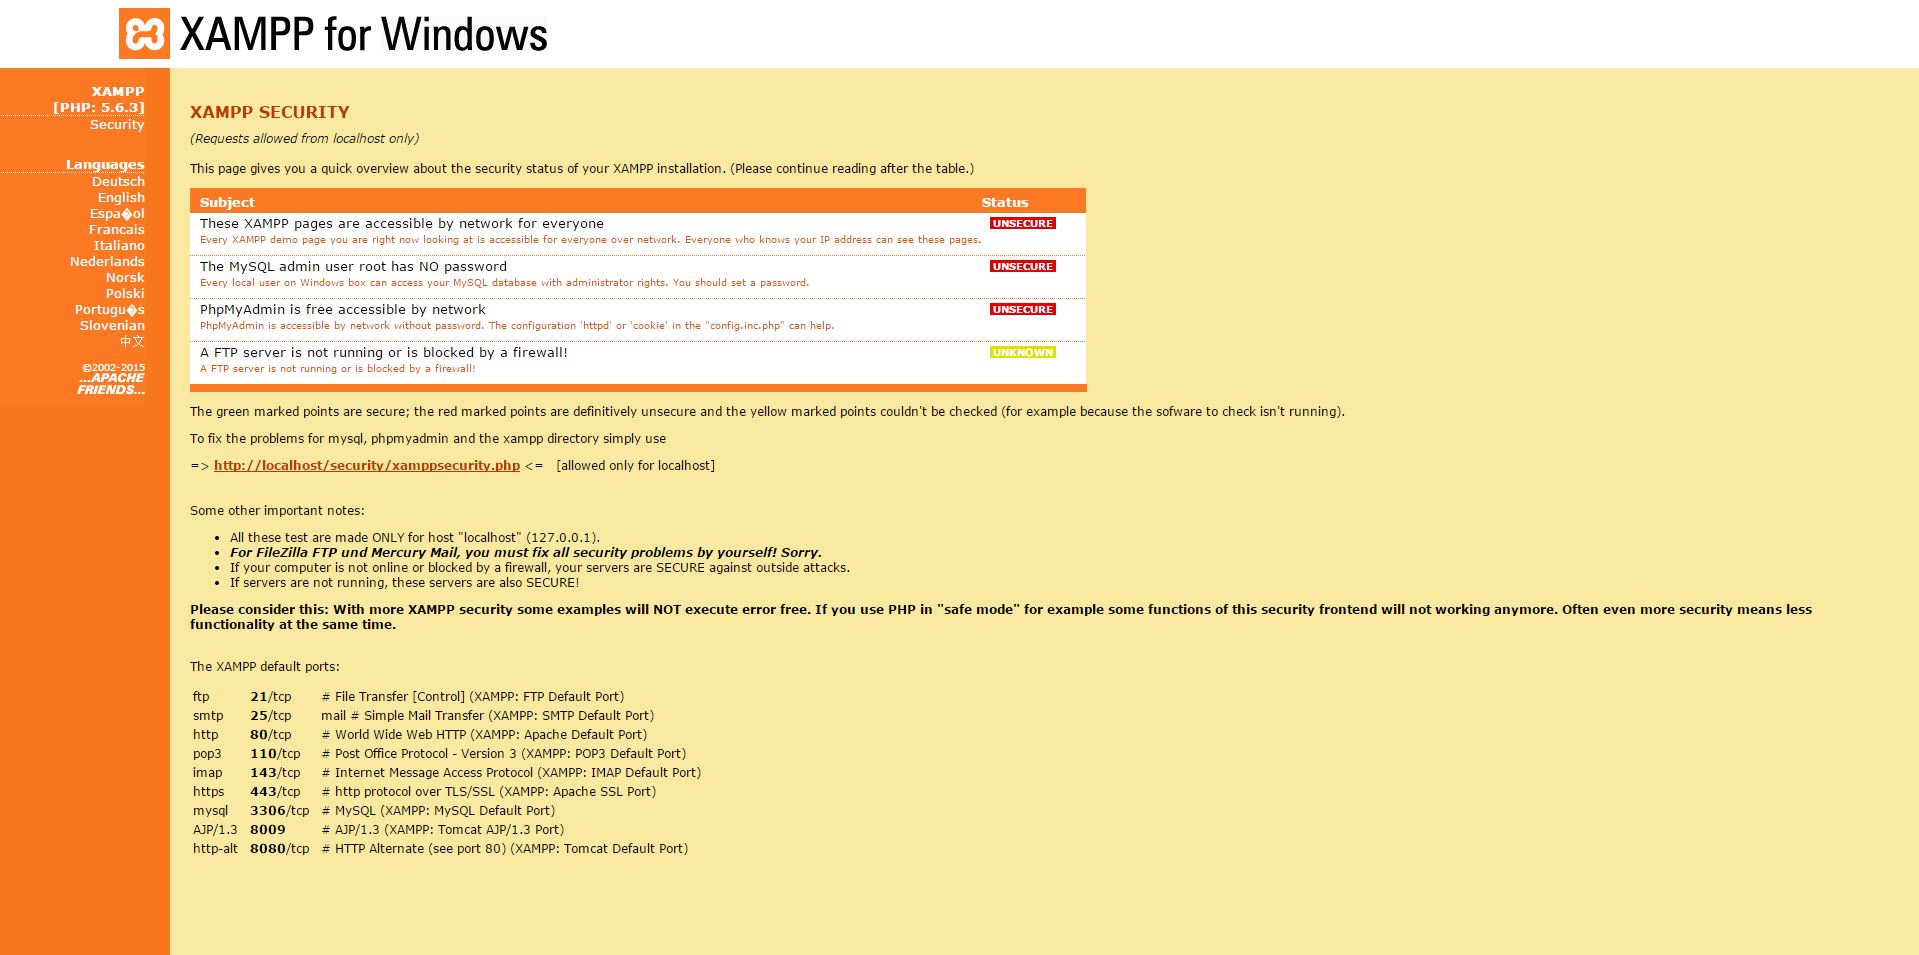
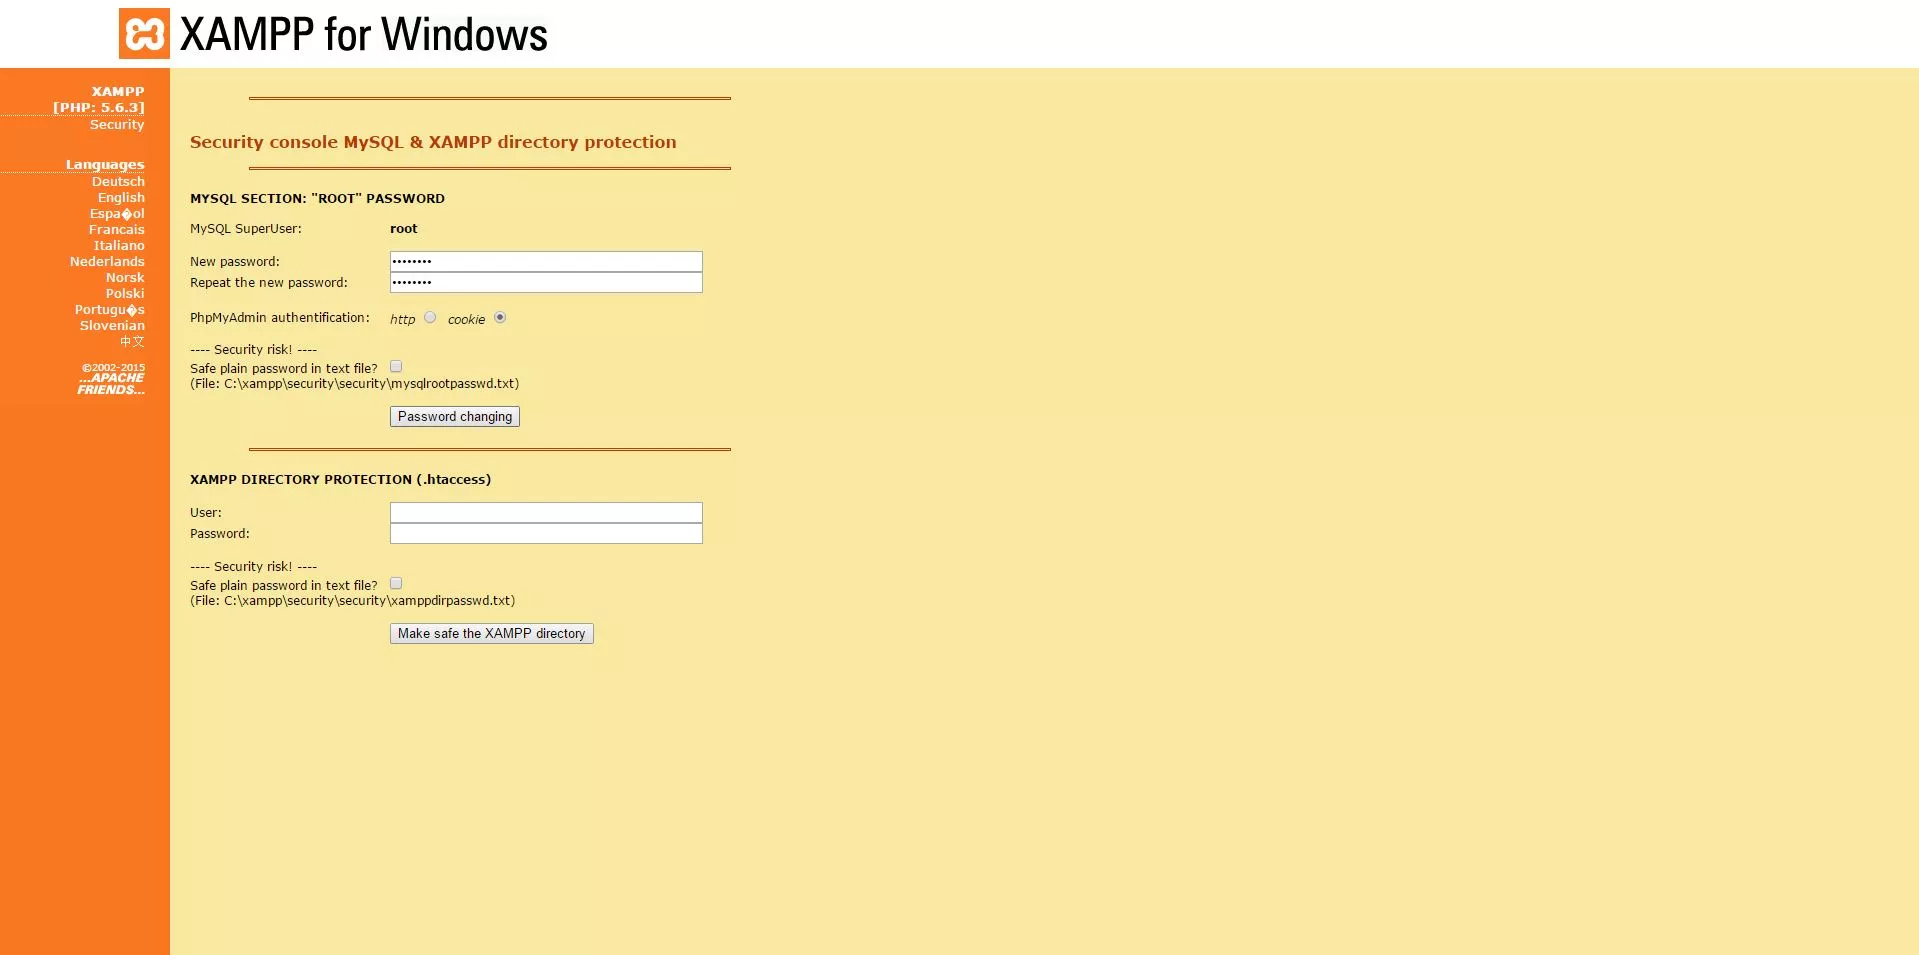
Let’s secure MySQL by clicking on the link https://localhost/security/xamppsecurity.php and setting up the password for MySQL root user –
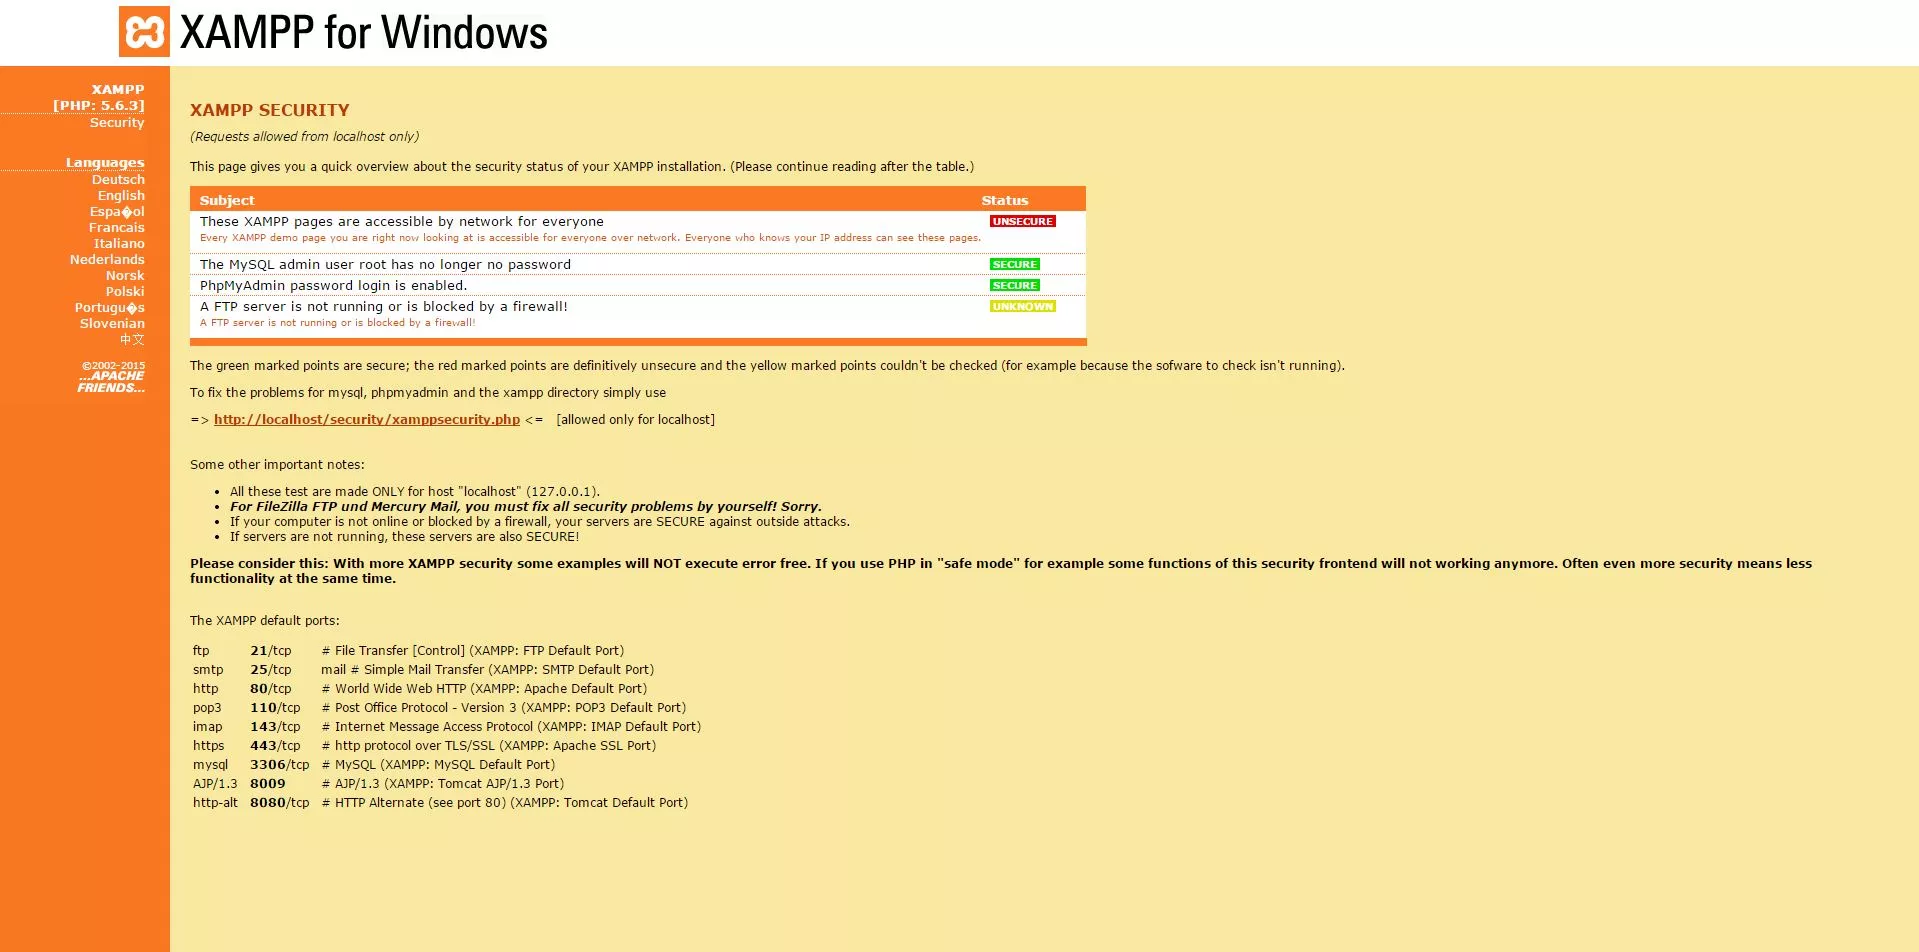
Once you set the password for MySQL. Restart the MySQL service from XAMPP control panel and come back to the security page. You will see that now it’s secure. Remember the password you have setup because you will need it while installing Elgg.
2. Installing Elgg
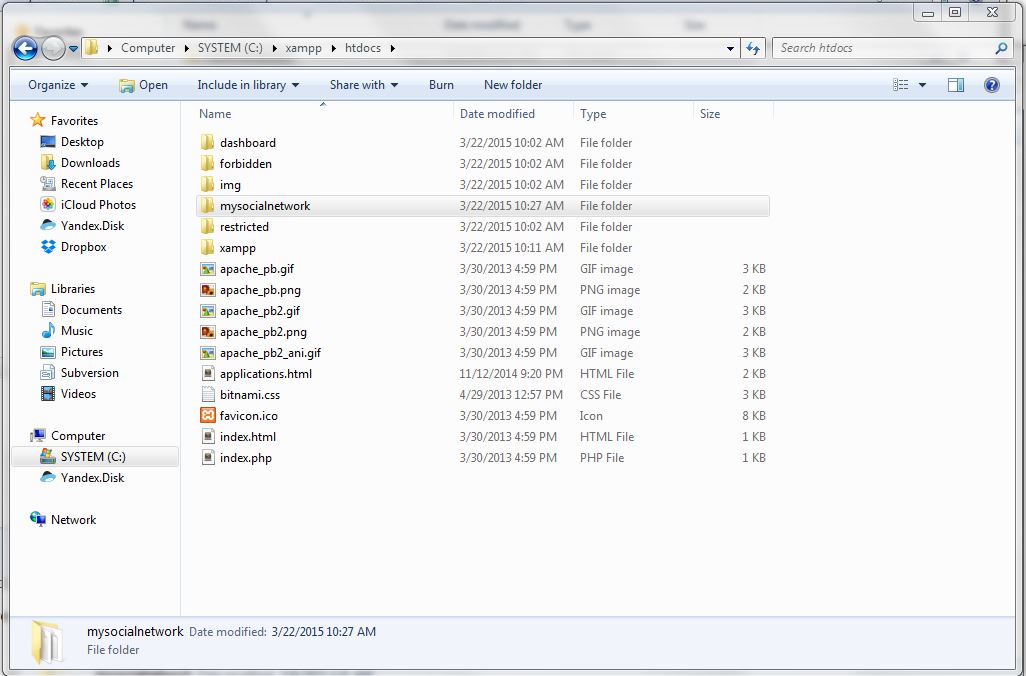
Download the latest Elgg package from https://www.elgg.org/download.php. Extract the downloaded zip file and rename the extracted folder to the name you want to give to your social networking website e.g. mysocialnetwork
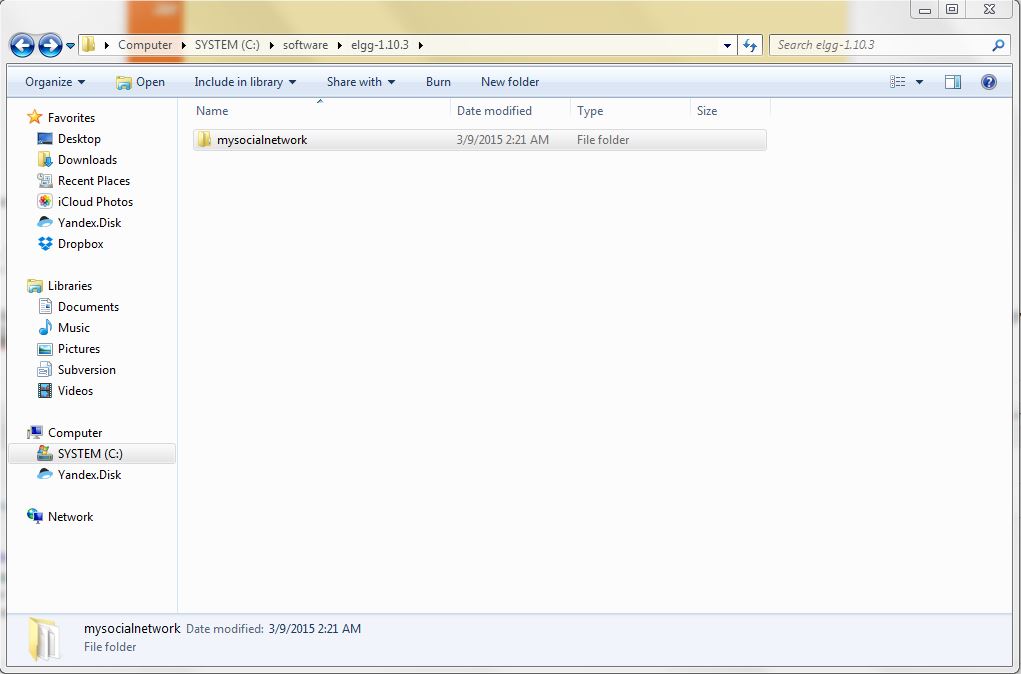
Now open your XAMPP directory and move to htdocs folder and copy the above mysocialnetwork folder here.
Now go to your browser and type https://localhost/mysocialnetwork, you will see following page:
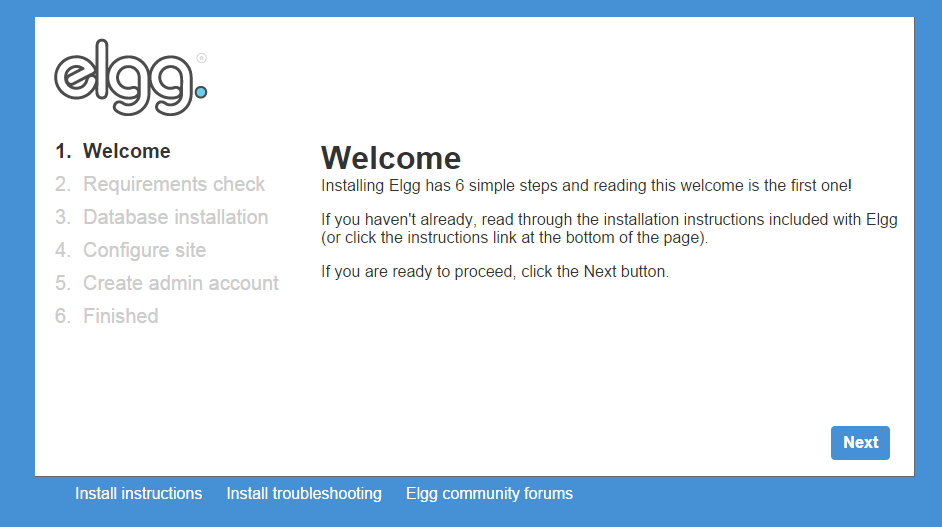
Follow the installation wizard and setup your social network –
Requirement Check –
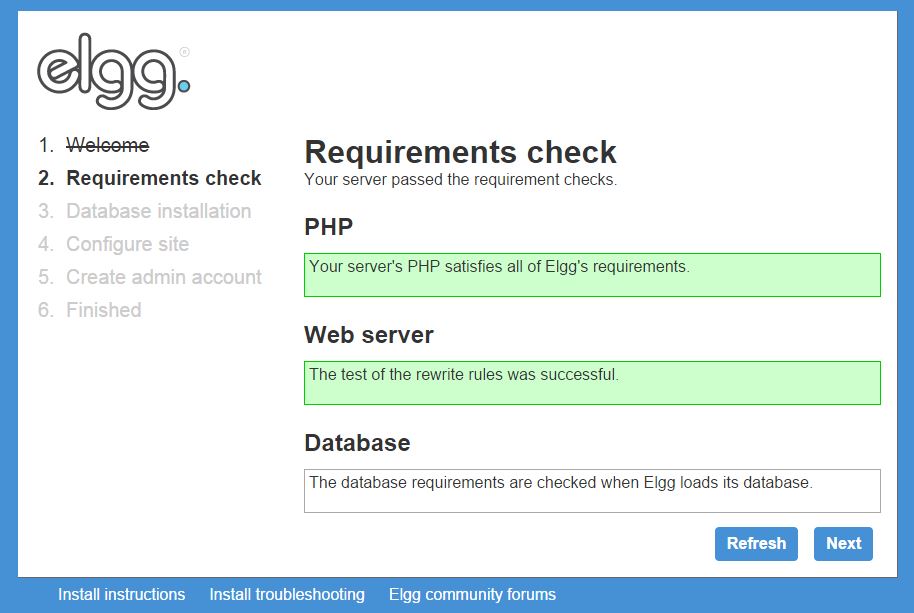
If requirements check is okay you can move to next step.
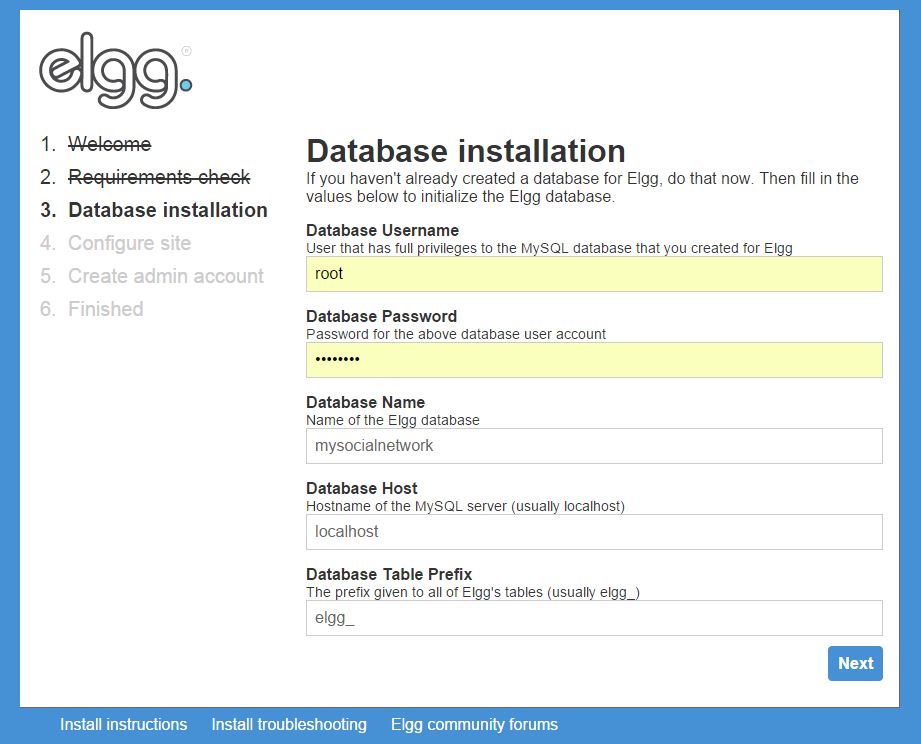
Database Installation –
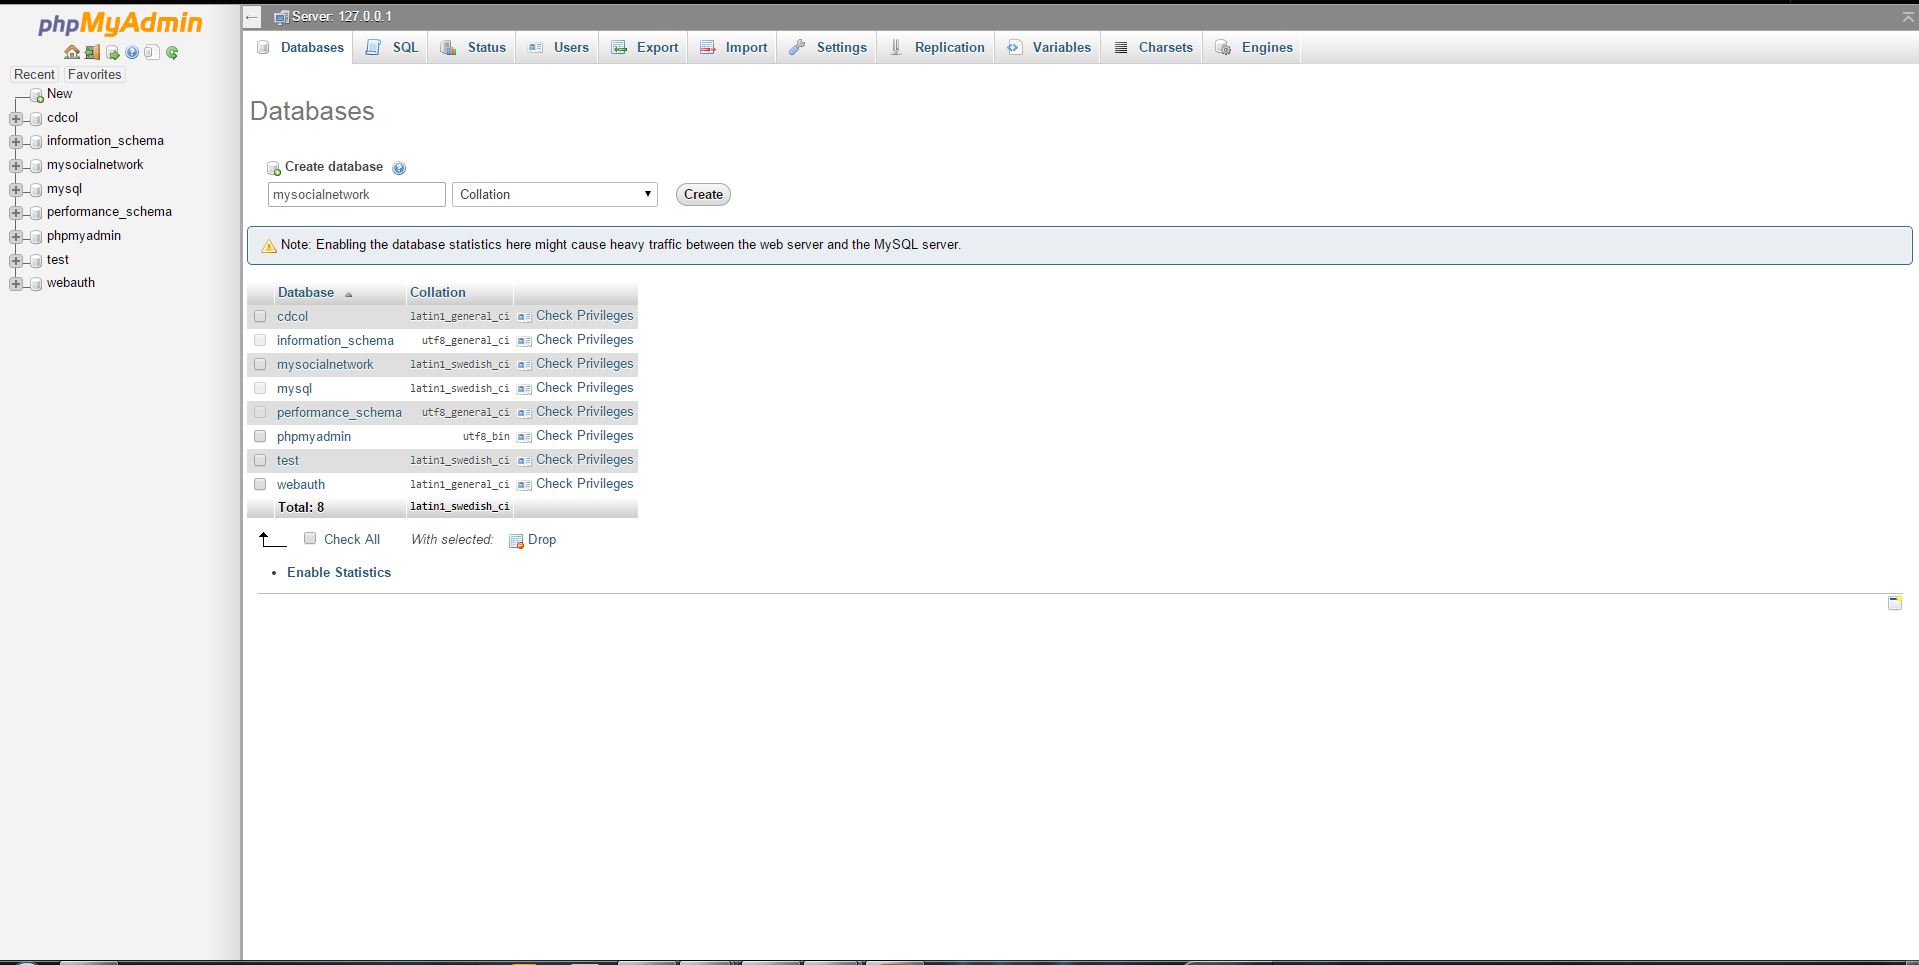
We already setup password for our database root user. We will now use these settings but before that go back to your XAMPP admin panel and click on the phpMyAdmin link on the left sidebar under Tools section. phpMyAdmin is web-based front-end for our MySQL database. Login to phpMyAdmin using root user and your password, it will open following page where we can manage your databases –

Now create a database for your social networking website which we will use in database installation setup of Elgg. e.g. we create mysocialnetwork database.
In database installation step of the Elgg installation wizard fill up the required fields and click next –
Configuring Site –
In this step give your social networking website a Name. If you have a mail server on your local you can give some mail address for now just give [email protected]. For the data directory, create a directory to store your social networking data and give the absolute path here. e.g.we created mysocialnetworkdata in c:\

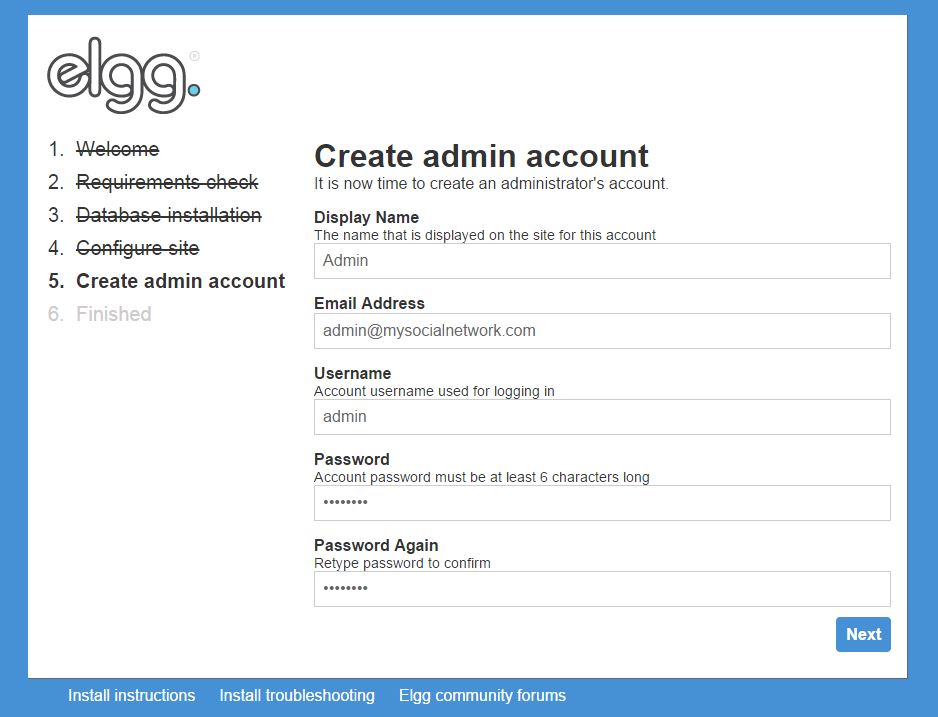
Create Admin Account –
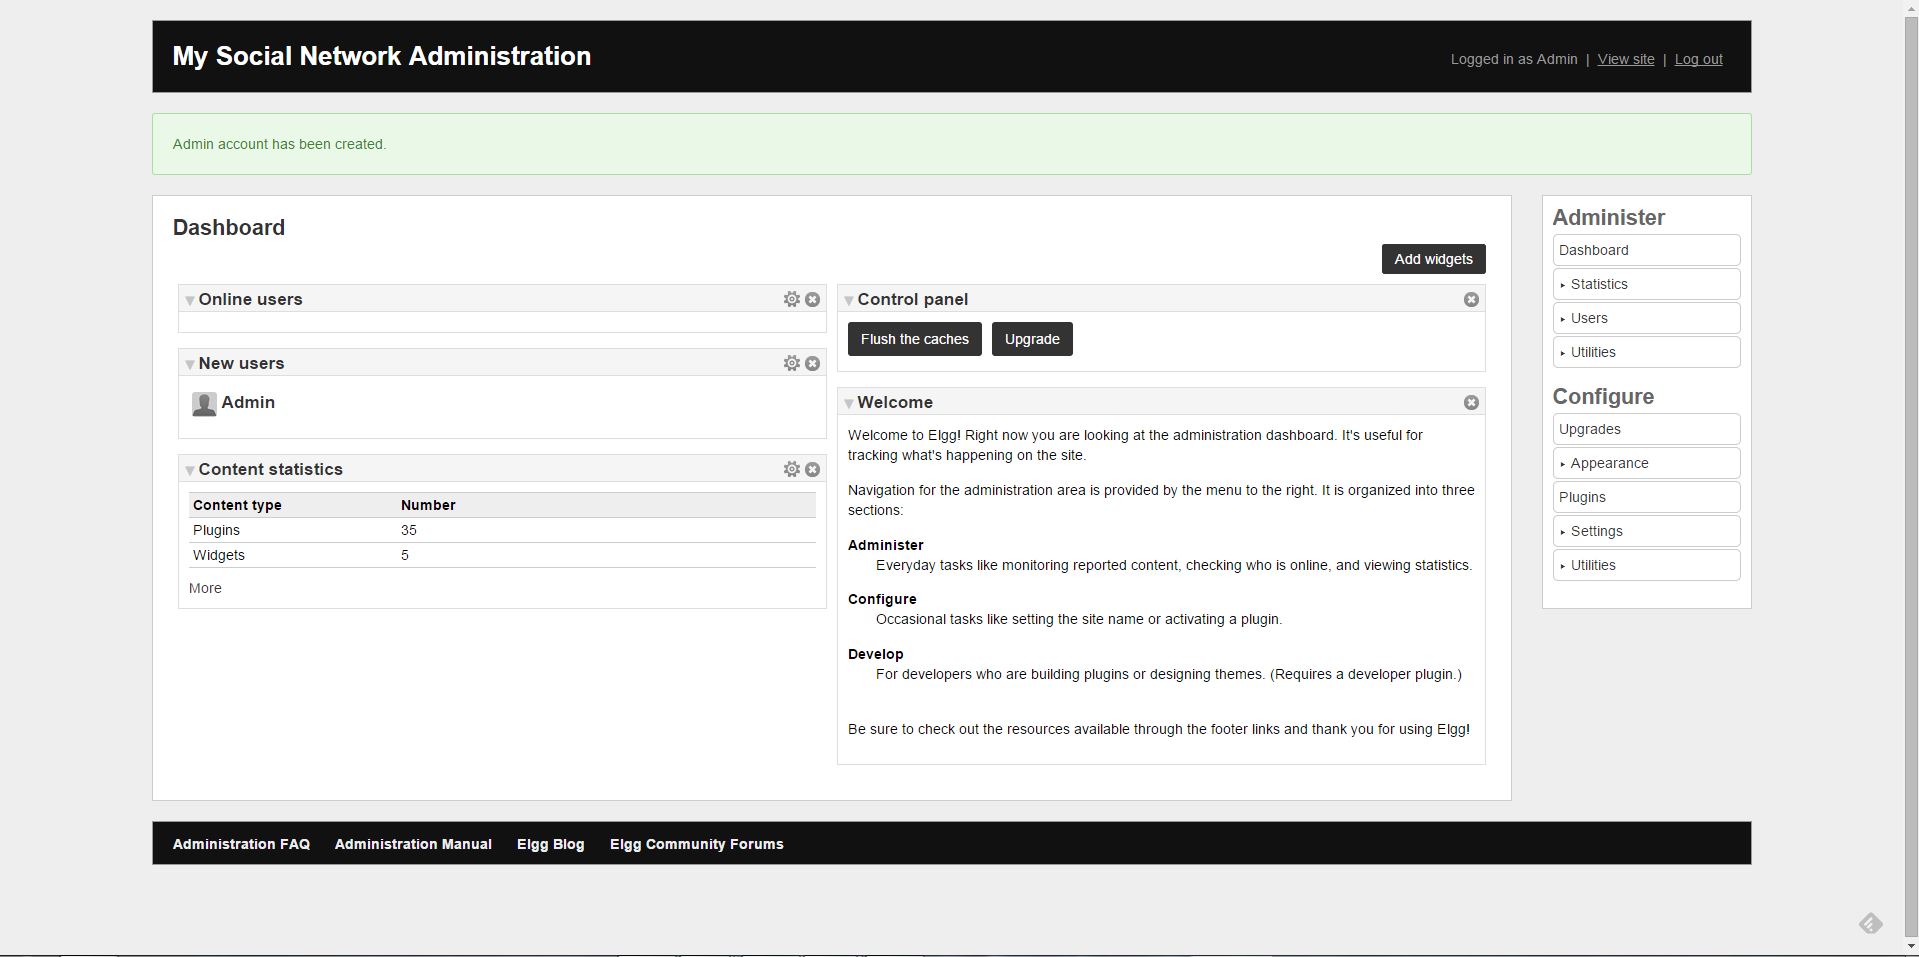
You will need a master admin account to manage your website. With this account you can control your social networking website, it’s users and contents. Create an admin account and click next –
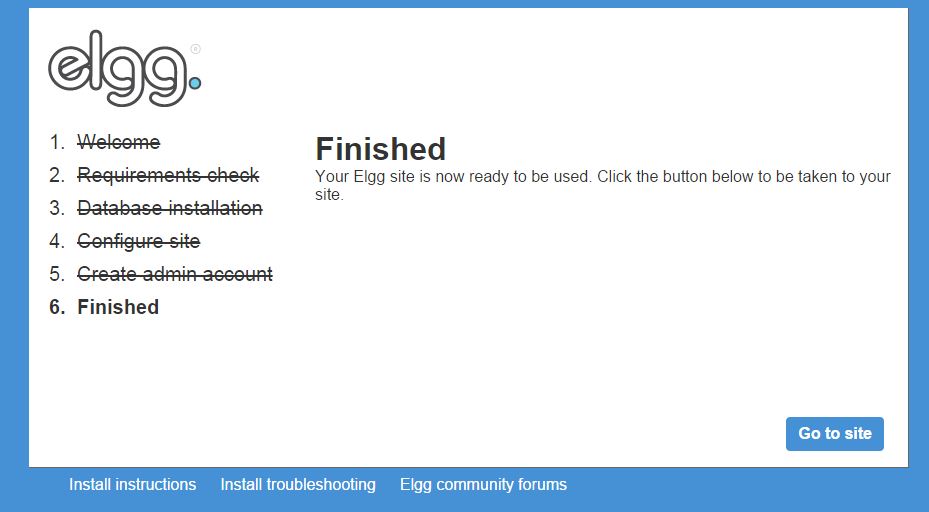
Get Ready For Awesome –
If you are seeing the following page, then everything is fine and you are a click away to see your awesome social network. Grab a beer and click on “Go to site” :)
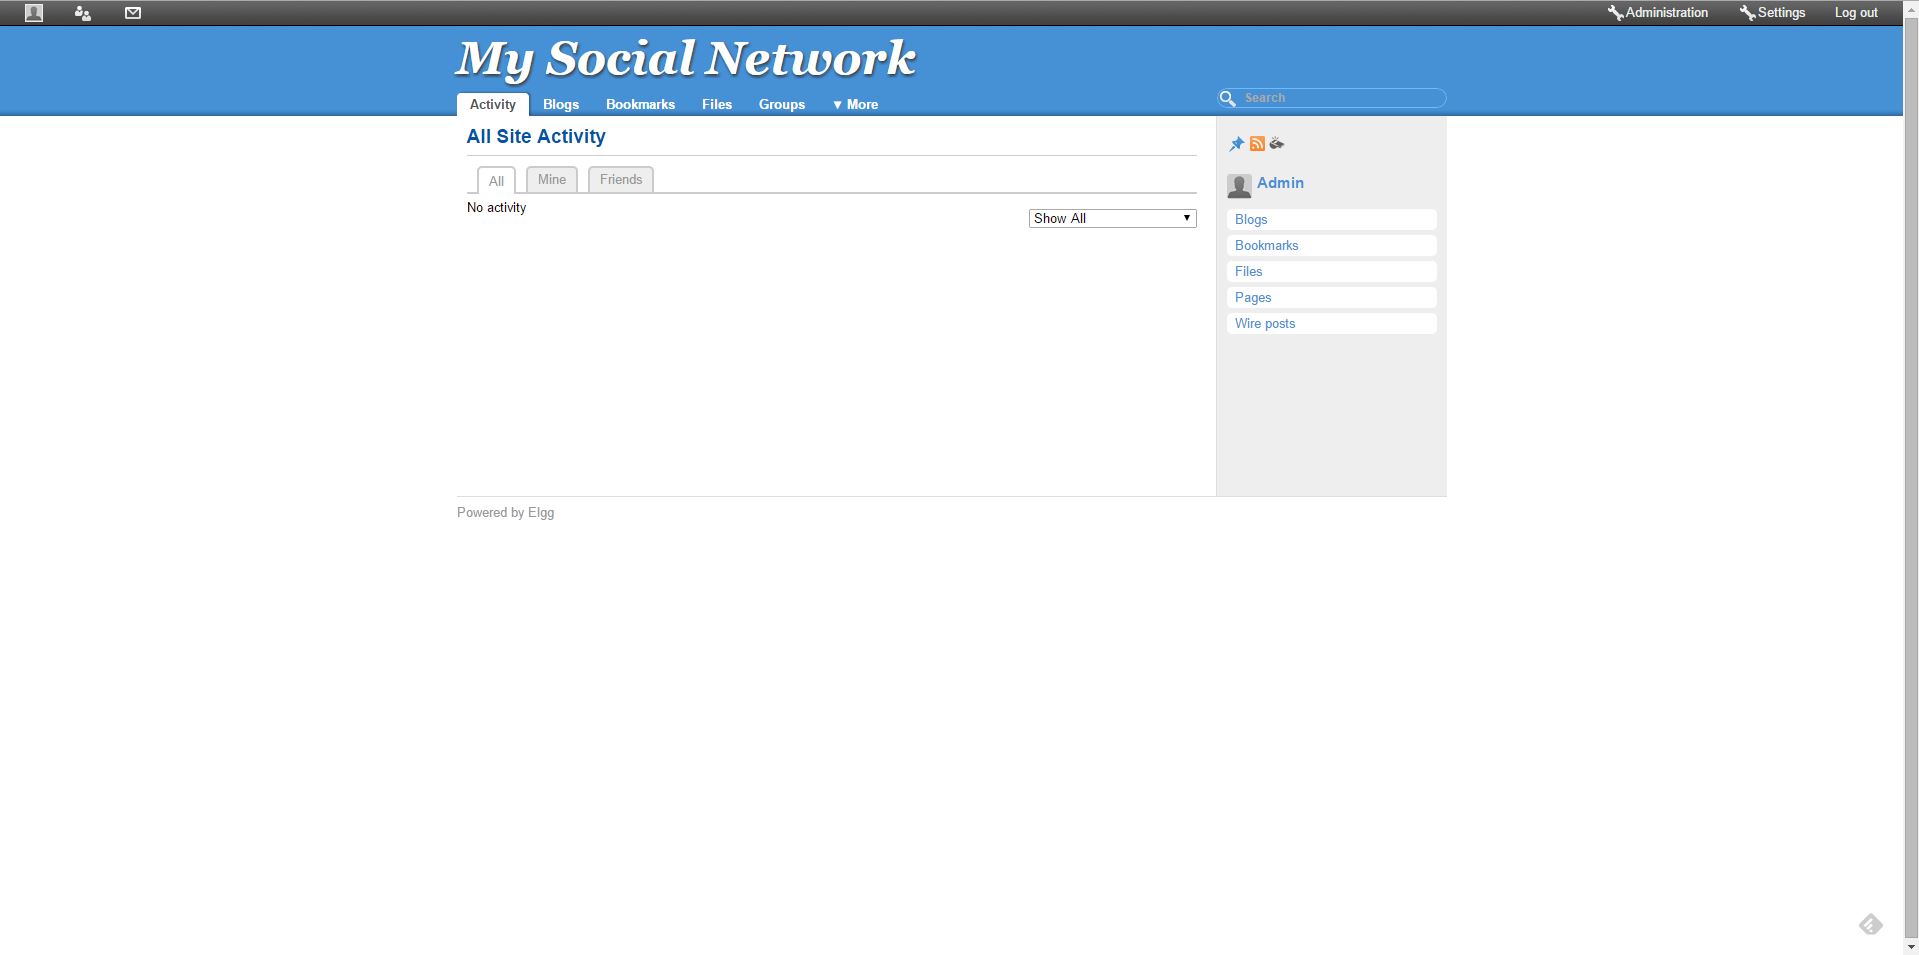
3. First Look at Your Social Network
You have setup your development environment, installed and configured your social networking website. It’s time you see how it looks. On the administration page, click on visit site link present at right side of the top bar –
4. Website Administration
You have your own social network website up and running. Now you can use the administration panel to make this site as you want. You can change the look and feel, functionality, add plugins for more features and much more. Admin panel can be accessed at https://localhost/mysocialnetwork/admin with the credentials you have created while installing Elgg.
Managing Elgg and explaining every functionality is a huge topic and out of scope of this article. But we will give you enough resources, tutorials, books and examples to help you out in building your next great social network.
e.g. Let’s change your site theme to look like facebook
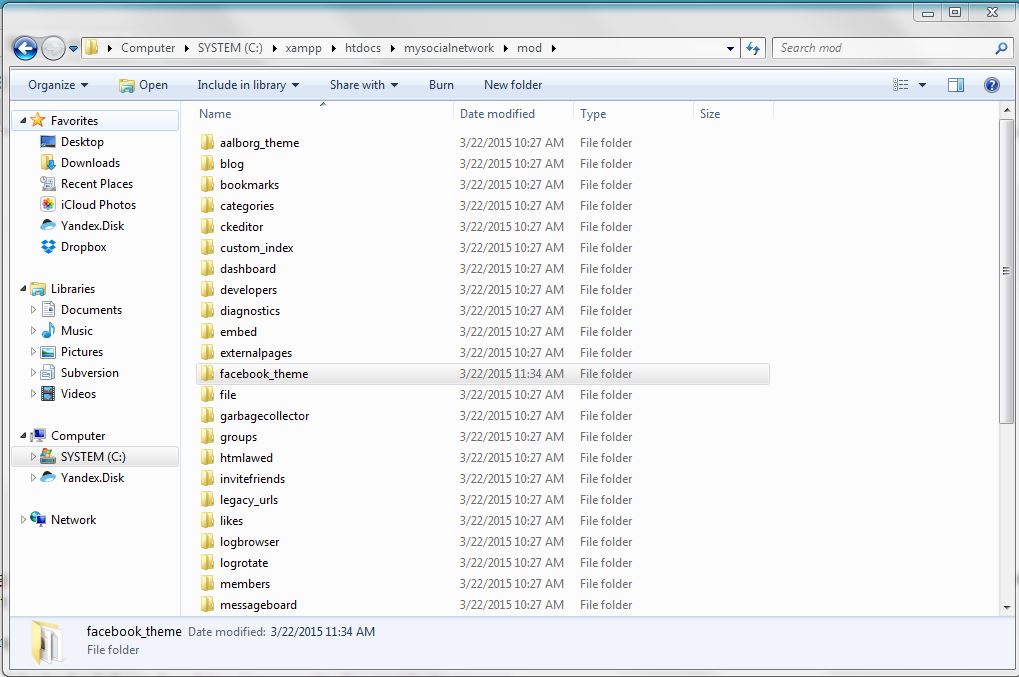
- Download the facebook theme from https://community.elgg.org/plugins/723329
- Extract it and put it in the mod folder of your social network website.
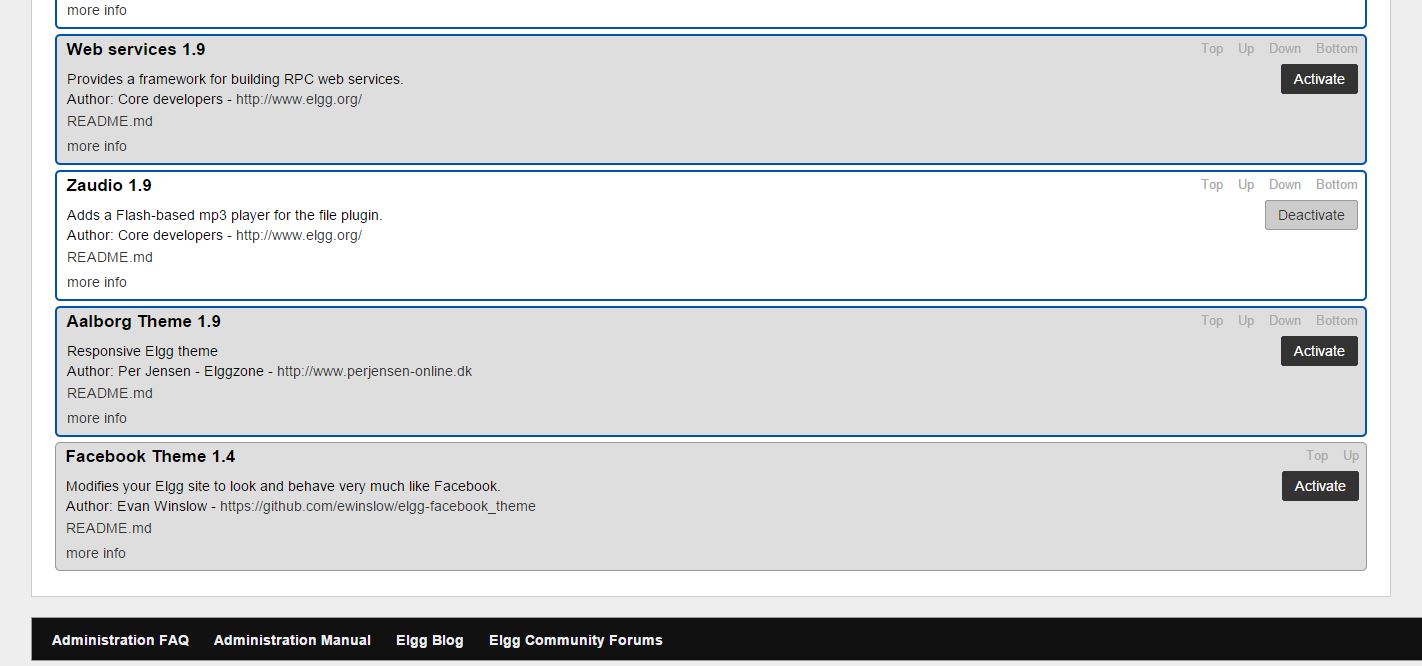
- Enable it from Administration Panel
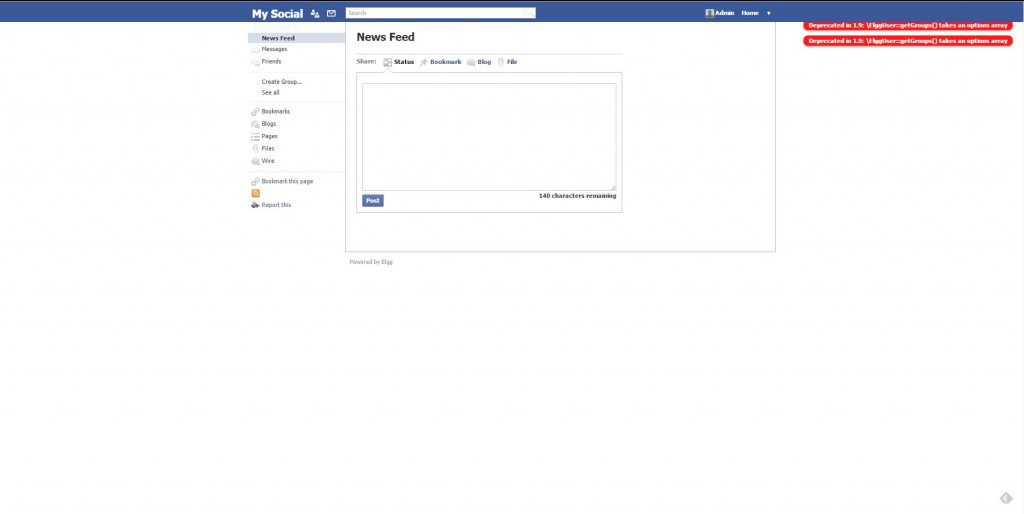
- Click on visit site link and you will see that your site now looks like old facebook. Please remember that this plugin is very old and not been updated so you might see errors in it because new Elgg version is not compatible with it. We have used it just for demonstration purpose –
Here are some useful resources that will help you build your Elgg site further –
Learning Resources:
Official DocumentationRecommended Books:
Elgg Social Networking – Mayank Sharma Elgg 1.8 Social Networking: Cash CostelloAfter you have built your social networking website completely and you are ready to go online follow: How to Build a Website and Go Online
Are you building your social network? Tell us in comments. Also, let us know if you need any help.