Ender 3: Open Source 3D Printer Reviewed By A 3D Printing Noob
3D printing has been all the rage lately with both professionals and prosumers accomplishing incredible things from printing patient organs for surgery practice to printing robotic arms and quad-copters. As with all things, there has been a trickle-down effect that’s led to even the most inexperienced being able to obtain this revolutionary technology.
Here we will explore my adventure from having never touched a 3D printer to assembling and operating my own Creality Ender 3.
In the spirit of transparency, I’ll let you know that before jumping down the rabbit-hole of 3D printing, I spent a couple of weeks, at least, gazing down it and learning everything that I could in a completely hands-off manner. YouTube is home to an incredible amount of content pertaining to operation and troubleshooting of 3D printers, and it’s a good place to start to see how you will be allocating your time spent on the hobby. Even high-end machines require troubleshooting, and it takes time to recognize the different symptoms caused by different problems.
Also Read: AnyCubic Photos S 3D Printer Review: Convinced A Beginner!!
So, what makes a 3D printer different from a computer-controlled hot glue gun? In theory, not much. In practice, everything. 3D printers are actually not as sophisticated as you might think. They run on little more than what the average Arduino does (typically an Atmel microcontroller).
In fact, the most common 3D printer firmware actually uses the Arduino ecosystem. The printer has no idea what it’s doing apart from following the step-by-step instructions that are outlined in the g-code. All of the smart bits are done by a full-fledged computer running a piece of software called a slicer. The slicer is what takes the model and, as the name suggests, slices it into many layers. Then the tool-path, the path that the hot-end travels, is derived from the layers. The g-code file can be many megabytes in size, all depending on how intricate the end product is intended to be.
Slicers do many amazing things. A slicer takes the 3D object file and generates the instructions for printing it. They take many things into consideration, such as the angles of different areas in a print so as to determine whether it needs support, or determining whether retracting the filament will result in a smoother finish or a less ‘hairy’ print. Slicers incorporate the wisdom from people that have spent thousands of hours 3D printing and help you, whether you’re a beginner or a seasoned professional, get the most out of your 3D printer.
Creality Ender 3 Review
Why did I choose Ender 3?
So, how did I make this decision? It was the right price and appeared to be a very popular unit among the others at the time I was looking, and still is. There is a very large community around it. So large a community, in fact, that Creality has made the entire Ender 3 open source, from the hardware to the software. This makes it an even more attractive choice because it becomes that much more extensible.
![Ender 3 Unboxing [2]](https://fossbytes.com/wp-content/uploads/2019/03/Ender-3-unboxed.jpg)
![Ender 3 Unboxing [1]](https://fossbytes.com/wp-content/uploads/2019/03/ender-3-unboxing-4.jpg)
![Ender 3 Tools [2]](https://fossbytes.com/wp-content/uploads/2019/03/Ender-3-tools.jpg)
![Ender 3 Unboxing [3]](https://fossbytes.com/wp-content/uploads/2019/03/ender-3-unboxing.jpg)
![Ender 3 Parts [2]](https://fossbytes.com/wp-content/uploads/2019/03/ender-3-parts-2.jpg)
![Ender 3 Tools [2]](https://fossbytes.com/wp-content/uploads/2019/03/ender-3-in-box-tools.jpg)
The Ender 3 is based on the OpenBuilds V-Slot rail system which is a modified aluminum extrusion design that allows for the extrusion to be the rails. This eliminates the need for separate rails in addition to the frame and reduces the number of parts that have to be replaced due to wear.
The OpenBuilds V-Slot products are available from a few different vendors because they are open source hardware (albeit, not in the electronic sense), meaning repair and extension of the Ender 3 can be done with commodity parts. In fact, the only part, as far as I can discern, that does not have drop-in parts available is the motherboard, but even that can be replaced with another non-Ender 3 board with little extra work given that most of the cables use common connectors.
The Ender 3 has many virtues. But it does have a few drawbacks. In short, the motherboard is not designed with repair in mind. If a stepper motor driver fails, then you will probably have to replace the entire board. If you take a look at most community-driven boards, such as the RAMPS, you’ll notice that the stepper motor drives are replaceable. That’s no coincidence, stepper drivers do fail – it’s not unheard of.
Additionally, the firmware that comes on the Ender 3 is Creality’s modified Marlin firmware. Marlin is one of the go-to open source firmware available for 3D printers. The version you receive on the Ender 3 is outdated and missing some of the thermal runaway safety features of newer versions. But, this can be remedied with relative simplicity if you have an Arduino, some jumper cables, and are familiar with the Arduino environment.
The Ender 3 is not without faults, but they can be mitigated with little investment. So, my research yielded the Ender 3 as the successful candidate to get into the hobby of 3D printing. Depending on your requirements, or when you read this article, there may be better options for you. But, as it currently stands, the Ender 3 is one of the best choices for beginners and experienced users alike.
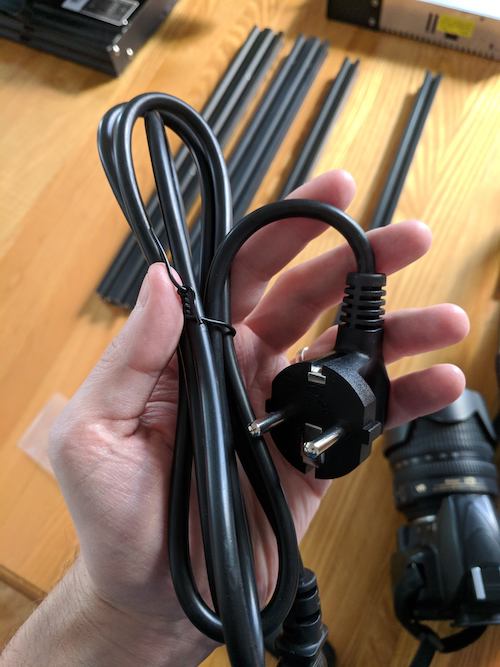
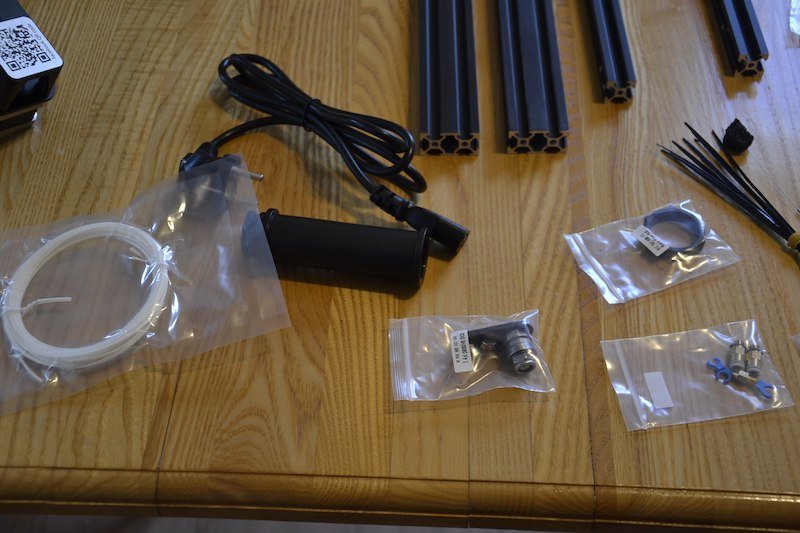
What’s inside the package?
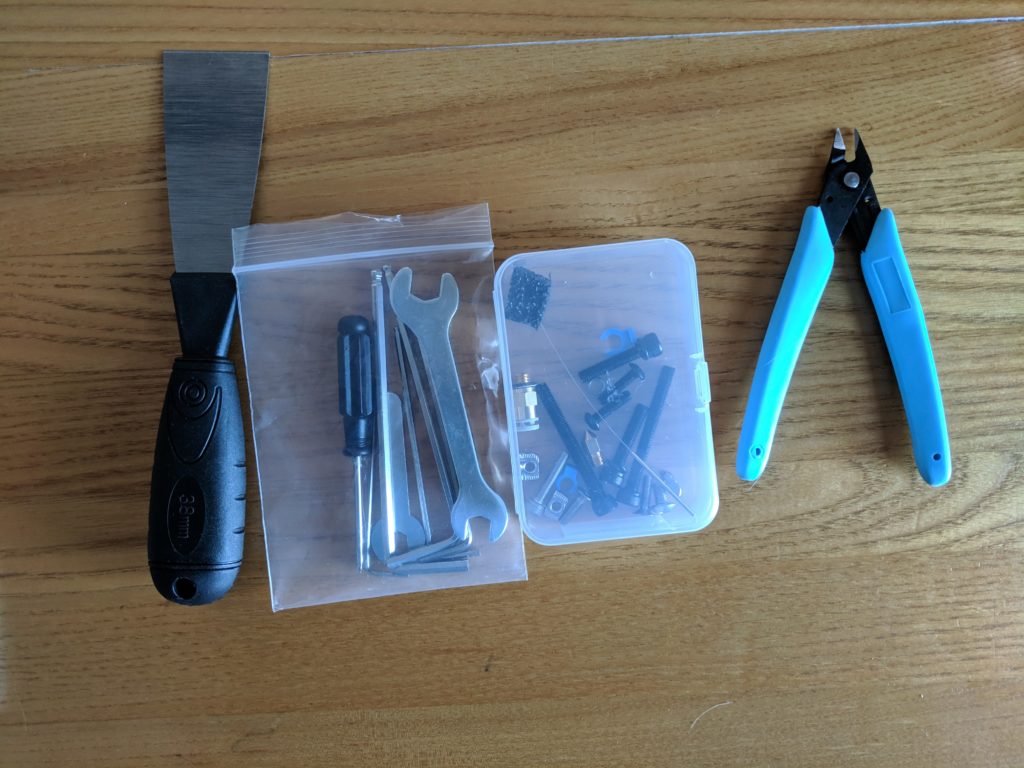
The tools included with the Ender 3 surprised me. I was ready to pull out all the tools I needed as I worked along, but the Ender 3 includes, not only the necessary tools for assembly, but the tools for operation as well. These include:
- Five Allen keys/wrenches
- Two wrenches
- A screwdriver
- Angle-cutters / filament snips
- Scraper/spatula tool (for separating prints from the bed)
- Clips for holding the build surface to the bed
- Nozzle cleaner with an extra nozzle
- MicroSD card with microSD to USB adapter
- A small amount of filament
- And a magnetic build surface (sits on the bed of the printer)
Ender 3 Assembly: Hits and Misses
My experience with assembling the Ender 3 was uneventful, which is a good thing. However, the instructions are not always clear because they are purely pictographic, containing no written language whatsoever. There was one representation in the printer instructions that essentially said, “put these two screws into these four locations.” It was obvious that I needed four screws, but the two pairs were of different sizes, which was immediately evident due to there only being two of the one described size.
After quickly referencing the, apparently more up-to-date, PDF file on the included microSD card (and it was at this point I realized my included microSD to USB adapter was DOA), I was on my way. The assembly did not require a second person at any point of the process, which is ideal assuming that maintenance will only require a single set of hands as well.
![Ender 3 Assembly [7]](https://fossbytes.com/wp-content/uploads/2019/03/Ender-3-Assembly-7.jpg)
![Ender 3 Assembly [2]](https://fossbytes.com/wp-content/uploads/2019/03/Ender-3-Assembly-2.jpg)
![Ender 3 Assembly [3]](https://fossbytes.com/wp-content/uploads/2019/03/ender-3-assembly.jpg)
After assembling the Ender 3 I started walking through the firmware to familiarize myself with it and the different capabilities it had (spoiler, it’s relatively barebones). The Ender 3 controls consist of a single rotary input with a button. You simply turn the knob to change the selection and then push the knob to make the selection, very simple.
The Ender 3, however, is notorious for one glaring oversight of the firmware. That is the presence of this shrill beeping every single time you press the button. The beep is more like that of a home smoke alarm than what you would expect from a user interface. Members of the community have designed some elegant solutions to this like 3D printable covers that snap onto it.
I chose a quicker and easier route. I simply put an HDD/CD-ROM screw (I can’t remember which) I had in my trusty jar of screws into the porthole of the piezo buzzer (or speaker? not sure, doesn’t matter) and that has muffled it to a more than tolerable level. The same can be achieved with adhesives, but I wanted something I could remove easier if I needed to.
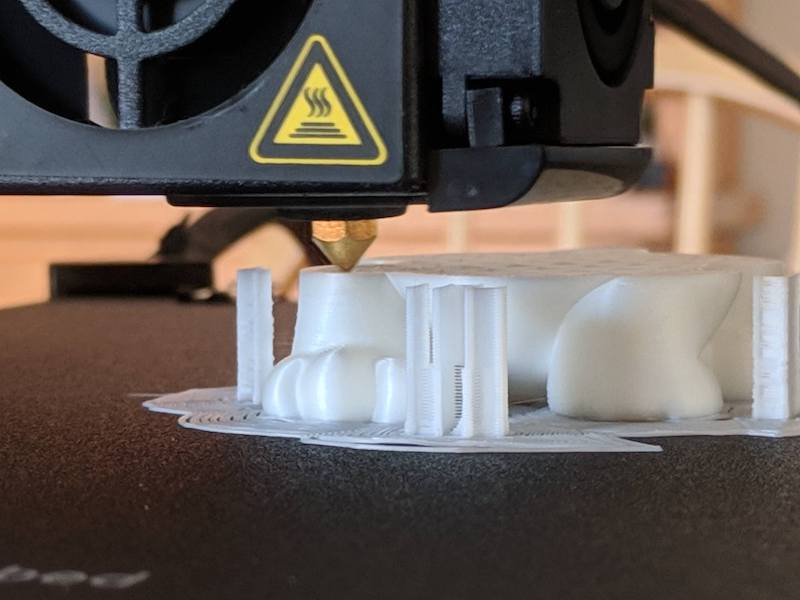
On to printing. Sort of. Before you can even start printing, you need to “level the bed.” This is not leveling in the same sense as leveling a floor. The goal is to ensure that the printer bed is parallel to the axes of the printer’s hot end, not the floor.
Furthermore, you need to set the bed such that the nozzle is about the thickness of a sheet of paper from it. If you don’t have precisely (within a tenth of a millimeter) the right distance, your first layer will either fail to adhere properly or the nozzle will tear it up as it goes by on another pass. This is the cause for an incredible amount of frustration for beginners. I, for better or for worse, nailed it on my first attempt (more on this later) and was off to a pretty good start.
![3d Printing Process [2]](https://fossbytes.com/wp-content/uploads/2019/03/Ender-3-Print-side.jpg)
The Printing Experience
My first print was the sample code that was on the included microSD card, a cute dog model. Little did I know, the included filament was nowhere near enough to actually print the dog. So, my dog got to about a third of the way to completion. I used this as an opportunity to try changing filaments mid print. I completely messed up, though, and I nudged the hot-end down the Z axis which resulted in it ramming into the print. So, that was that. But, it was an excellent print up until that occurred.
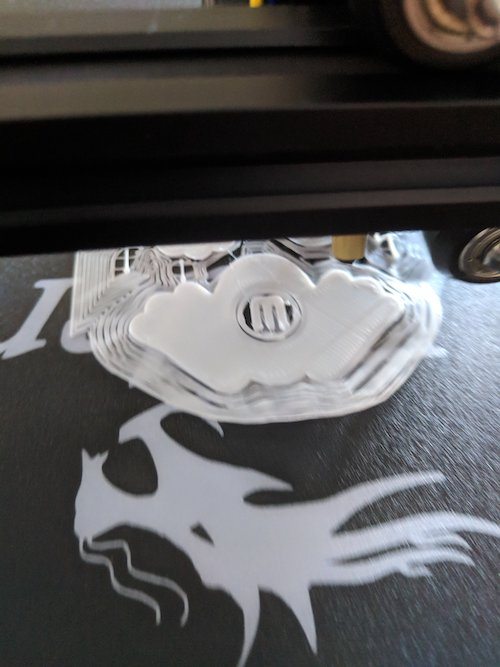
After the first and second prints, I discovered that my printer was having a lot of difficulty with models that were larger, or more specifically, those that required more surface area on the bed. Try as I might, many of these prints would simply fail on the first layer. It would take several tries to get a first layer that is of sufficient quality to continue the print.
This is where, after some reading, I discovered that some Ender 3 units have warped beds. There are three solutions to this problem. The first, and most expensive, is to replace the bed. This is not ideal as you could just as well receive another warped bed. The second is to use a glass build surface instead of the magnetic mat they provide. This can be any appropriately sized sheet of glass or mirror as they are very flat and fairly cheap, just be sure not to buy anything too thin. The glass helps a lot by being rigid enough not to form to the various peaks and troughs of the bed, providing a much smoother transition between highs and lows. Lastly, and without any (direct) cost is to flash mainline Marlin onto the motherboard to make use of the manual mesh leveling (automatic mesh leveling exists, but requires the purchase of a compatible probe).
I chose the third option to see if it would be right for me. Lo and behold, I was getting good prints again on a regular basis. The premise of mesh leveling is that the printer runs a routine where, instead of leveling each corner, it will have you check the Z-offset of many points in a grid across the build surface and will compensate accordingly.
But, again, over time, I noted certain areas of the build surface in particular that, try as I might, would never yield a very good bed adhesion or would result in a ripped-up first layer. It seems that my bed is just too warped to be compensated for by the mesh leveling, at least not reliably. So, at this time, I avoid the portions of the bed that I know to be problematic and will soon be obtaining some glass to print with.
Flashing a new firmware onto the printer isn’t too difficult, but it is an involved process requiring an Arduino and some jumper cables. I won’t be going into detail, though, as this is a very well (and repeatedly) documented process online. It consists of flashing the Arduino as ISP firmware to your Arduino and connecting to the ISP headers on the Ender 3 motherboard to flash the Arduino bootloader and optionally the firmware, but once the bootloader is installed, the firmware can be flashed over a USB cable. This also provides the added benefit of being able to update the firmware without any hassle, simply connecting the USB cable.
While the warped bed has resulted in some frustrating hurdles that I’ve had to work to overcome, it’s been a learning process, and that’s a large part of why I started with 3D printing.
The issue has yet to cost anything beyond my time, which I had already committed to investing. It did provide the opportunity to learn things. I plan to buy a few sheets of glass, and I expect that it might cost about $10CAD (~$8USD), which is really nothing considering the filament costs $20CAD (~$15USD) a roll and I simply view it as an operating cost rather than a problem cost.
Ender 3: Final thoughts
Overall, I’m actually very pleased with the results from my Ender 3. I printed a few upgrades for it, two fan ducts to increase thermal performance and holder for all of the provided tools that conveniently sits on top of the frame.

![Ender 3 Print [3]](https://fossbytes.com/wp-content/uploads/2019/03/Ender-3-Print-3.jpg)
![Ender 3 Print [2]](https://fossbytes.com/wp-content/uploads/2019/03/Ender-3-Print-2.jpg)
![Ender 3 Print [1]](https://fossbytes.com/wp-content/uploads/2019/03/Ender-3-Print.jpg)
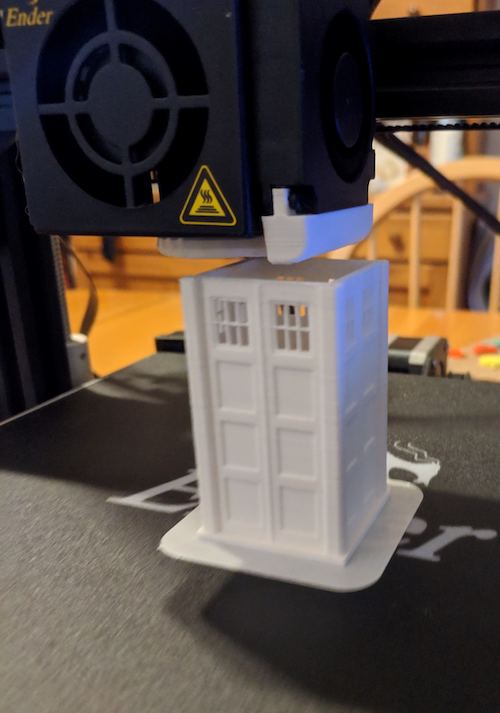
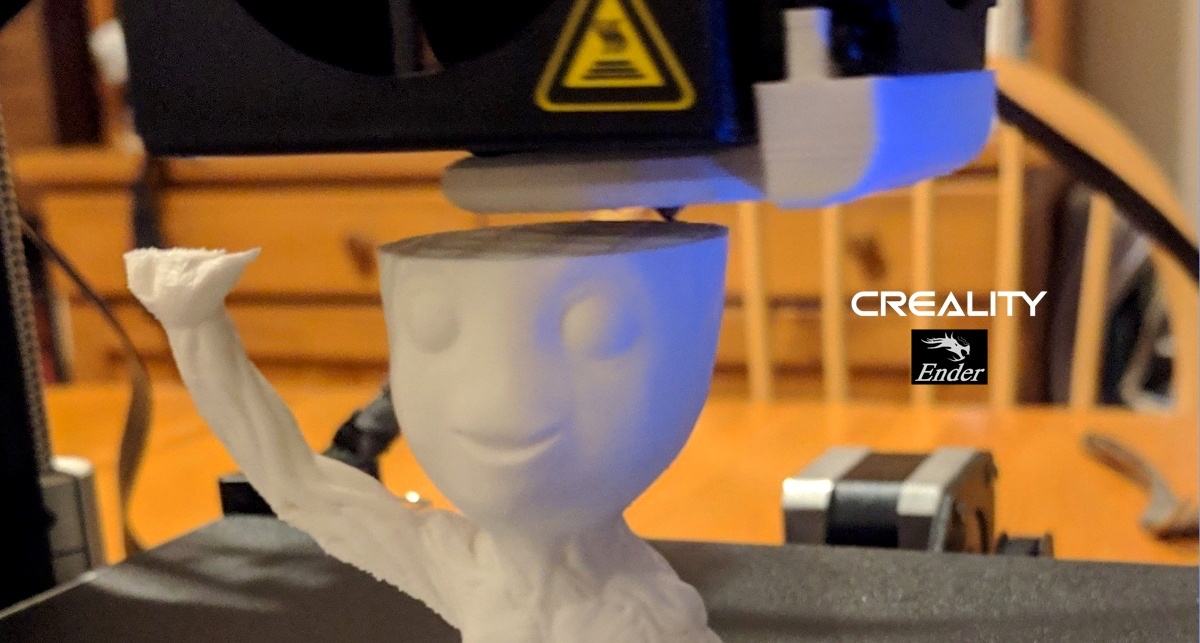
I find it astounding how quickly I, someone with no prior experience, was able to get up and started printing models I downloaded from the internet, like a TARDIS, Baby Groot, and Pokemon gym badges, with little issues to overcome.
I would like to commend the community around 3D printing and the Ender 3. There is an abundant amount of information that I would have been lost without.
For those looking to get into the hobby, I would recommend the Ender 3, not because it is empirically better by any particular measure, but because the community is strong and the machine is extensive in addition to being open source. It makes for an excellent choice, despite the mentioned flaws.
Also Read: TicWatch C2 Review: The Best Value For Your Dollar