How to Hard Reset an HP Laptop?

When your HP laptop is facing serious issues like freezing, slow performance, or software problems that can’t be fixed through regular troubleshooting, a hard reset or factory reset might be the solution. A hard reset restores your laptop to its original factory settings, erasing all personal data, files, and applications. This process can help resolve ongoing problems and give your device a fresh start. In this article, we’ll guide you through the steps to perform a hard reset on your HP laptop.
Backup Your Data
Before doing a hard reset on your HP laptop, it’s really important to save any files you don’t want to lose, as the reset will erase everything on the laptop, including documents, photos, and any other important data.
To ensure you don’t lose anything valuable, you can copy your files to an external drive, upload them to cloud storage, or use another method to back them up. This will allow you to retrieve your files after the reset, keeping everything important and safe.
Steps to Perform a Hard Reset on Your HP Laptop
Here are the steps to perform a hard reset on an HP laptop:
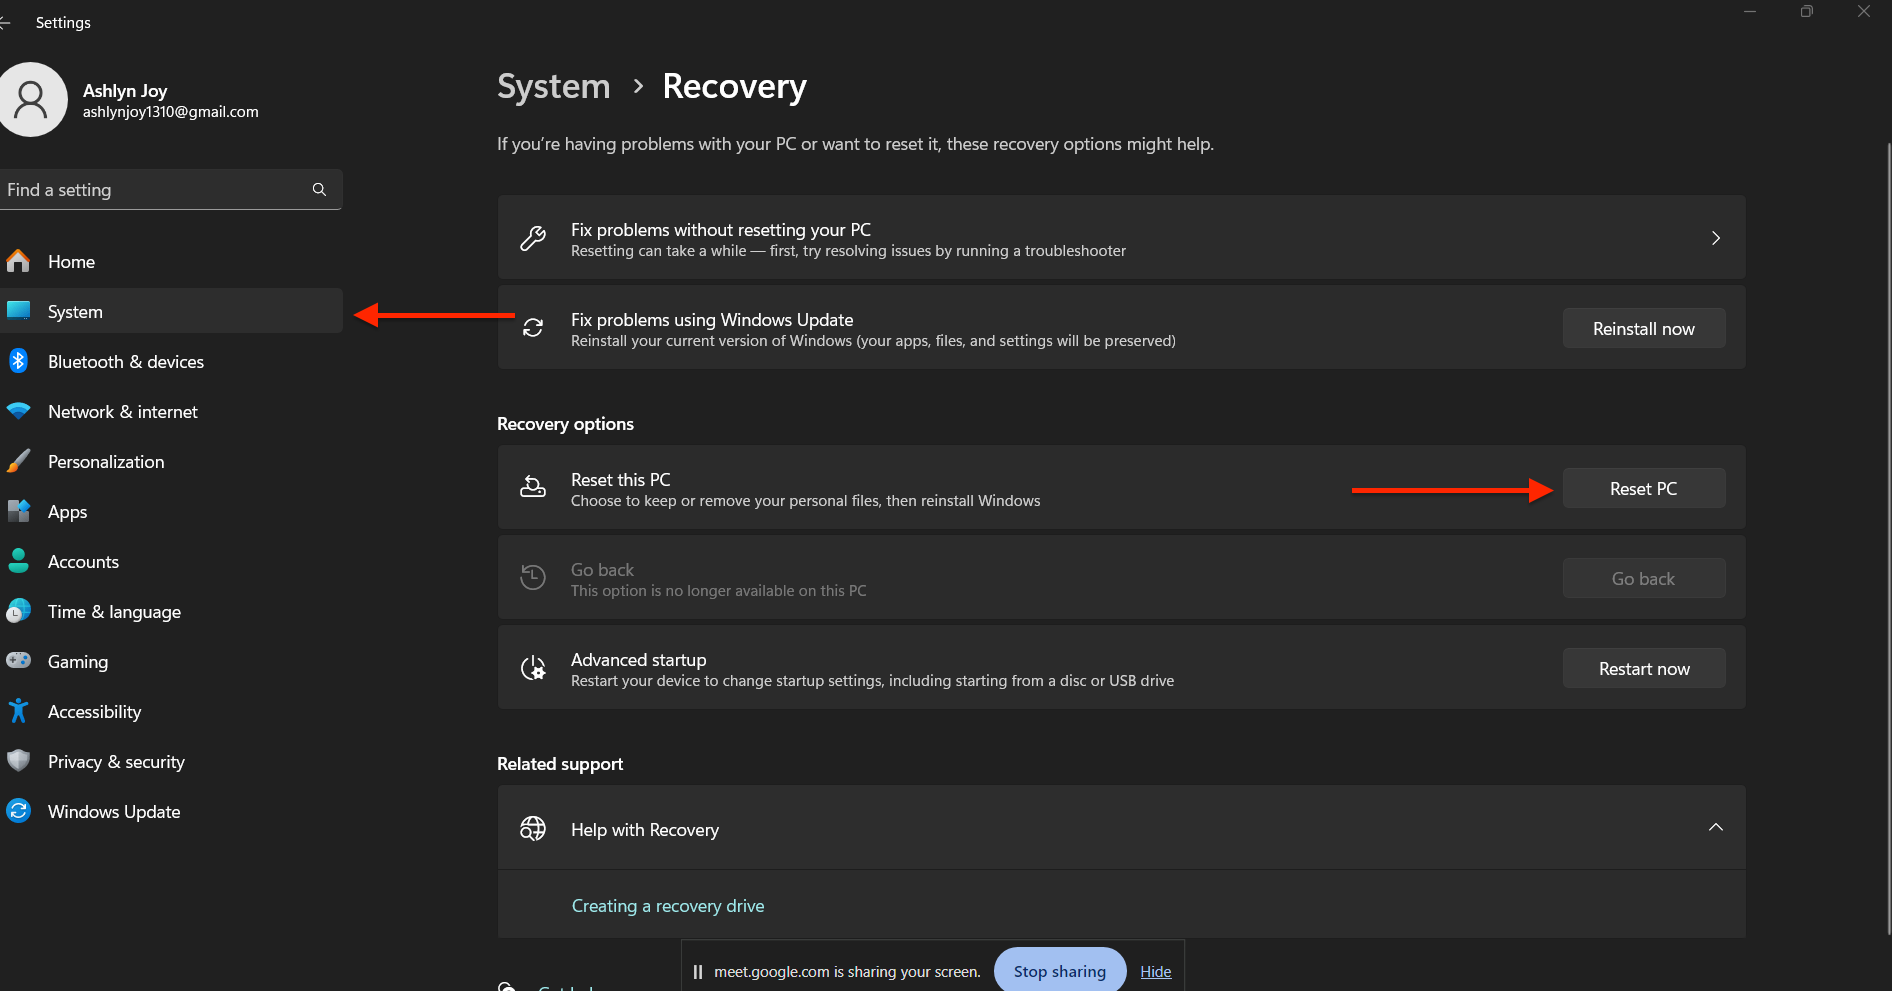
- Open Settings: Start by opening the ‘Settings’ menu on your laptop.
- Select System: Click on ‘System’ from the options available on the left side.
- Find Recovery: Scroll down and select ‘Recovery.’ Then click on the ‘Reset PC’ button to begin.

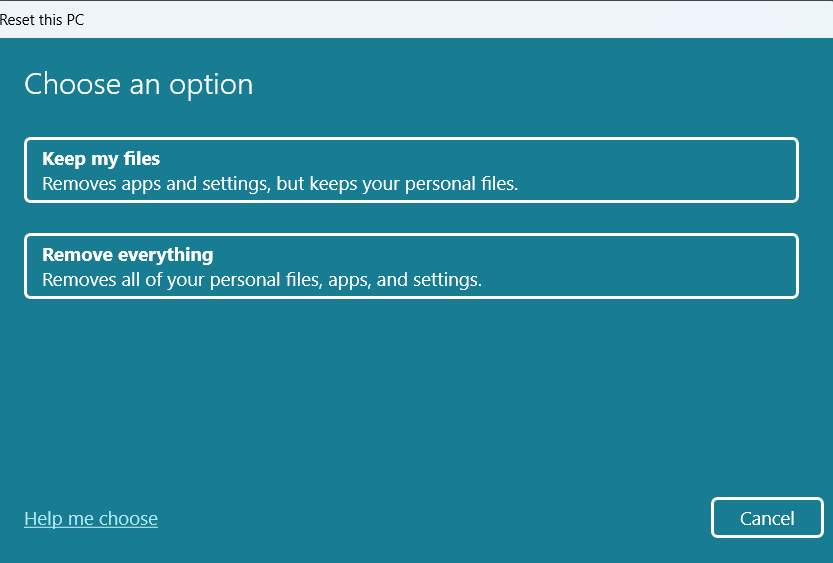
- Choose Reset Type: Choose whether to keep your files or remove everything. After making your choice, click “Next.”

- Confirm and Reset: Review any additional warnings based on your selection. Click ‘Reset’ to confirm and start the hard reset process.
After the reset, turn on your laptop and make sure it starts up properly. Check if the problems you were having are fixed. If your laptop still has issues, you might need to try more troubleshooting steps or get help from a professional.
Once your laptop is running smoothly, you can start restoring your saved files. Use the backups you made earlier to restore your documents, photos, and other important files.


