How To Set up Jellyfin Media Server Using NordVPN?
Everyone stores personal data, such as photos and videos, on their phones or laptops. However, the risk of losing it all due to device damage or loss is a constant concern when we carry these devices everywhere we go. While cloud storage provides a solution, the costly subscription and the fact that our data is in the hands of a company make it an unpopular choice for many people. If you are one of those individuals, then the best alternative would be to set up a media server. Here is everything you need to know about it.
What is a media server?
Before delving into the details, it’s crucial to understand what a media server is. A media server is a PC or laptop that stores all your media files and allows other devices to access the stored content from anywhere in the world.
In hindsight, the benefits of a media server are apparent, especially when you want to store your important photos and videos on a device securely. However, there’s another significant use case for such servers – storing movies.
It’s no secret that many of us once had DVD collections before streaming platforms gained popularity. However, the current landscape is vastly different. Streaming prices are at an all-time high, and paying for multiple apps is a significant expense. Moreover, the frustrating issue of companies removing beloved TV shows and movies compounds the problem.
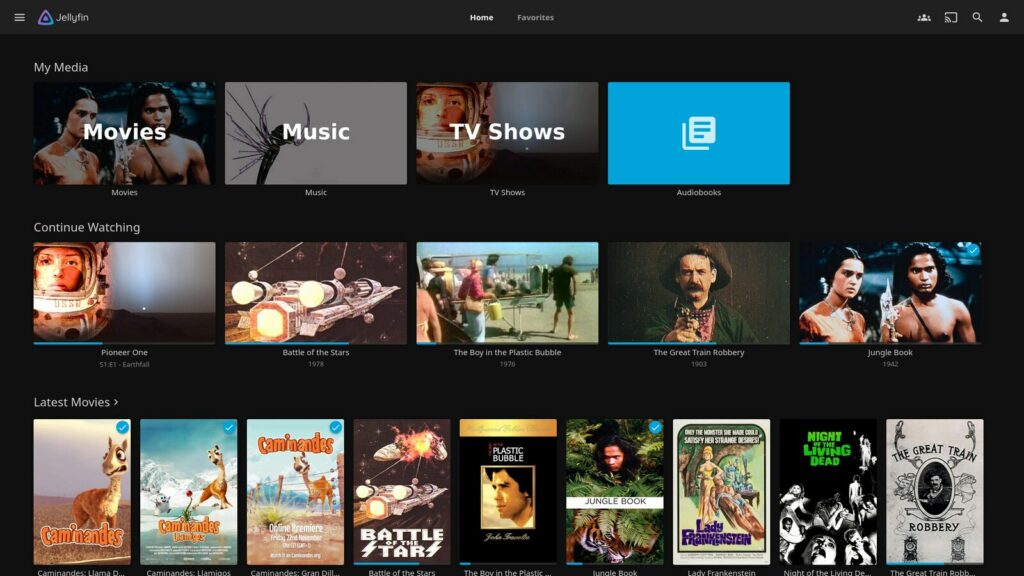
This is where a digital media server becomes invaluable. It allows users to securely store their favorite content and access it from anywhere in the world without concerns about subscription costs or the fear of data loss.
How to set up a virtual media server using NordVPN?
While there are many services to help you set up a media server, Jellyfin stands out as one of the best, given its open-source nature and its ability to manage, view, and share media content on various devices. Furthermore, its support for all major operating systems — Windows, macOS, and Linux — makes it accessible for everyone to create their server.
However, Jellyfin does have a significant limitation: it only allows users within a specific Local Area Network (LAN) to access content. Enter NordVPN, with its free-to-use Meshnet technology, enabling multiple devices to connect regardless of their physical location. This means you can access your Jellyfin server from anywhere.
Download Jellyfin
Before diving into the process, note that we are setting up the media server on a MacBook. As a result, certain steps might vary for other operating systems.
- Visit the Jellyfin website [here].
- Download the latest build for your OS.
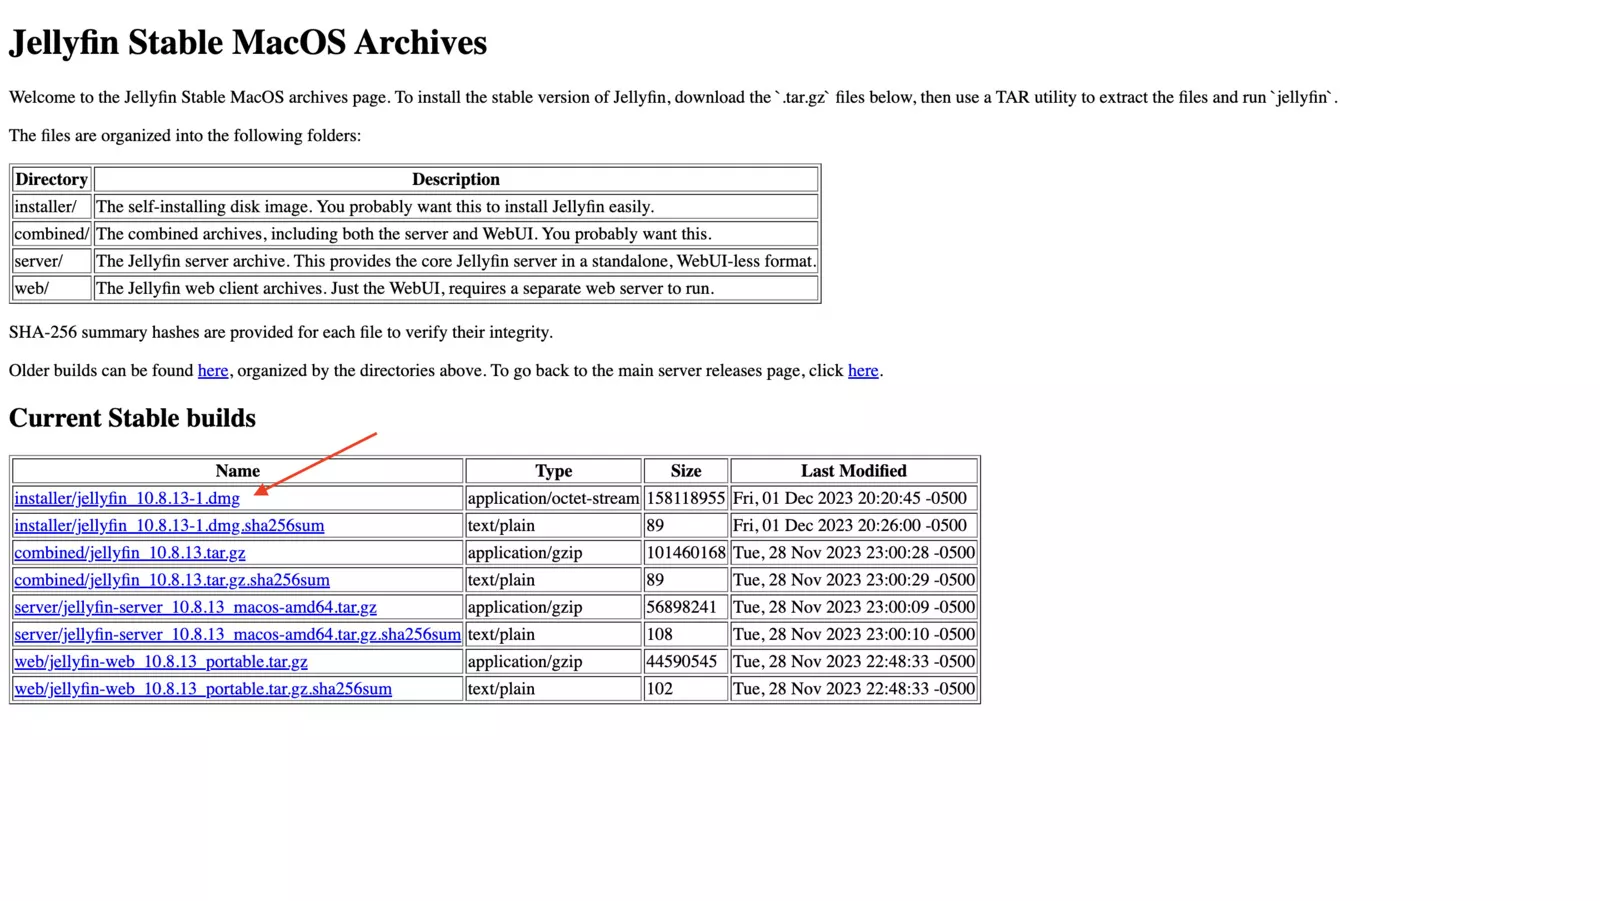
- Install the Jellyfin file and open it.
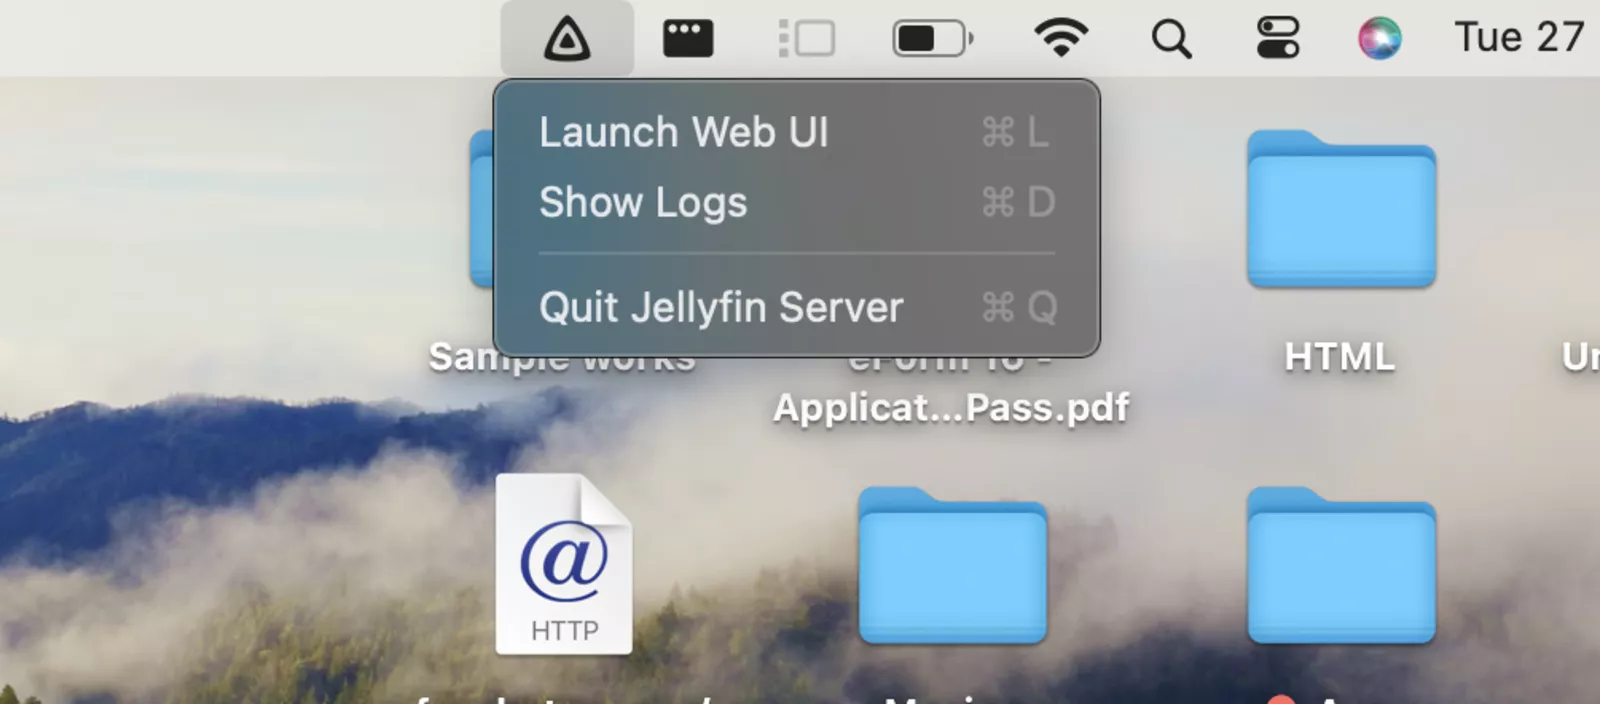
- In the top status, click on the Jellyfin logo and select “Launch Web UI.”
Setup Jellyfin
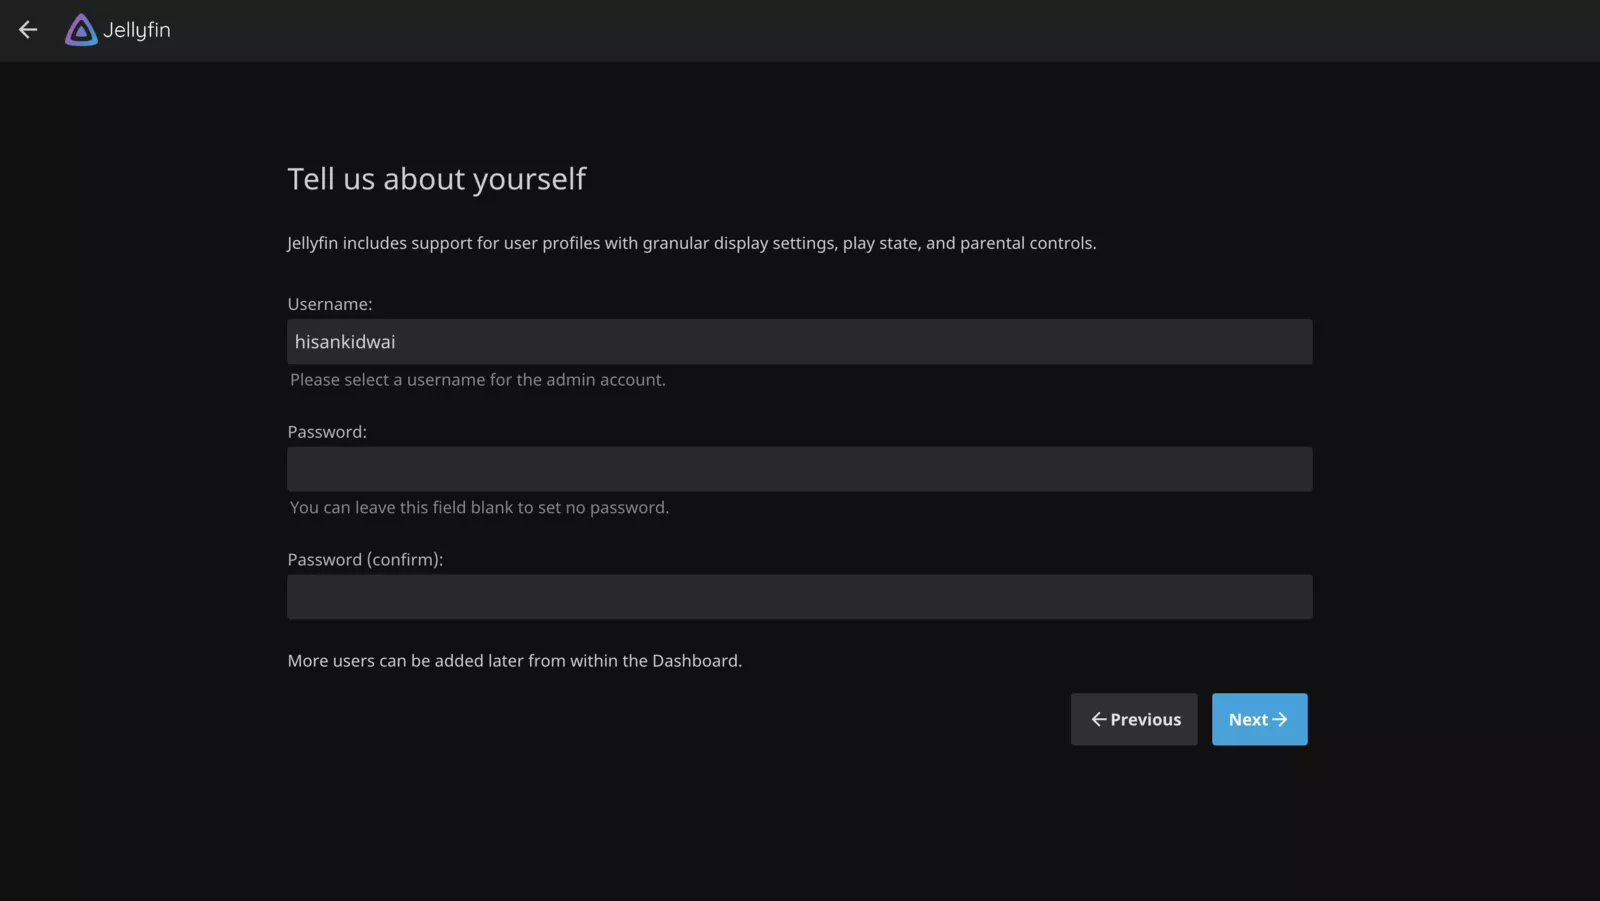
- On the web UI page, choose your desired username and password.
- On the “Setup your media libraries” screen, click “Next” without adding any media.
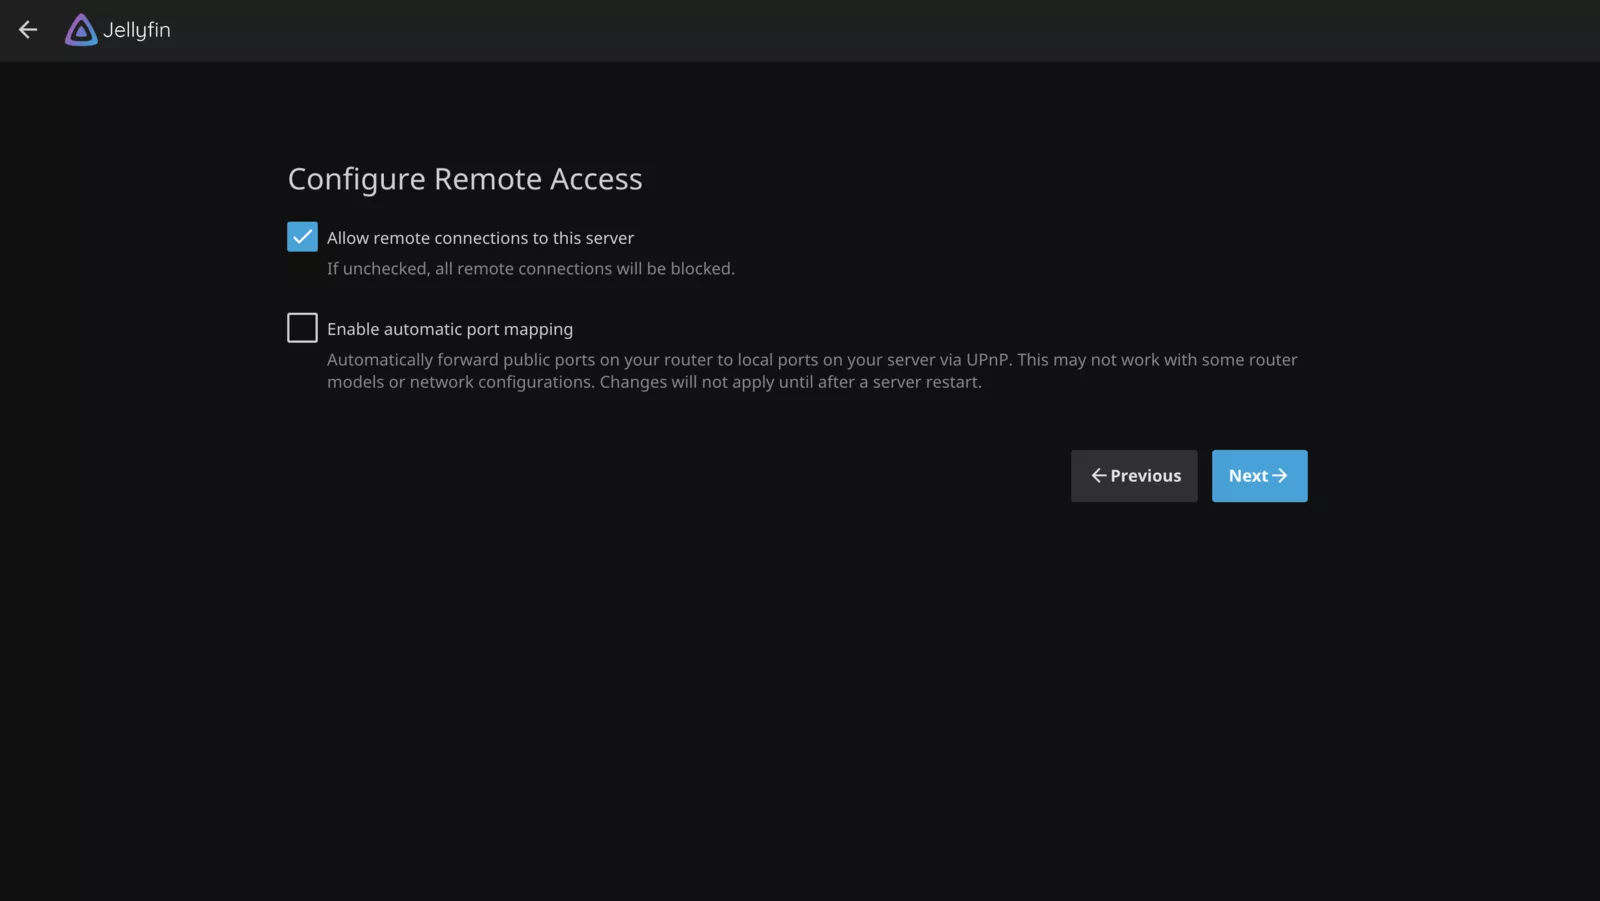
- Tick the “Allow remote connections to this server” checkbox and complete your setup.
Add media libraries
- Sign in to your server.
- In the top left, click on the hamburger menu and go to “Dashboard.”
- Navigate to the “Libraries” section and click the “+” icon.
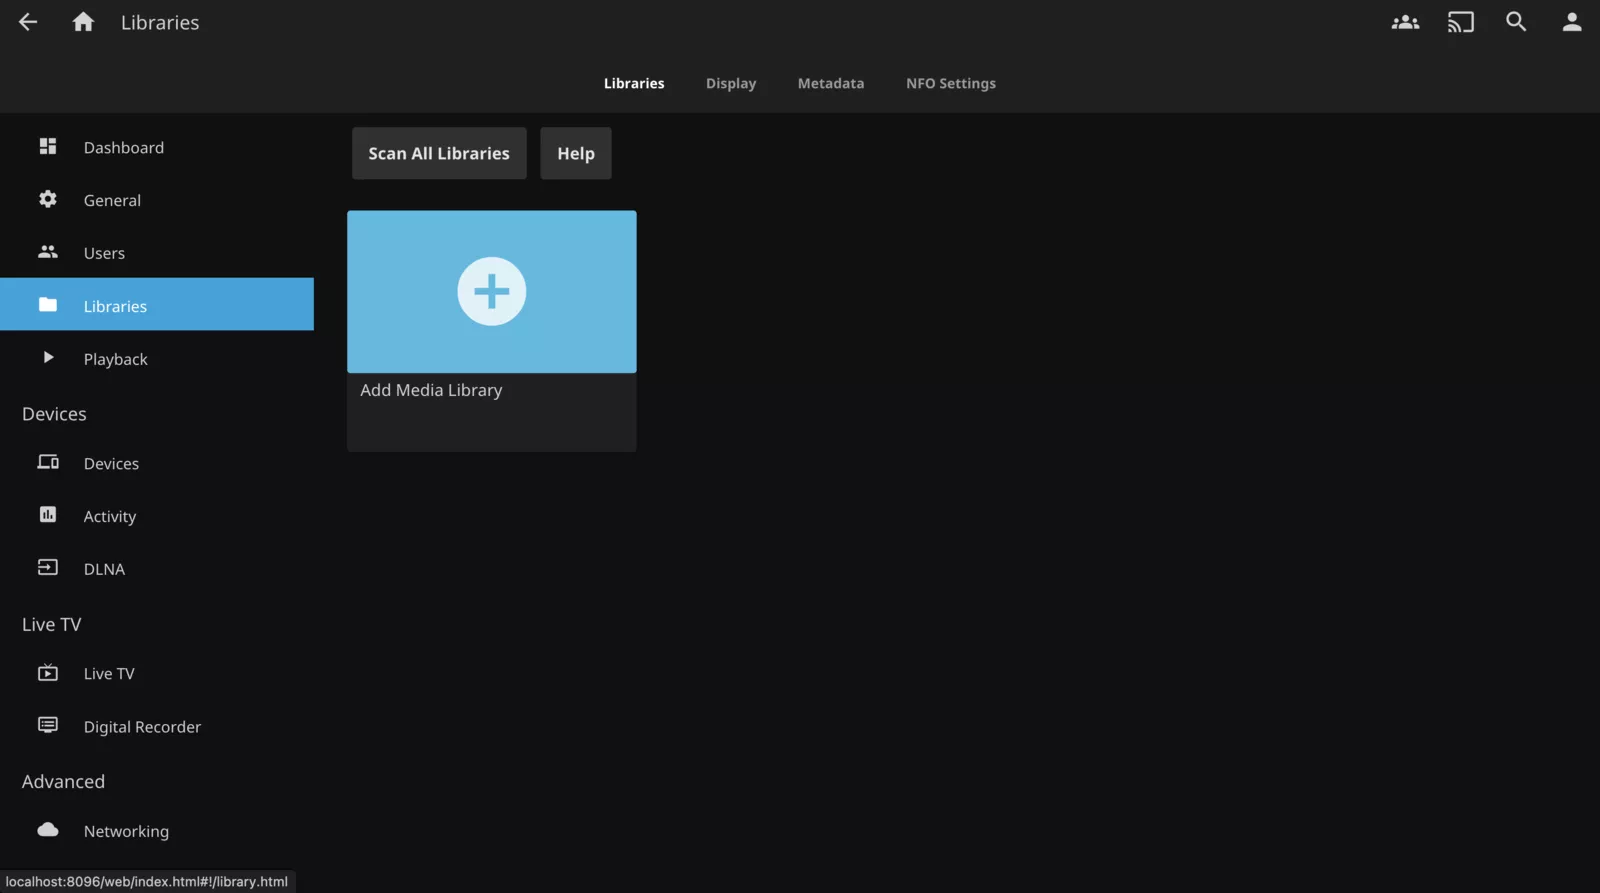
- Type the desired content type and select the display name.
- Next to the Folder icon, click on the “+” symbol.
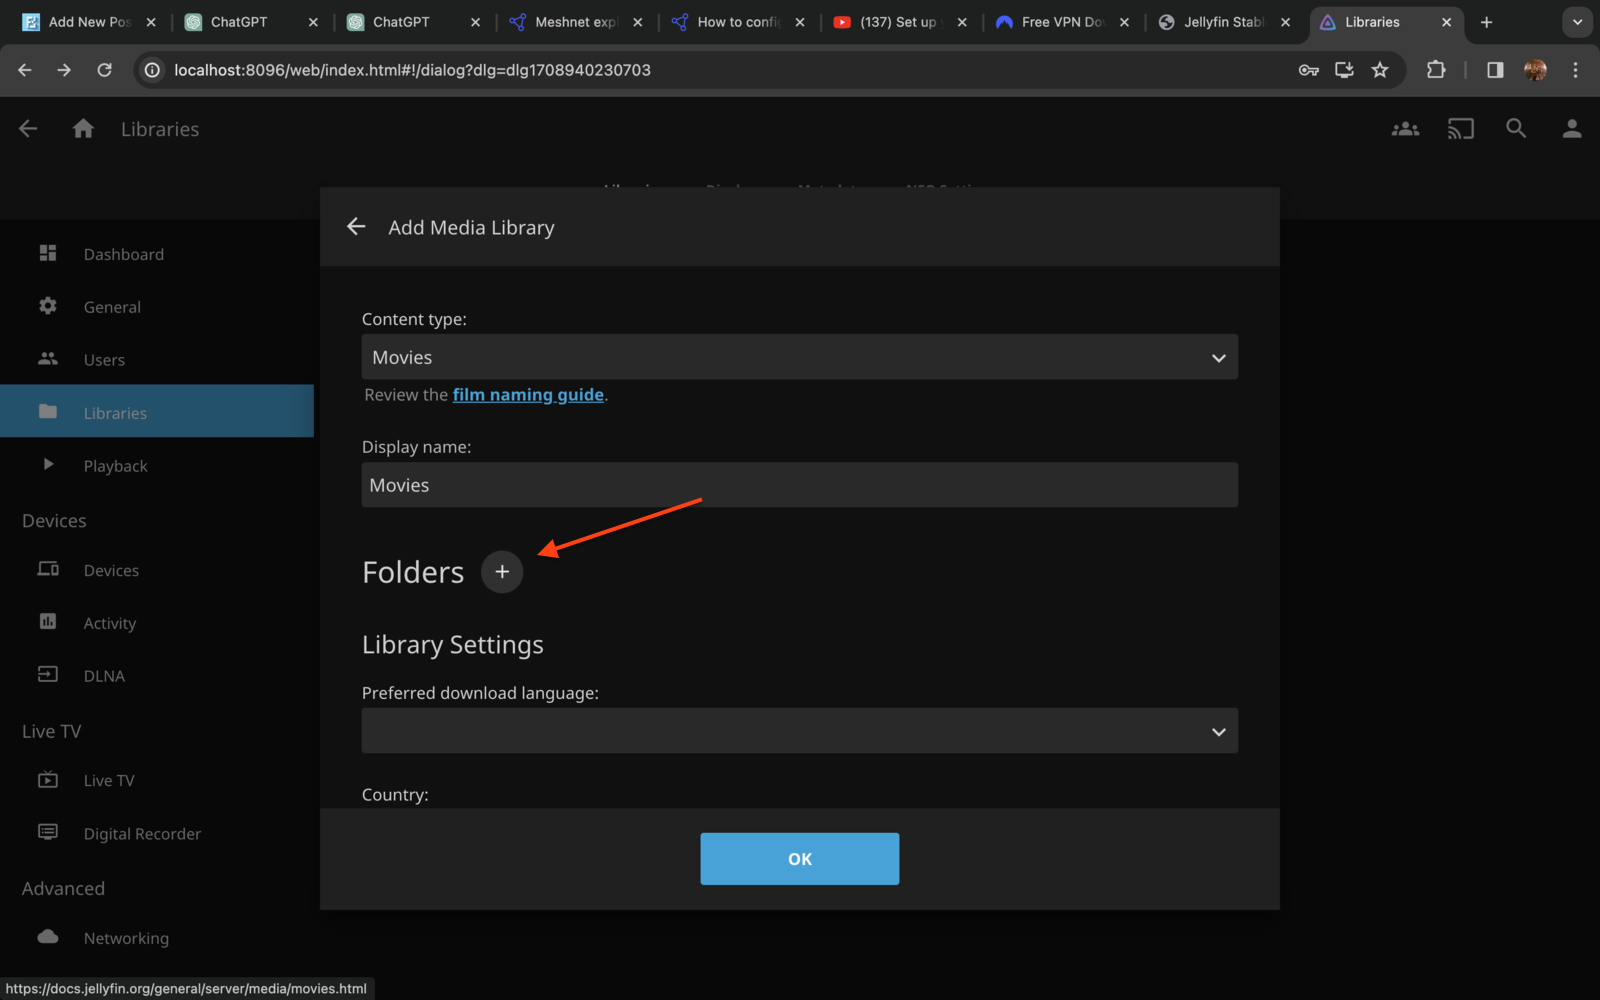
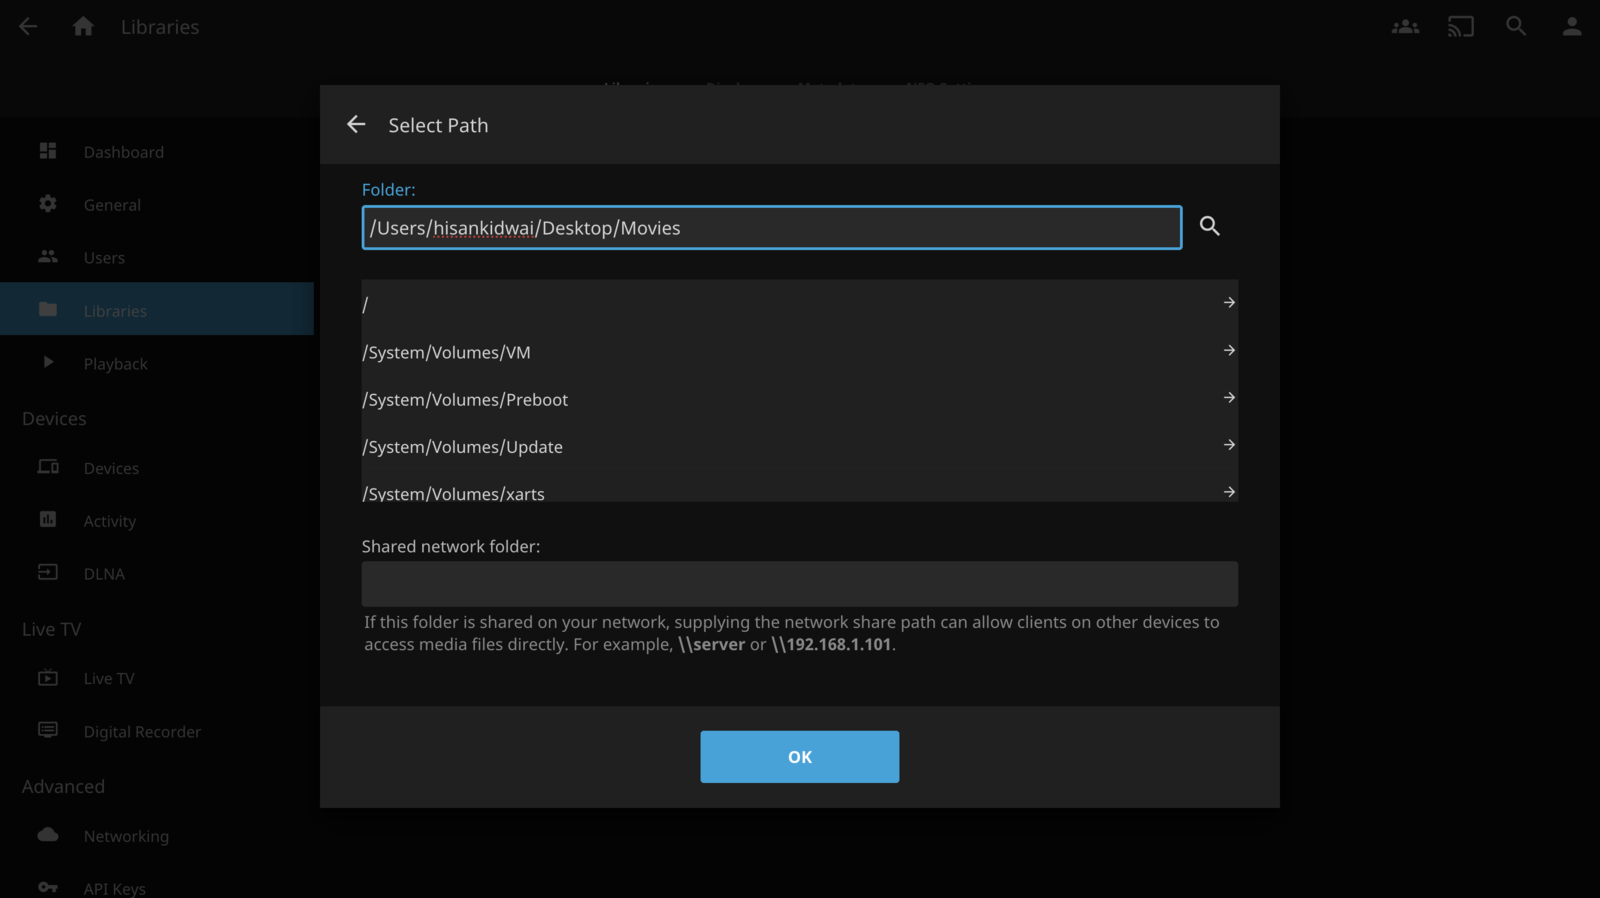
- Now, go to the movies folder on your PC/laptop, copy the path, paste it, and click “OK.”
Restrict remote access
Since remote access is enabled by default, it’s crucial to adjust settings to permit only specific individuals to access your server. Follow these steps:
- Go back to the “Dashboard” menu and navigate to “Networking.”
- Scroll down to the “Remote access settings” section.
- In the “Remote IP address filter” field, enter “100.64.0.0/10.”
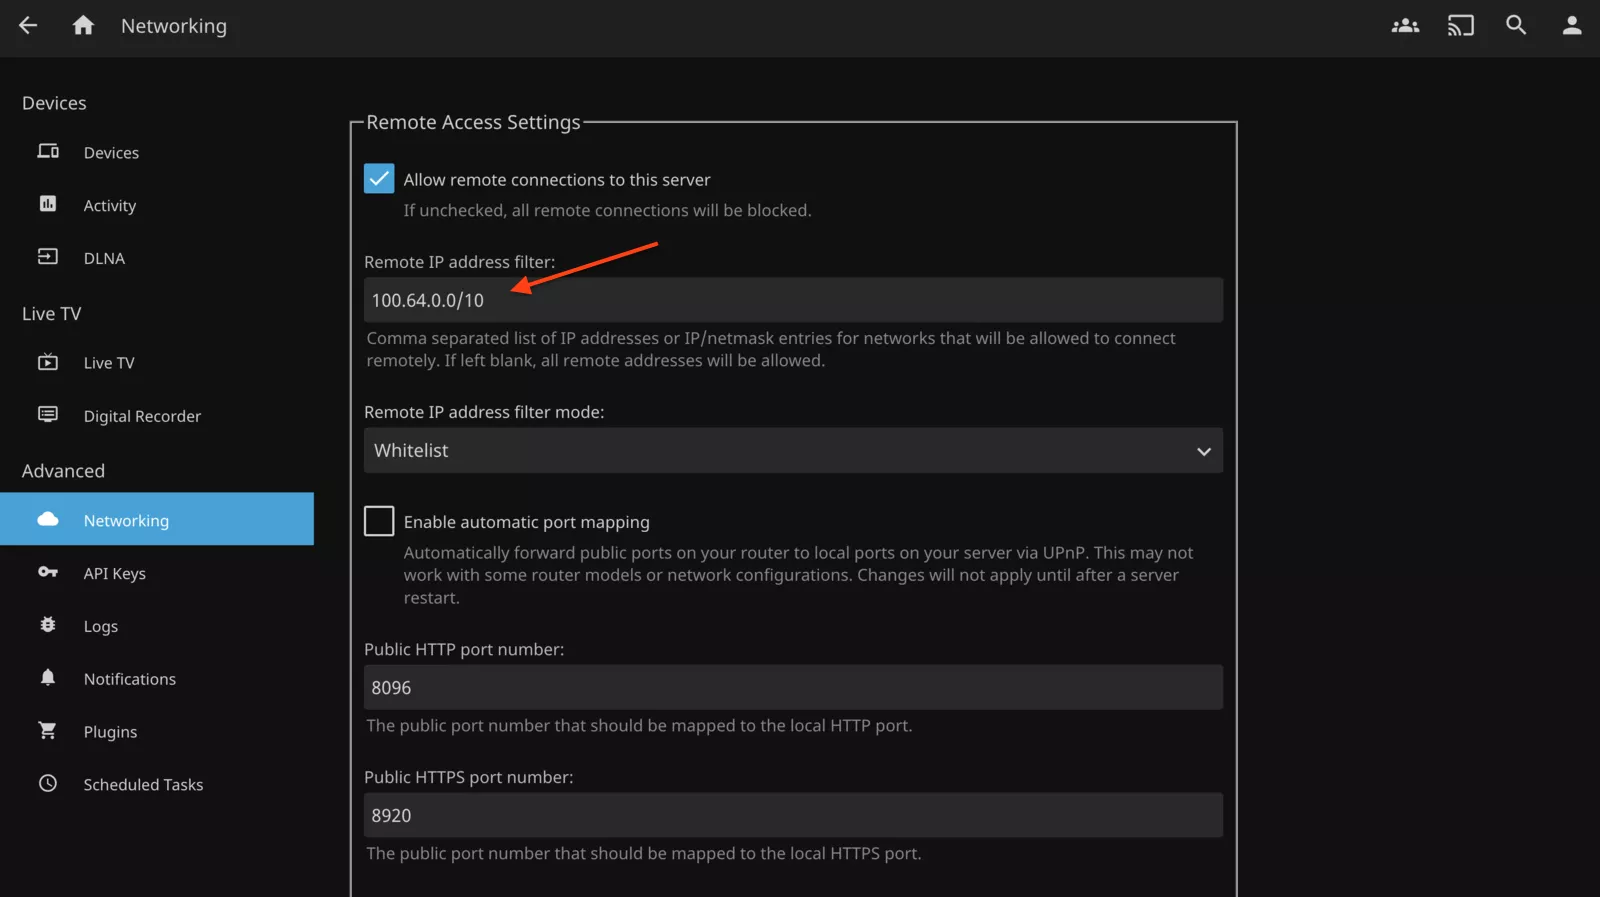
- Click “Save.”
Accessing the remote server
- Download NordVPN [here] and log in with your credentials.
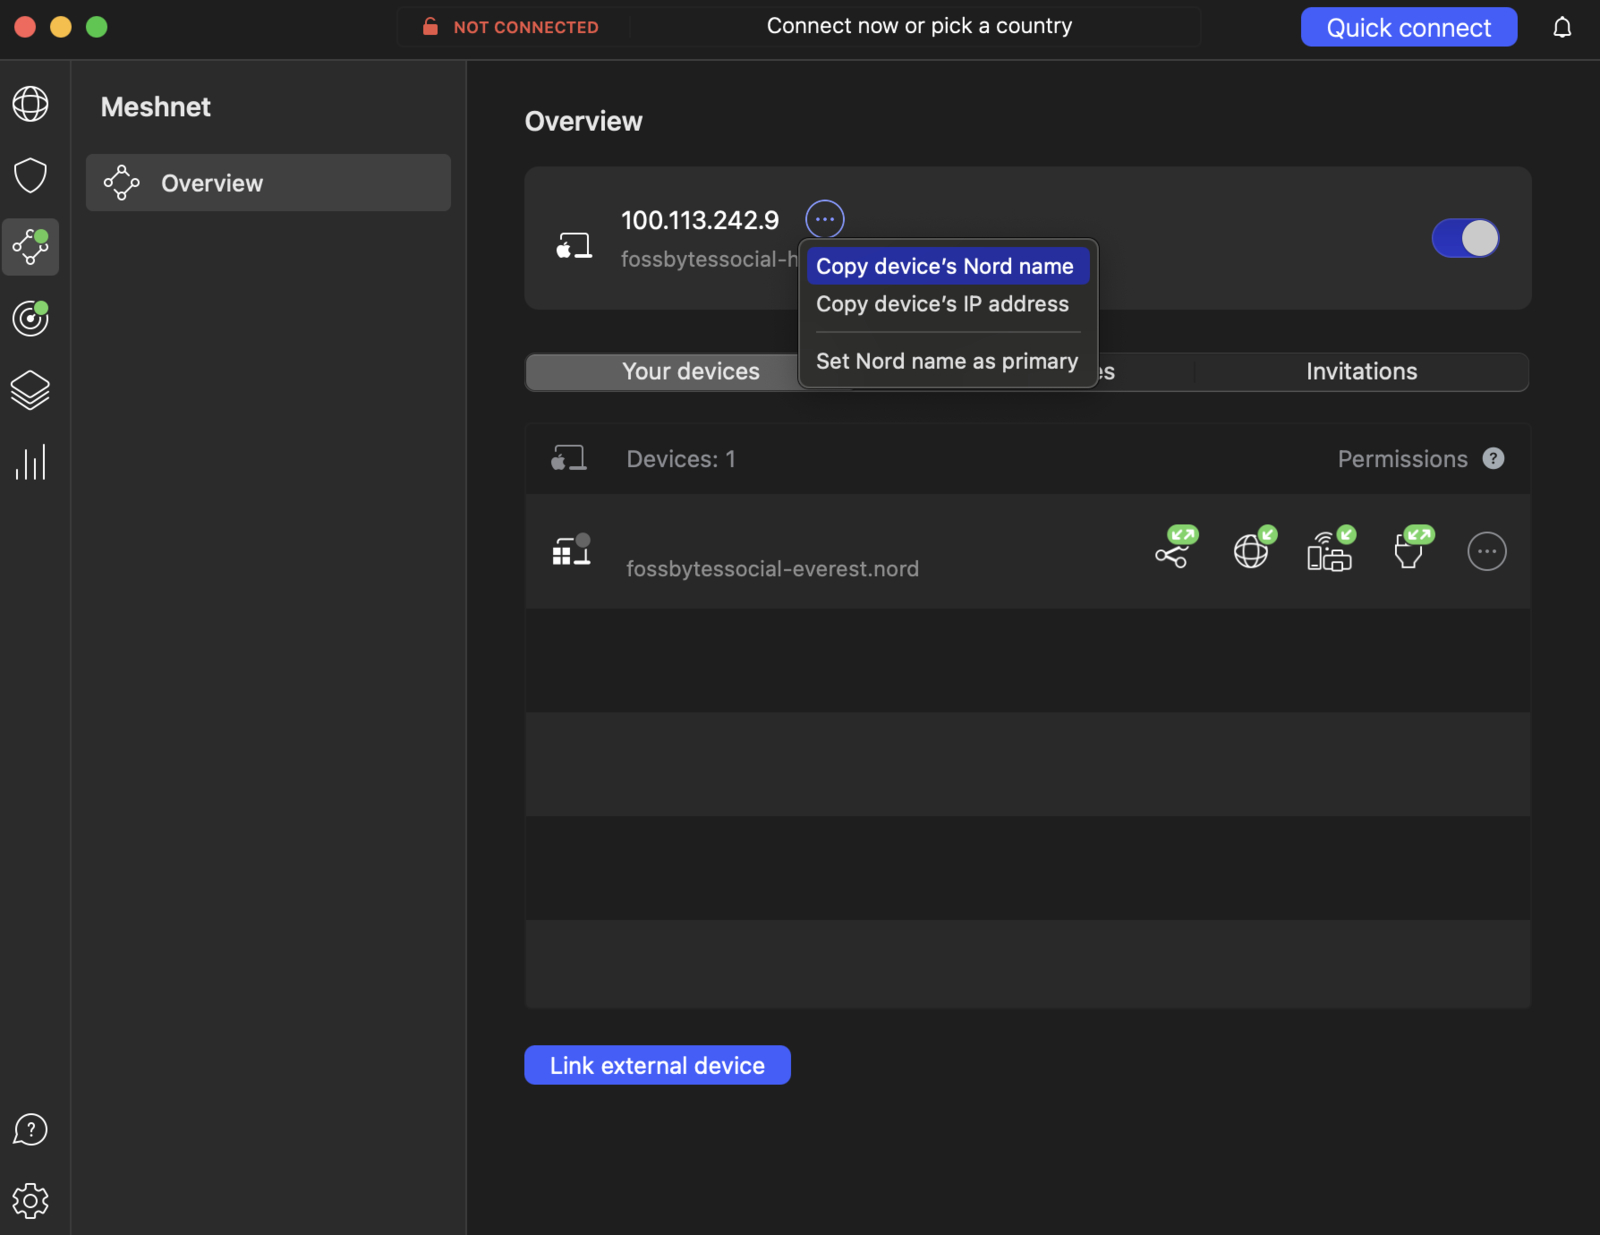
- Go to the Meshnet section and toggle it on.
- Copy your device’s Nord name.
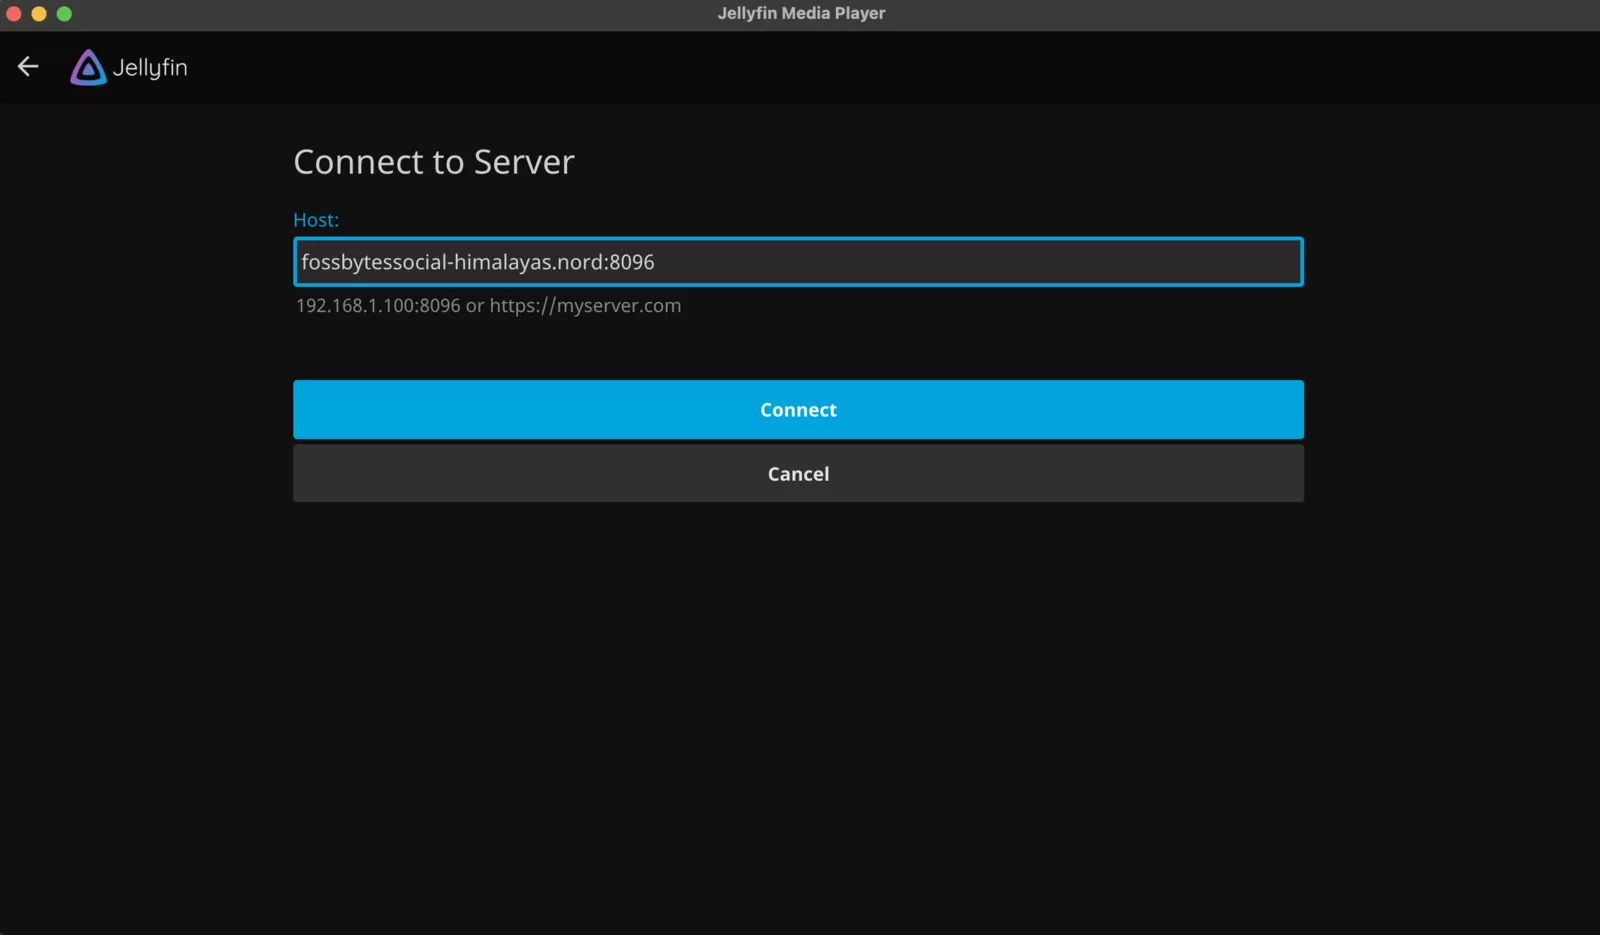
- Install the Jellyfin media player app [here] on your other device. Alternatively, you can also install the mobile app [here].
- In the app, paste the device’s Nord name in the server section, followed by “:8096.”
That’s it. Now you can enjoy your favorite movies from anywhere in the world.


