How To Install Multiple Apps In Batches Easily On Windows 10/11
A clean installation of Windows can indeed be a piece of work. Restoring all your software and data requires quite some time. What if there was a way to directly install most of your applications without downloading all of them separately? You can install multiple apps using third-party multi-app installers.
Say you bought a new machine or clean installed the latest version of Windows 11; setting up a PC for the first time requires a lot of time, for the application install process is complicated. Fret not because you can use various tools to quickly install all your favorite apps in just a few clicks. You can also read our article on ping of death using command on windows.
How to install multiple programs at once
While various third-party software can help you install multiple applications at once, only a few work quickly and efficiently. This Windows guide will help you install multiple apps using Chocolatey and Ninite. Note that both of these softwares work on both Windows 10 and Windows 11.
Using “Chocolatey” to install multiple apps
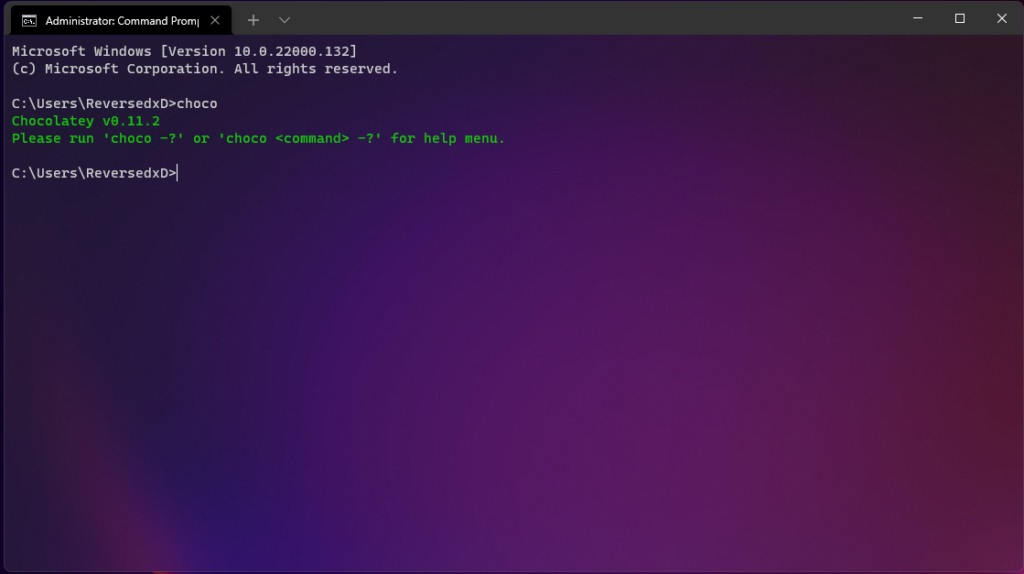
Chocolatey is a widely popular tool that you can use to install multiple apps/programs at once. The process is pretty easy once you set it up, and you can install apps from Command Prompt directly without downloading installers. Here’s how to set up Chocolatey.
1. Open Windows PowerShell as an administrator from the Start Menu. Search for PowerShell in the Start Menu, right-click on the Windows PowerShell icon, and select the “Run as administrator” option.
2. From there, copy and paste the following syntax and press enter.
Get-ExecutionPolicy3. If the output displays “Restricted” after entering the syntax, run one of the following syntaxes. Else, skip to the next step.
Set-ExecutionPolicy AllSignedOR
Set-ExecutionPolicy Bypass -Scope Process4. Further, copy and paste the following syntax and press enter:
Set-ExecutionPolicy Bypass -Scope Process -Force; [System.Net.ServicePointManager]::SecurityProtocol = [System.Net.ServicePointManager]::SecurityProtocol -bor 3072; iex ((New-Object System.Net.WebClient).DownloadString('https://community.chocolatey.org/install.ps1'))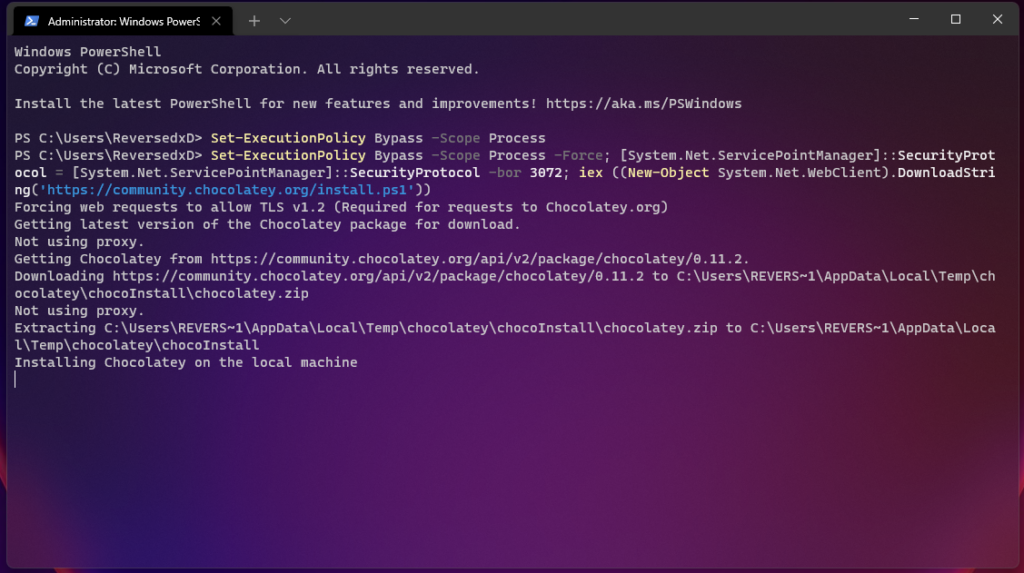
That’s it; you now have installed Chocolatey on your system. Now, here’s how to install apps using Chocolatey:
5. Make sure you’ve closed any running PowerShell or Command Prompt instances, then open Command Prompt as administrator. Search for “cmd” in the Start Menu, right-click on the Command Prompt option, and select the “Run as administrator” option.
6. You can input and run the command choco to check if you have Chocolatey setup and ready to use. Now, let’s try installing VLC Media Player. Run the following command:
choco install vlc -y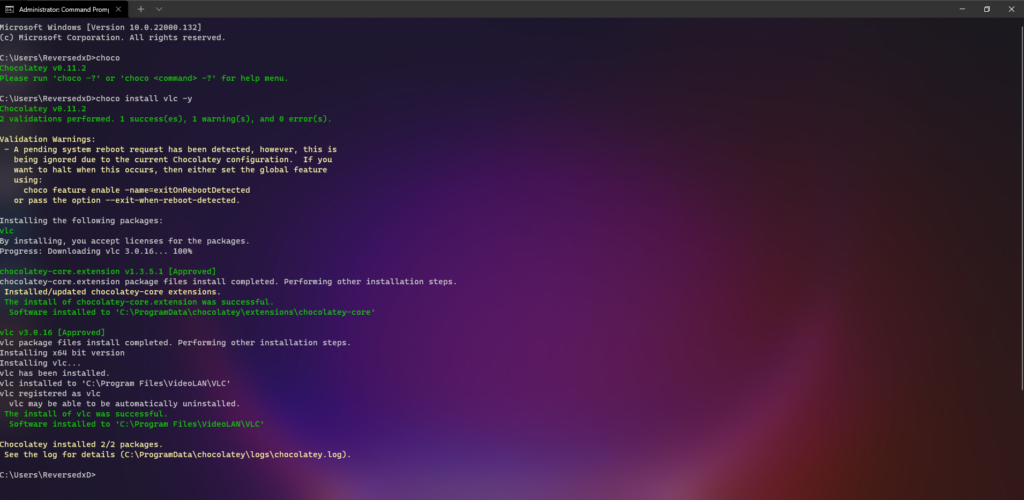
Note:
The “-y” install argument is used to agree to any terms and conditions that the installer would prompt. If we don’t use the argument, the process would pause and ask for agreeing to the terms and conditions. Also, you might have noticed that we used the package name “vlc” to install VLC Media Player. Each software has its package name that you can find on the Chocolatey packages website.
7. To install multiple apps simultaneously, you can run the same command by adding package names for the apps you want to install separated by a space. Let’s try installing ADB (Android Debugging Bridge), Notepad++, and WinRAR.
Enter the following syntax in an administrative Command Prompt instance:
choco install adb notepadplusplus winrar -yChocolatey will install all these packages automatically. Once done, you can see the apps installed in the Start Menu as well.
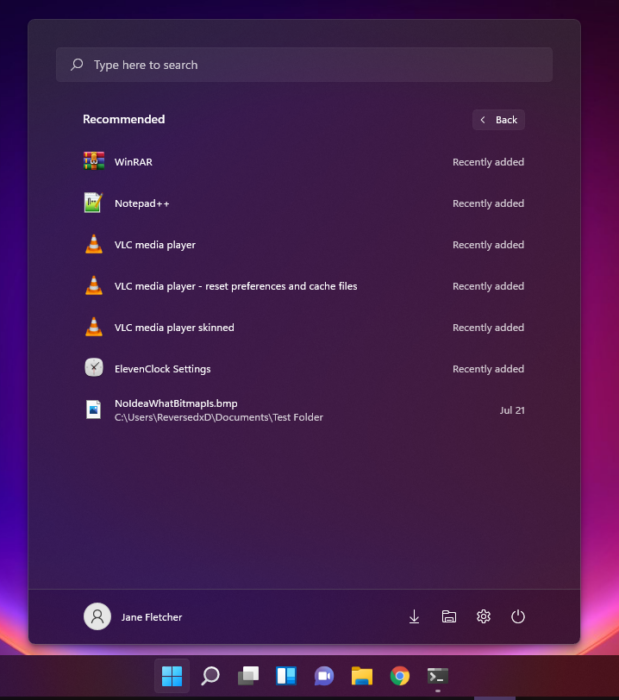
This concludes the process of setting up and using Chocolatey. Once set, you can just run choco install <packagename> whenever you want to install an application. Chocolatey offers a variety of other features like allowing you to change the default download directory and more. By default, Chocolatey will install all applications in the “C:” drive. To learn more, you can always visit Chocolatey’s “Getting Started” guide.
Using “Ninite” to install multiple apps
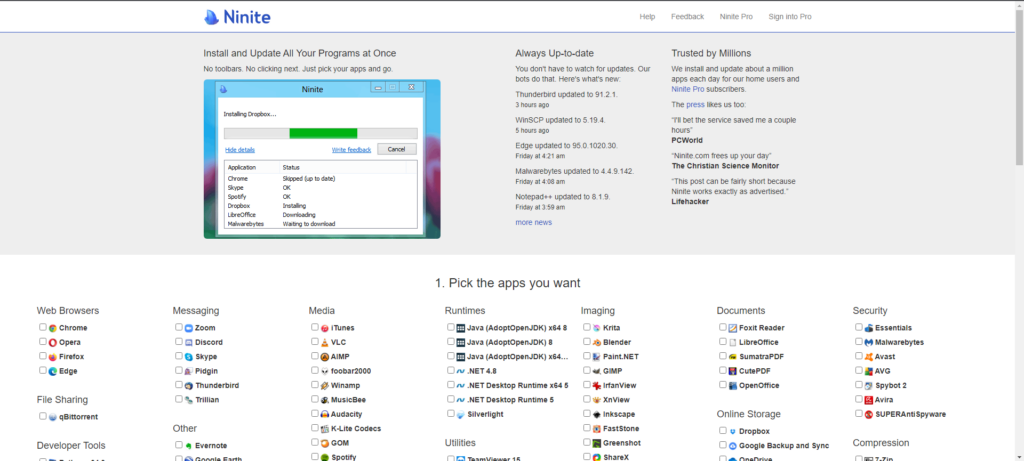
Ninite is yet another popular service that lets you pick your favorite apps from a list and install them all together. Likewise, most users prefer Ninite because of its semi-GUI experience. You can choose the apps you want and download a Ninite installer that will automatically install multiple apps.
1. Firstly, visit the Ninite website.
2. Scroll down to view the list of available apps on the website.
3. From the given categories, tick multiple apps that you want to install.
4. Further, scroll down and click the blue button that reads “Get Your Ninite.”
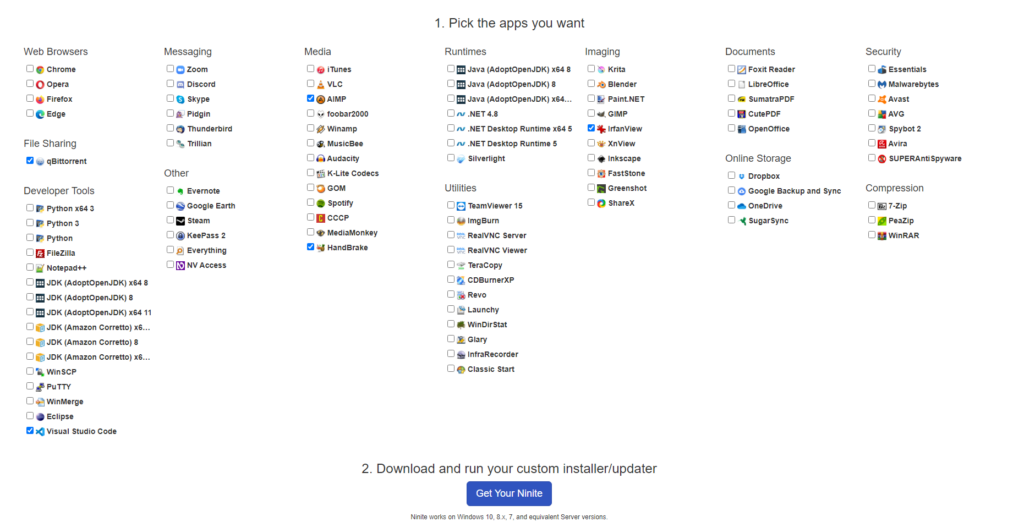
5. A download of the Ninite installer will begin shortly. Once downloaded, open the .exe file that you just downloaded.
6. Select “Yes” when prompted.
7. The Ninite installer will begin downloading and installing your selected applications.
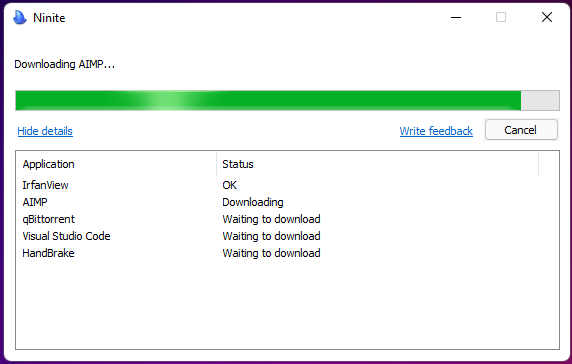
8. Exit the installer once all the selected applications are installed.
Finally, this concludes the process of installing multiple apps on Windows 10/11 via Ninite. Ninite offers a quick and easy way to download apps but has a limited catalog. Hence, Chocolatey wins the competition of having a better app catalog.
Did you find this guide helpful? Let us know in the comments below.


