10 Ways To Fix “Can’t Connect To This Network” Error For Good

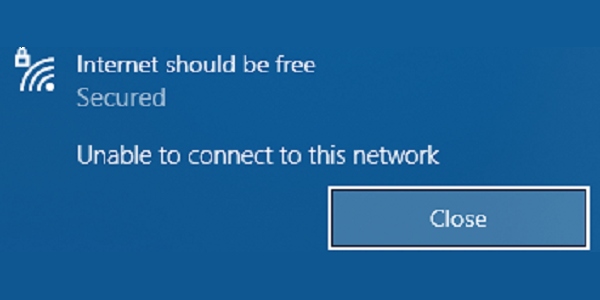
Got your Wi-Fi up and running but still facing the “can’t connect to this network” issue on your Windows PC? Worry not. We understand how annoying this problem must be for you because we have also faced the same issue enough to make us write this “how to fix” guide on it.
A big grievance about this error notification is that, although it tells us the Wi-Fi connection couldn’t be established, it doesn’t tell us why. It’s like banging on the reception bell but not voicing your concern when the receptionist finally arrives.
Moving on from strange analogies, we can still narrow down, find out, and fix the true cause of the “can’t connect to this network” error on your Windows computer.
“Can’t Connect To This Network” Error Guide
- What Is “Can’t Connect To This Network” Error In Windows? What Causes It?
- 10 Ways You Can Fix “Can’t Connect To This Network” Error
- 1. Forget Network And Connect Again
- 2. Turn Airplane Mode On And Off
- 3. Troubleshoot Network Issues
- 4. Troubleshoot Network Adapter Issues
- 5. Manually Set Up A New Connection
- 6. Reset Network Settings
- 7. Install Windows Updates
- 8. Reinstall Network Adapter Driver
- 9. Update Network Adapter Driver
- 10. Try These CMD Commands
- FAQs
What Is “Can’t Connect To This Network” Error In Windows? What Causes It?
This one’s a comparatively common error that occurs when your PC is unable to join a network and successfully access the internet. The absence of a network connection means no transmission or reception of data and your system staying offline.
From driver software to faulty network settings, there are a number of factors that could be the underlying reason for this behavior. Here’s a list of common causes for the “can’t connect to this network” error in Windows 10:
- Outdated drivers
- Incorrectly configured settings
- Software bugs
- Congested network
- Mandatory user authentication
- Hardware issue
- Problem on ISP’s end
10 Ways You Can Fix “Can’t Connect To This Network” Error
Before you proceed with these fixes, make sure you have tried restarting your PC, restarting your router, checking up with your ISP, moving closer to the router, reducing the number of devices connected to the router.
Also, if you are on a shared network, you might need additional authentication to use the internet. Pay attention to any browser tabs that open up when you try connecting to such a network, or simply, open the browser yourself. Now, you might see a network login page, use the required credentials to go online.
Once you have done these checks, you can be sure that the problem lies somewhere else and try the following fixes:
Please note that the methods included in this article are general fixes.
1. Forget Network And Connect Again
When there’s a change in router settings or network password, you might need to unpair your Wi-Fi and re-connect. You can do this by running through these steps:
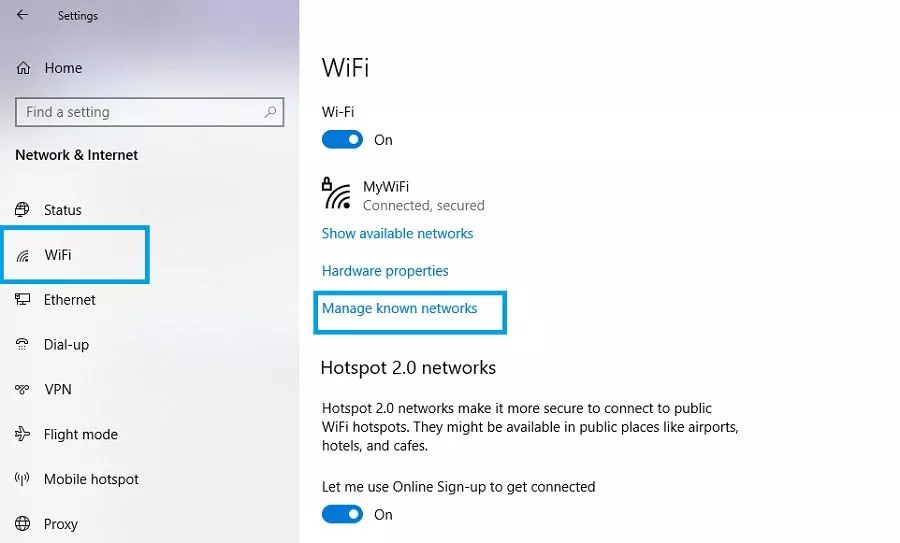
- Hit Windows button and “I” key simultaneously to open “Settings.”
- Select “Network & Internet.”
- Select “WiFi” from the left column and click on “Manage known networks.”
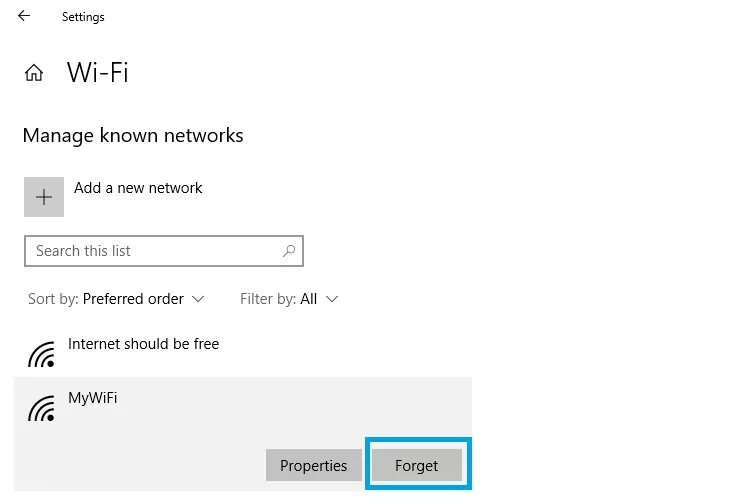
4. Choose your network and select “Forget.”
5. Click on the back button (top-left corner) and select “Show available networks.”
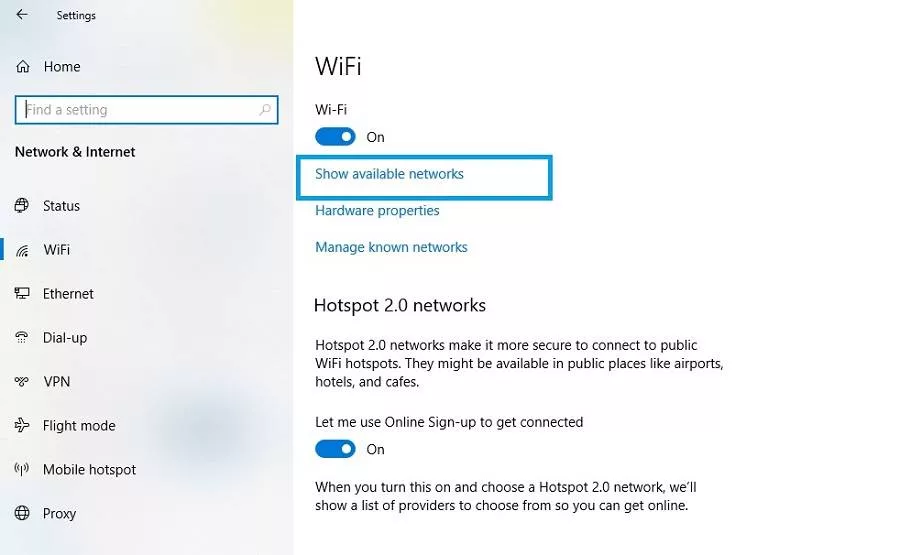
6. Choose your network, enter the password, and hit enter to successfully connect.
2. Turn Airplane Mode On And Off
At times, completely disconnecting your desktop/laptop is needed to resolve any connectivity issues that might not be apparent. For this, we can simply enable and then disable the Airplane Mode.
- Click on the Windows Action Center button (the dialog box icon at the bottom-right of the taskbar).
- Select “Expand” and click on “Airplane mode”/”Flight mode” to enable it.
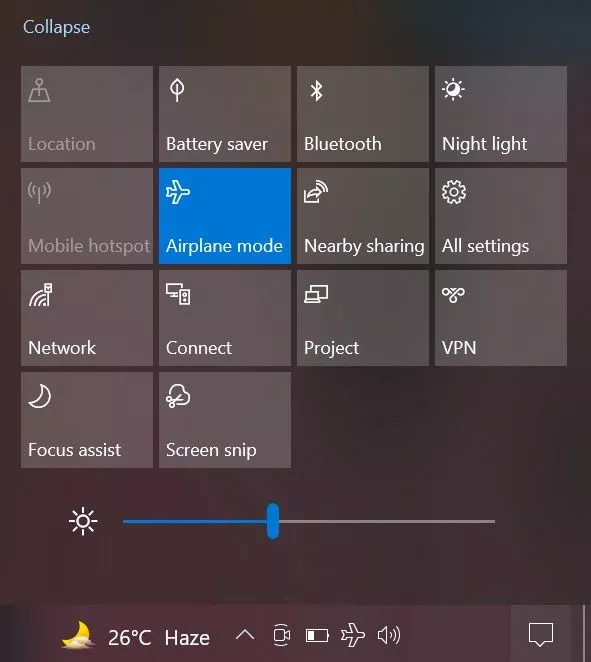
3. After some seconds, click on the same button again to disable Airplane Mode.
3. Troubleshoot Network Issues
Windows offers built-in features that you can use to automatically detect any issues with your network. To run the Network Troubleshooter, check out these steps:
- Open “Settings” and click on “Network & Internet.”
- Scroll down and select “Network troubleshooter.”
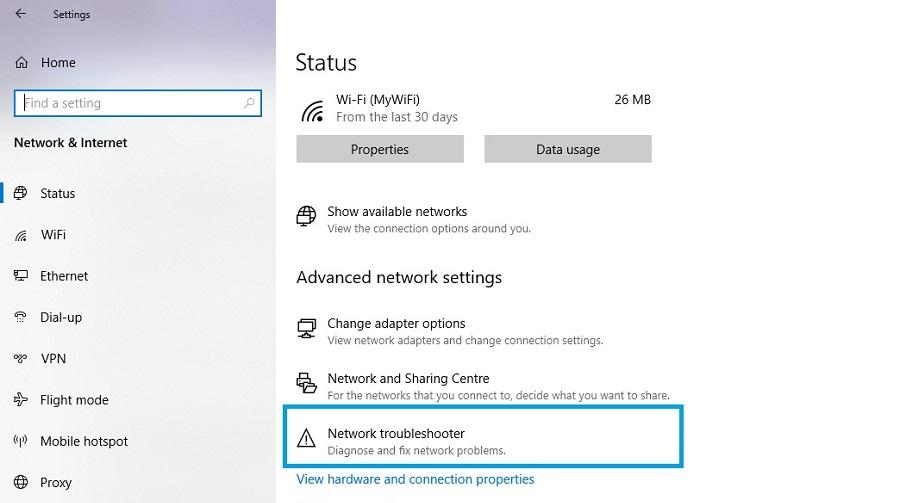
3. The troubleshooter will now run and check for any anomalies. Follow on-screen instructions to help identify and fix the issues.
4. Troubleshoot Network Adapter Issues
The network adapter is an important component in your system that allows you to connect to other computers over a network. You can run a scan on the network adapter to check for any overlooked problems. Follow these steps to run the network adapter troubleshooter:
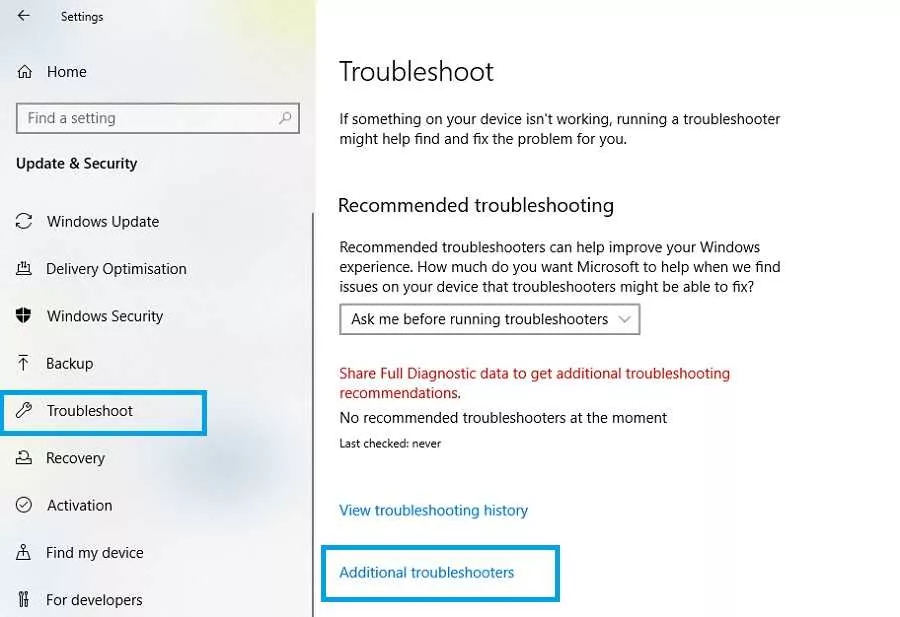
- Open “Settings” and click on “Update & Security.”
- Select “Troubleshoot,” from the left column and click on “Additional troubleshooters.”
3. Scroll down, choose “Network Adapter,” and click on “Run the troubleshooter.”
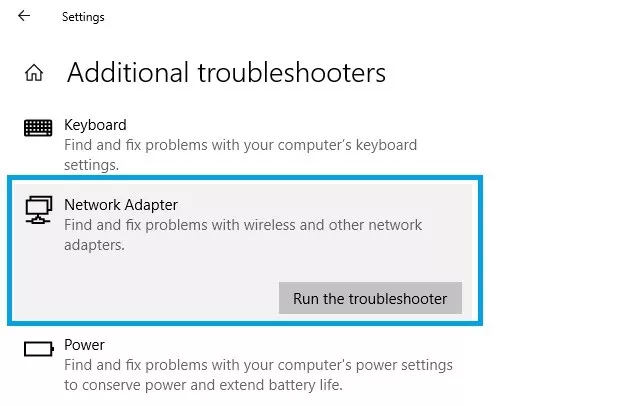
4. Follow the on-screen instructions to find and resolve any adapter issues.
5. Manually Set Up A New Connection
In some cases, trying to connect to a network in the usual way could give you trouble. Therefore, it is important to try setting up your connection manually to overcome any issue arising from the usual process.
- Open “Settings” and select “Network & Internet.”
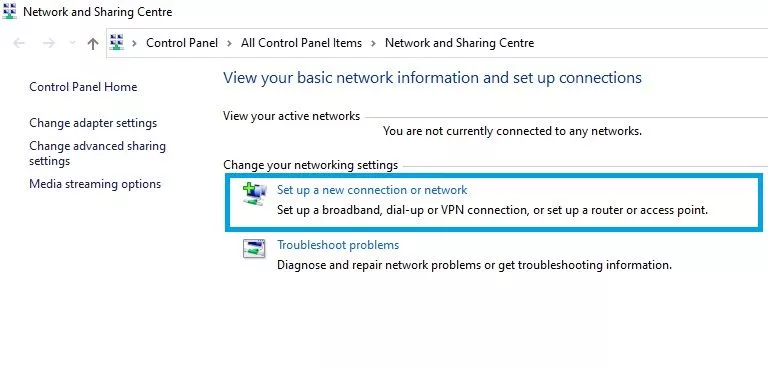
- Click on “Network and Sharing Center.”
- Select “Set up a new connection or network.”
4. In the window that opens, select “Manually connect to a wireless network” and hit “Next.”
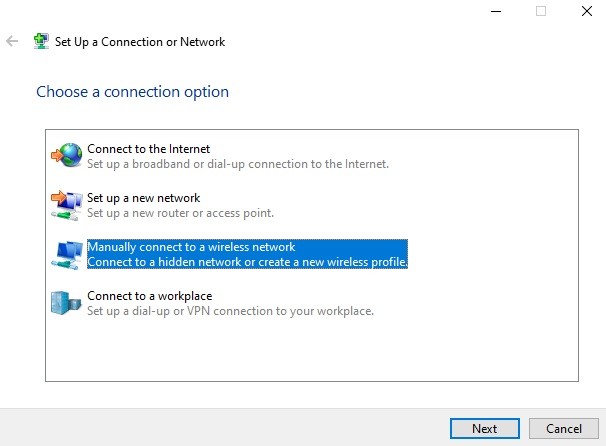
5. Now, enter the required details about the network, hit “Next,” and follow the on-screen instructions to complete the setup.
6. Reset Network Settings
If network settings have been incorrectly configured, then it could cause the “can’t connect to this network” error. To replace the current settings with the default settings, perform a network reset using these steps:
- Open “Settings,” select “Network & Internet.”
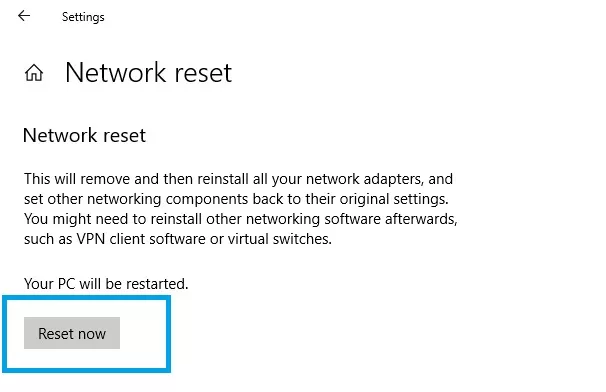
- Select “Network reset.”
- Click on “Reset now” to execute the process.
7. Install Windows Updates
As mentioned earlier, software bugs could very well be the reason for this network problem. Fortunately, Windows regularly releases updates that address these bugs and other issues. That’s why it’s a good idea to make sure you have the latest Windows Update installed. Here’s how you can do so:
- Open “Settings” and select “Update & Security.”
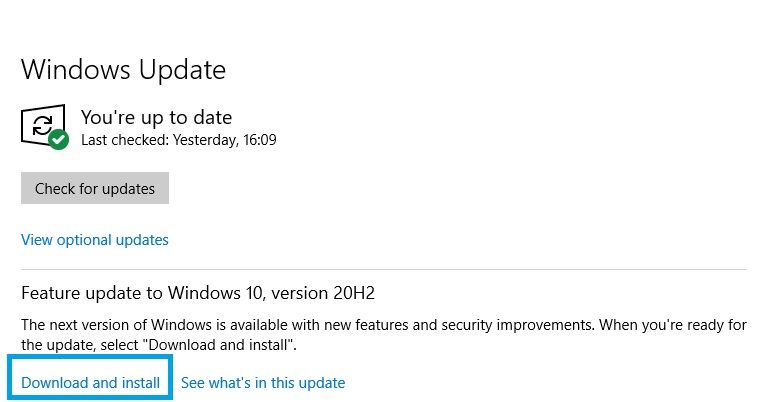
- Click on “Check for updates” to find the latest software.
- Click on “Download and install” to apply the update.
4. Finally, restart your system for the changes to take effect.
8. Reinstall Network Adapter Driver
The network adapter driver is a piece of software that makes sure the hardware component required to establish a connection runs smoothly. Over time, the driver might get corrupt, causing you to face network errors. The remedy for this is reinstalling your network adapter’s driver.
- Hit Windows button and “R” to open Run.
- Now type in “devmgmt.msc” and hit enter to open Device Manager.
- Select “Network adapters” to open the drop-down menu. Also, note down the complete network adapter driver name for reference later.
- Right-click on your Wi-Fi driver and select “Uninstall device.”
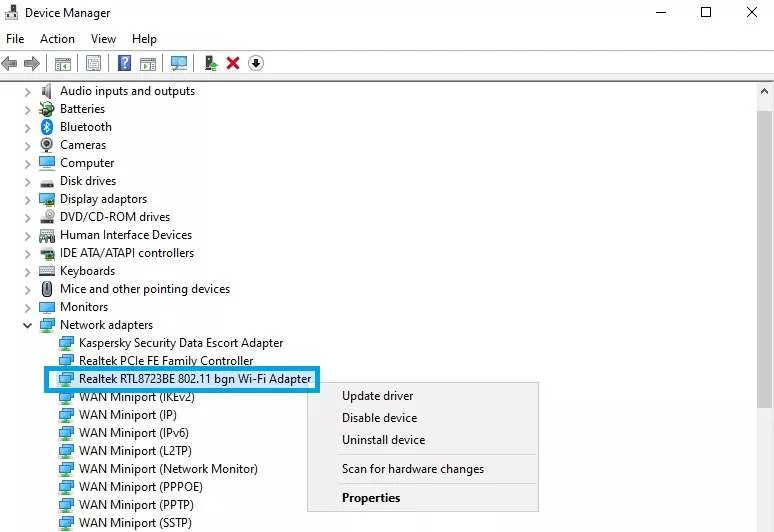
5. Follow the on-screen instructions to uninstall it.
6. Restart your system and Windows should automatically reinstall the missing driver. In case it doesn’t, follow the next step.
7. From the name you noted down earlier, identify and go to your network adapter manufacturer’s website and download the required driver. Follow on-screen instructions to install it manually.
9. Update Network Adapter Driver
If reinstallation doesn’t work, you can try updating the driver using the steps given below:
- Follow through step 1-3 from the previous fix.
- Right-click on your Wi-Fi driver and select “Update driver.”
- Select “Search automatically for drivers” and follow on-screen instructions.
10. Try These CMD Commands
If the problem isn’t driver-related or hardware-related, then chances are it might have something to do with your IP configuration. In this event, you can run a set of commands on Command Prompt to solve the issue.
These commands will reset your computer’s internet connectivity configuration, renew your IP address, and clear the network cache. Here’s how you can go ahead with these:
- Click on the magnifying glass icon on the taskbar and type in “cmd.”
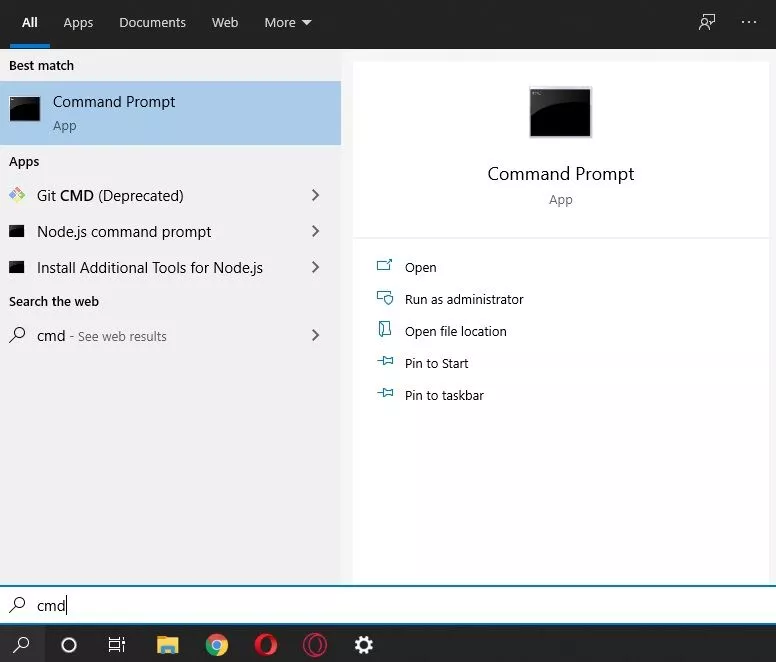
2. From the search result, right-click on “Command Prompt,” select “Run as administrator,” and click on “Yes” when prompted.
3. Type in these commands without quotes and hit enter after each: “netsh winsock reset,” “netsh int ip reset,” “ipconfig /release,” “ipconfig /renew,” and “ipconfig /flushdns.”
4. At last, reboot your PC for the changes to take effect.
Finally, those are all the fixes that are suggested for those facing the “can’t connect to this network” issue. Hopefully, one of these solutions worked out for you. If they didn’t, the problem could most likely be on your internet provider’s side. Maybe, you guys need to talk.
FAQs
It means that, although the network exists, Windows is unable to establish a connection because of an underlying problem that could range from a driver issue to wrongly configured settings.
If Windows is unable to connect to a network, you can test out a number of fixes, including resetting network settings, clearing network cache, updating relevant drivers, etc.
There are various reasons for which you might be getting this issue despite having the right password. These reasons are conflicting drivers, a change in router configuration, outdated Windows software, etc.