How To Disable Startup Programs In Windows 11/10?

Windows automatically launches certain programs when you boot your computer. If you have many applications installed which are set to launch on startup, your PC is bound to run slow. Moreover, most programs set themselves to launch after startup automatically.
Likewise, the list of programs that automatically launch after a startup can get long. The more programs in the list, the slower your PC will run. Here’s how to deal with the apps that launch after startup using Task Manager and Settings.
Disable it with Task Manager
Since Windows 10’s arrival, managing startup apps via the Task Manager is quite convenient. It provides users with a list of apps and their details about their startup behavior. The process is the same for Windows 10 and 11.
1. First, right-click on the Start Menu (or Taskbar in Windows 10) and open Task Manager.
2. Navigate to the Startup tab from the top menu (you may need to click on More details to expand the app).
3. There, you’ll find a list of apps that can be launched on startups. You can sort the apps by their start-up impact, status, and name.

4. To continue, select the program you want to disable and click on the Disable button below.
5. Finally, repeat the process for each app that you want to disable and close Task Manager.
The next time you boot your computer, the disabled programs won’t automatically launch on a startup.
Disable via Settings
The Settings app has a lot more features than one would expect. In the same vein, you can disable startup programs via the Settings app on Windows with ease. Since the app changed on Windows 11, here’s how to do it for both Windows versions.
Disable Startup Programs in Windows 10 Settings
1. Firstly, open the Settings app from the Start Menu or use the keyboard shortcut Windows key + I.
2. Then, click on the “Apps” button.
3. From the left sidebar, navigate to the Startup tab.
4. Furthermore, a list of apps that can start up on boot will appear. You can sort them by their name, status, and startup impact.
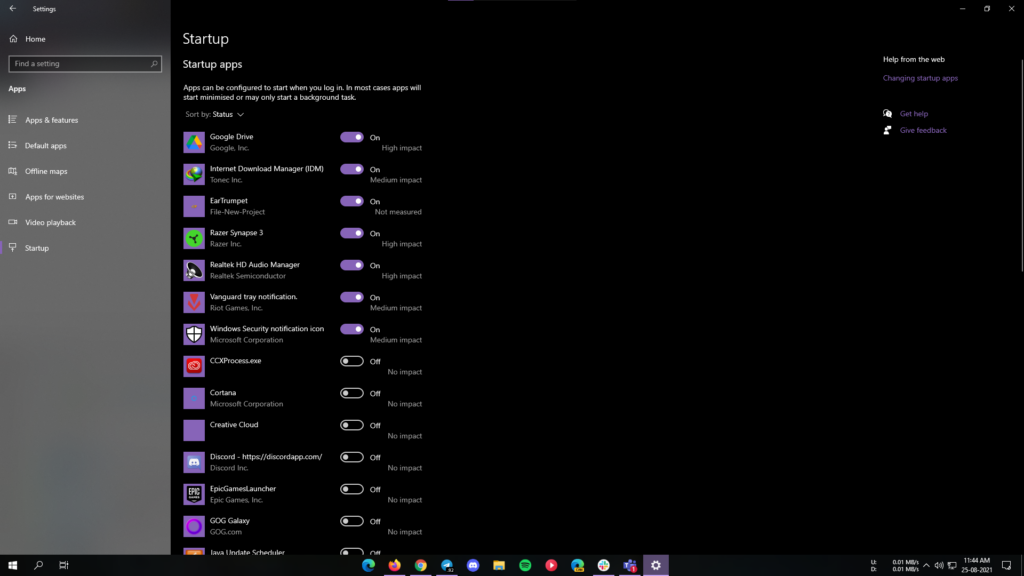
5. From the list of apps, toggle off the app you want to disable on startup.
6. Finally, repeat the same for each program that you want to disable.
In conclusion, the disabled programs won’t automatically launch after a startup the next time you boot your computer.
Disable Startup Programs in Windows 11 Settings
1. Firstly, open the Settings app from the Start Menu or use the keyboard shortcut Windows key + I.
2. From the left sidebar, navigate to Apps > Startup.
3. Furthermore, a list of apps that can start up on boot will appear. You can sort them by their name, status, and startup impact.
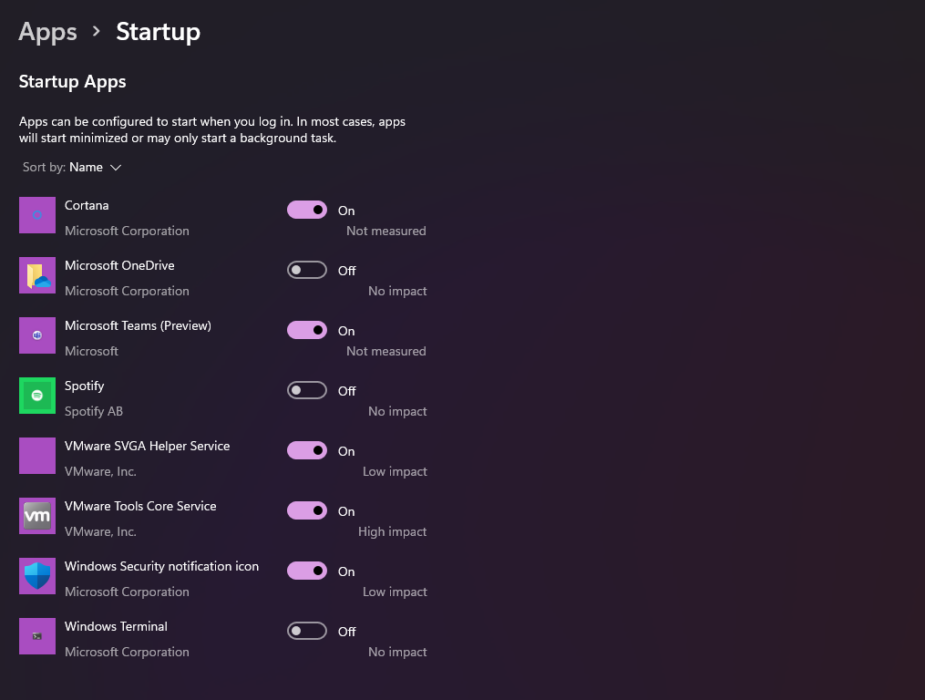
4. From the list of apps, toggle off the app you want to disable on startup.
5. Finally, repeat the same for each program that you want to disable.
In conclusion, disabled programs won’t automatically launch after a startup the next time you boot your computer.
Disable Startup Programs using Autoruns
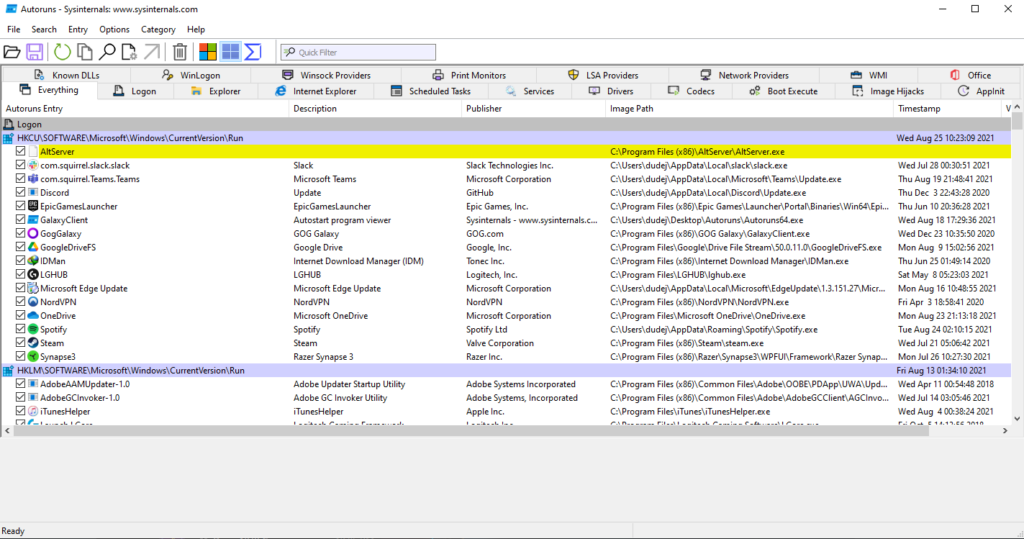
Autoruns is an application for advanced users which can give a user control over all startup items. Likewise, you can control much more than startup apps, such as browser extensions, scheduled tasks, drivers, services, and more. However, the app is not meant for general users as it may seem complex to use, which it is.
Subsequently, you can download the Autoruns zip from Microsoft’s website. Extract the zip and run the “Autoruns64.exe” file. The app offers a complete list of tasks, services, and apps that automatically run. Although the user interface may seem complex at first, it is quite handy.
Did you like this guide? Make sure to check our other Windows 11 guides too.