How to Cancel NordVPN Subscription and Get a Refund?
NordVPN stands out as one of the best VPN services on the market, offering a plethora of features such as Meshnet, file transfer, and the ability to set up private servers. However, if you need to cancel your subscription for any reason, here is a straightforward guide to do it and secure a full refund.
Money-Back Guarantee
Before we dive into the explanation, it’s crucial to note that NordVPN provides a 30-day money-back guarantee, allowing users to cancel their subscriptions and receive a full refund with no specific conditions. The process is quite simple for first-time users:
- Open the NordVPN app on your laptop/PC.
- Navigate to the “Settings” section on the left.
- Click on the “Accounts” tab.
- Select the “Cancel auto-renewal” option.
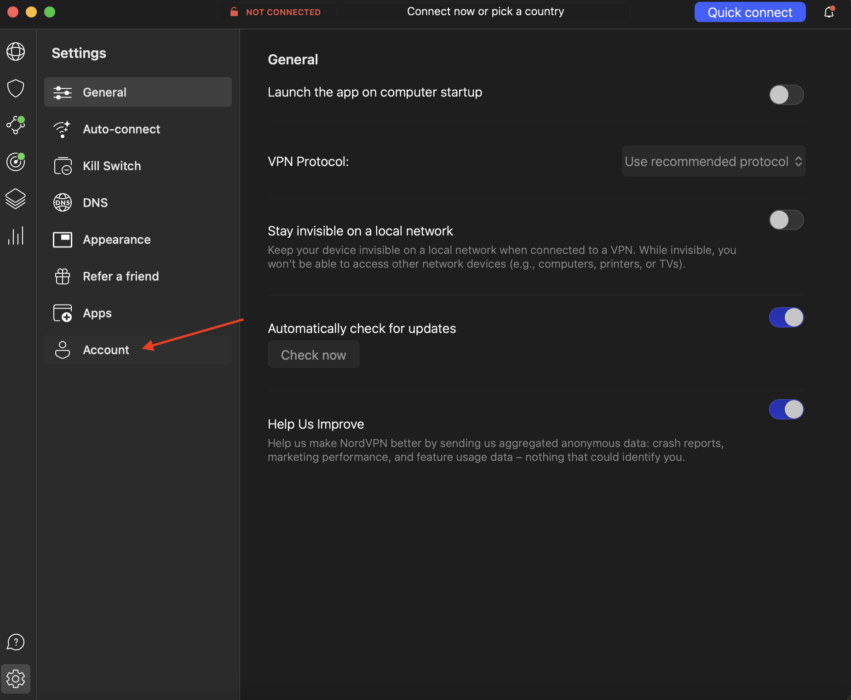
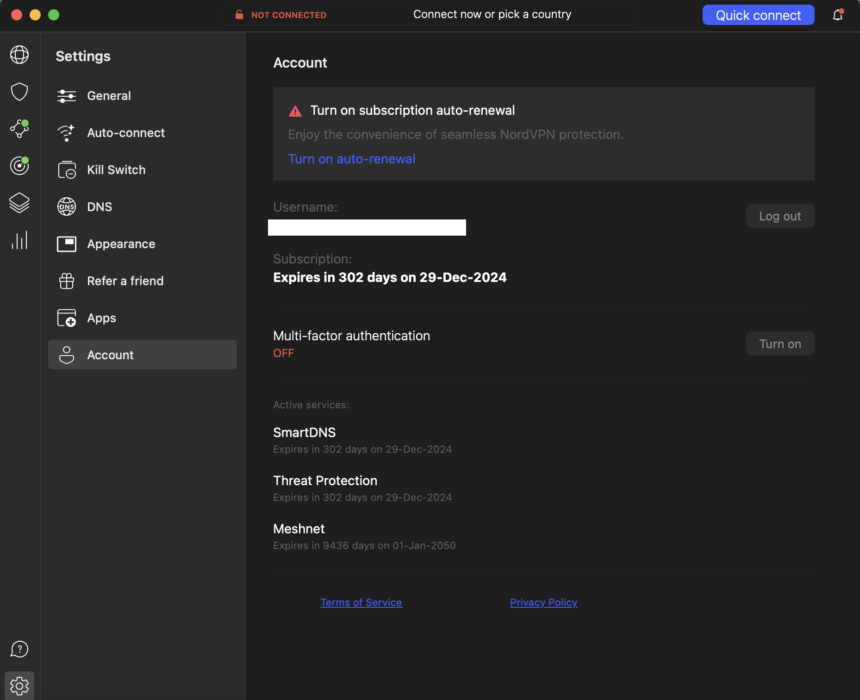
However, it is important to note that to obtain a refund, reaching out to the customer service team is necessary. Moreover, the company has also implemented measures to prevent the abuse of its refund policy. Repeated attempts to cancel and refund may result in restrictions on further refund requests.
Cancel active NordVPN subscription
For regular users, the cancellation process is a bit more complex:
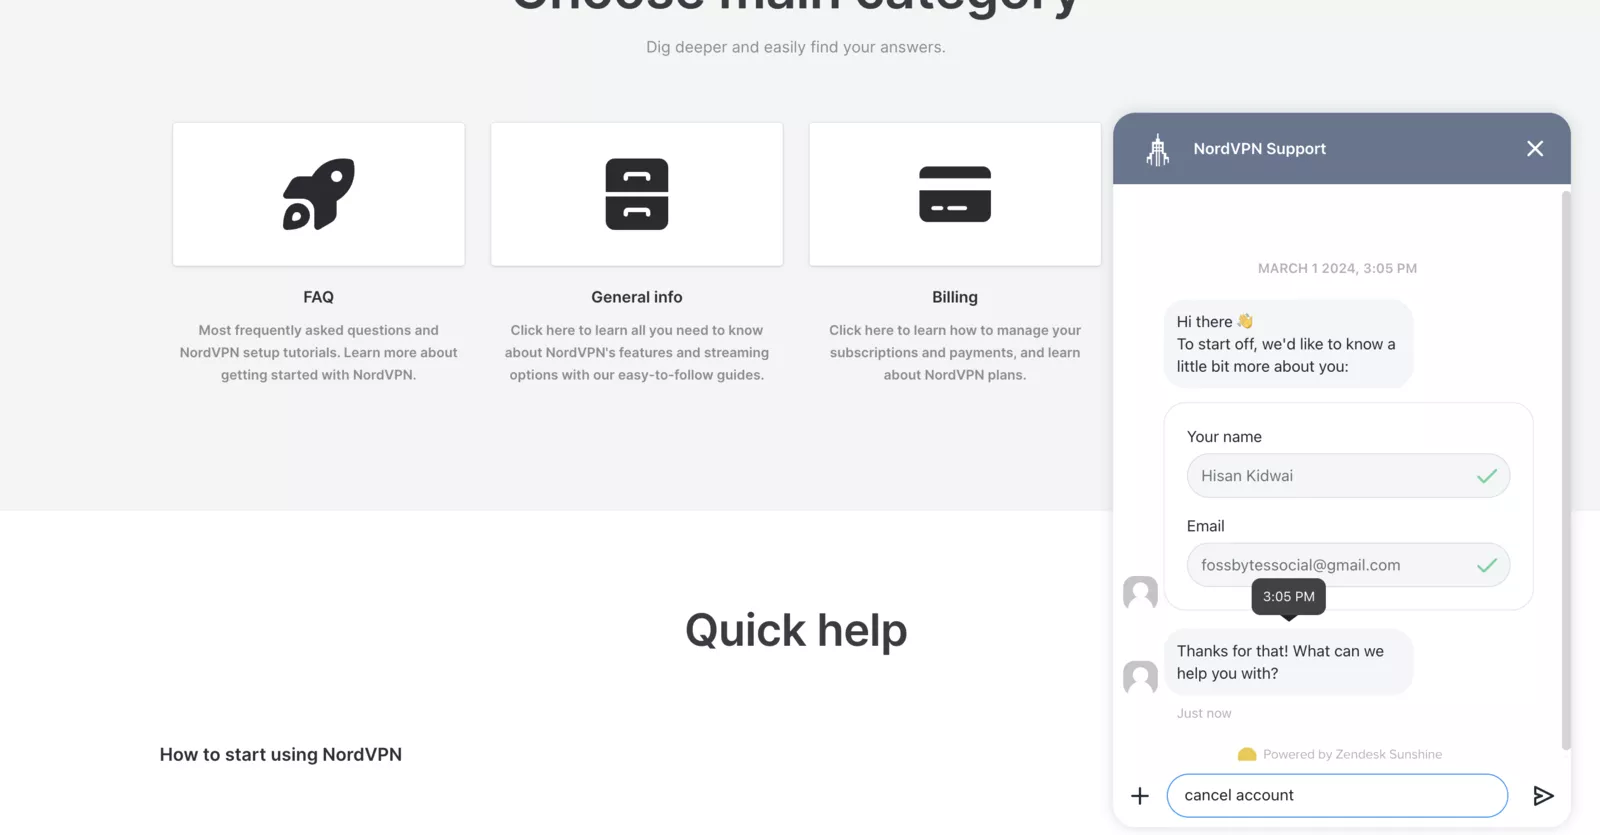
- Head over to NordVPN’s website [here].
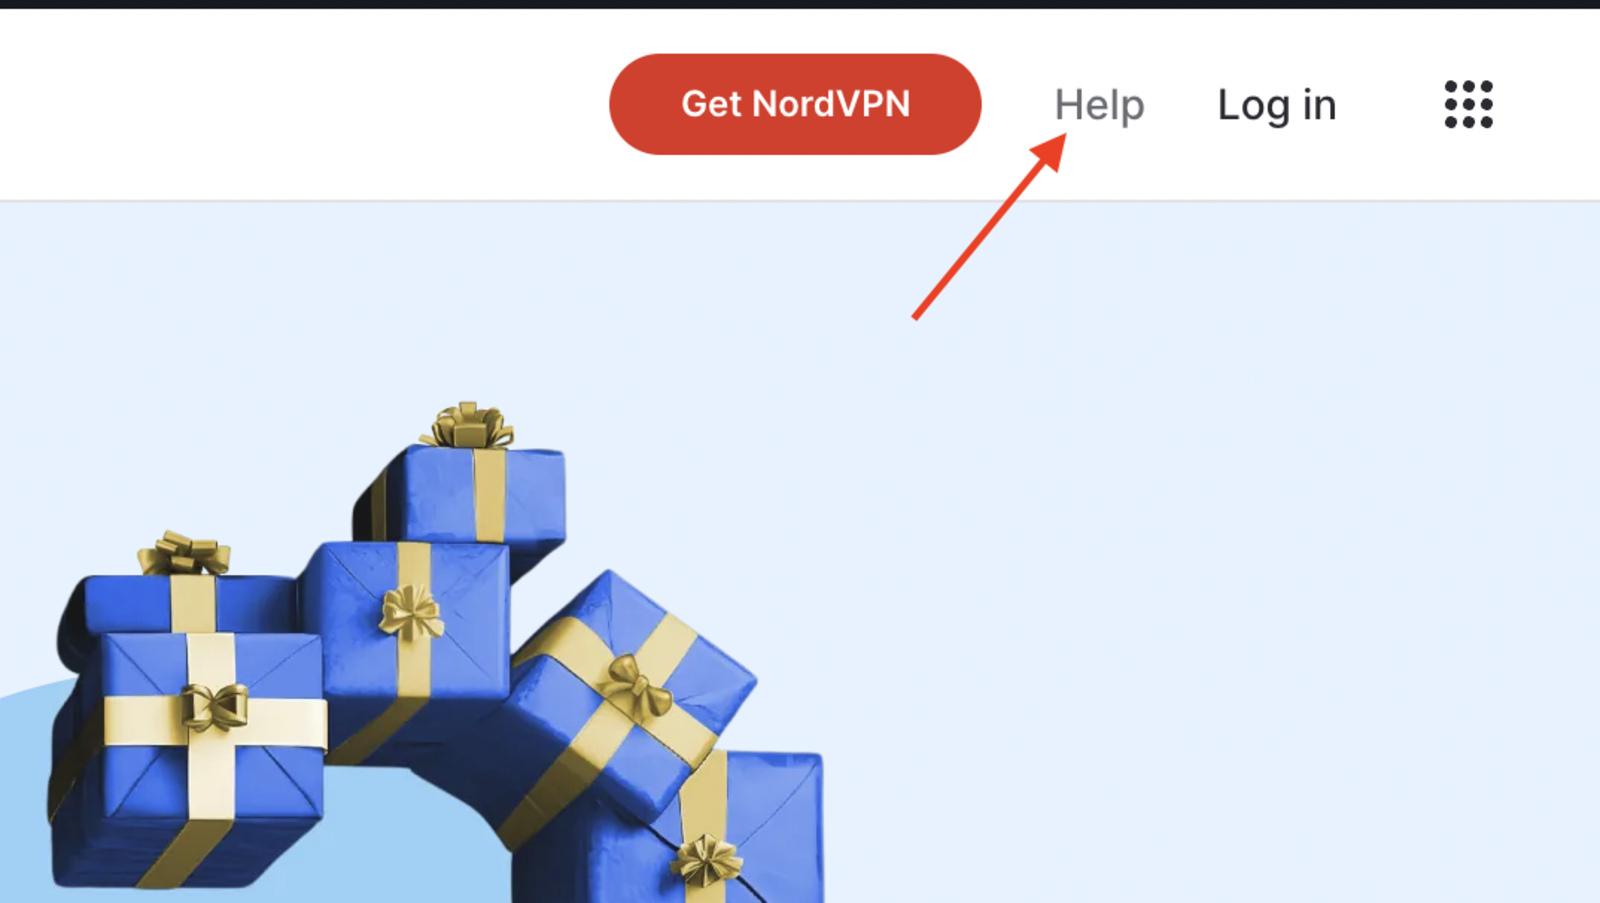
- Click on the “Help” button on the top right.
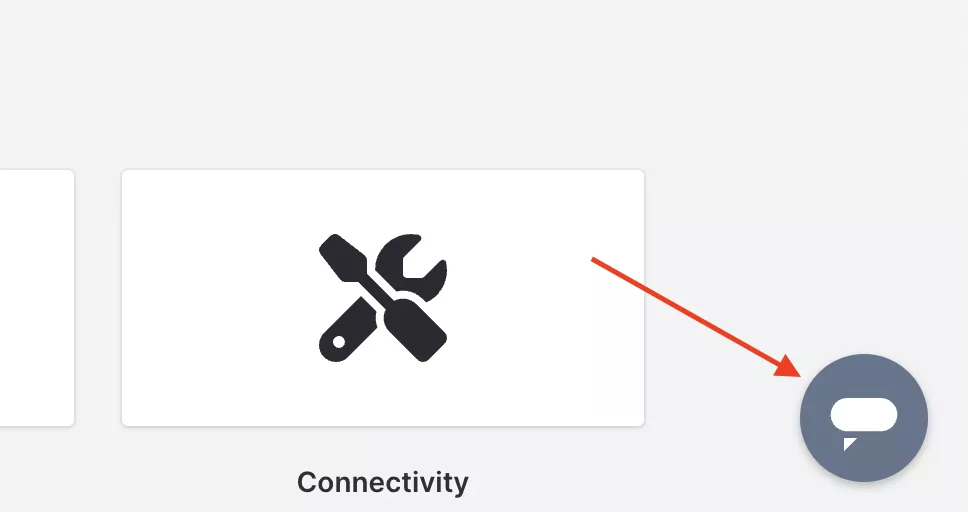
- Select the chat icon in the bottom right-hand corner.
- Enter your name, email address, and the reason for your message (i.e., “cancel the account”).
On the other hand, if you subscribed to NordVPN through platforms like the Google Play Store or the Apple App Store, the cancellation process differs.
For the Google Play Store
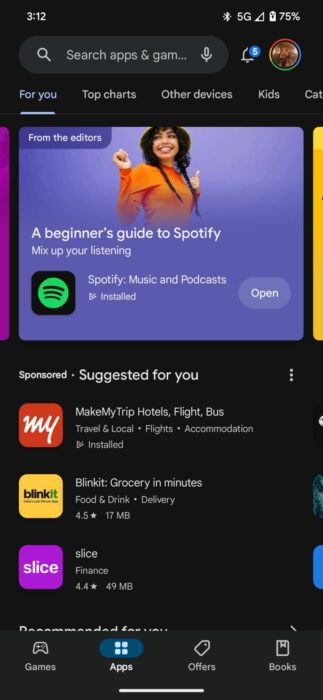
- Open the Play Store.
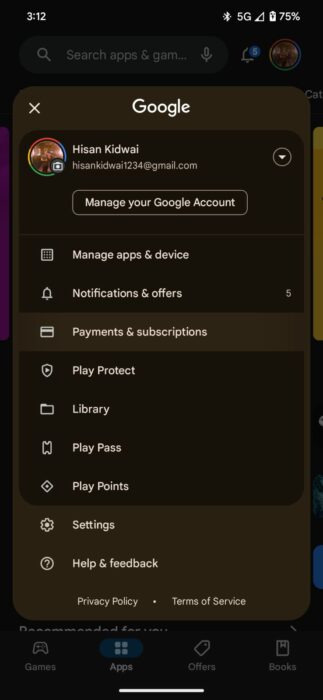
- Click on your profile on the top left.
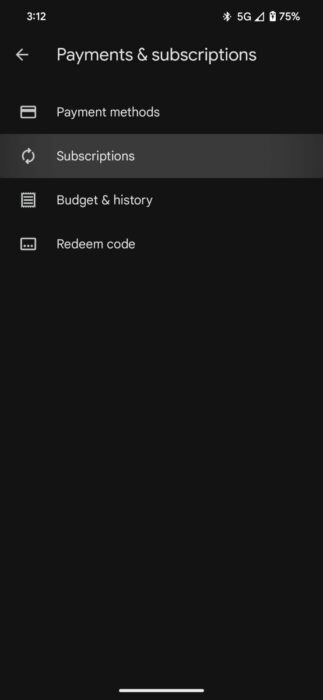
- Navigate to Payments and Subscriptions > Subscriptions.
- Click on NordVPN, then “Cancel Subscription.”
For the Apple App Store
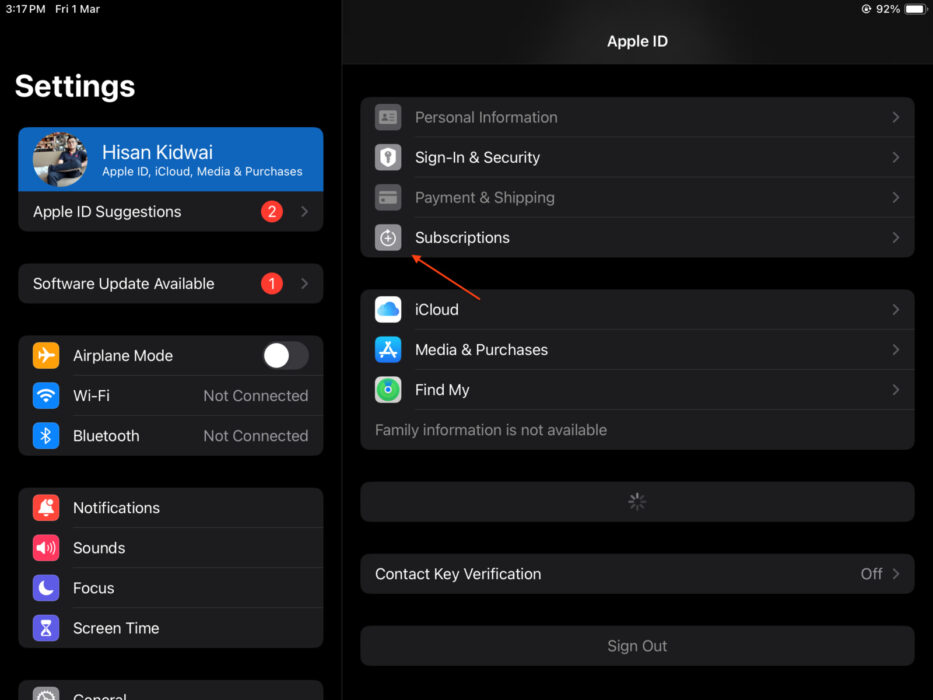
- Open the Settings app on your iPhone.
- Tap on your name, then navigate to “Subscriptions.”
- Click on NordVPN.
- Select “Cancel Subscription.”
