Accidentally Deleted a File on Mac? Here’s How to Recover It

Accidental deletion happens when we unknowingly delete important files while deleting unwanted files and folders from our Mac system to free up space. For an average Joe, deleting files/folders may be the end of the world. However, this is not true. There is still a chance to recover deleted files on your Mac.
Let’s read further and learn ways to recover deleted files on Mac.
- Recovery Depends on How You Deleted a File
- Methods to Recover Deleted Files on a Mac
- Method 1: Recover Deleted File/Folder Using the Undo Function
- Method 2: Recover Deleted File from Trash
- Method 3: Recover Deleted Photos using the Photo App
- Method 4: Check Files App on iPad/iPhone
- Method 5: Use an External Drive Backup
- Method 6: Use iCloud Drive to Recover Files
- Method 7: Use Time Machine to Recover Accidentally Deleted Files on Mac
- Method 8: Recover Using a Mac Data Recovery Software
- Tips to Prevent Data Loss
- Conclusion
Recovery Depends on How You Deleted a File
Once you realize you have deleted an important file or, worse, a complete folder containing important documents, panic sets. Not all is lost right away and you must take a moment to calm down and think, how did you delete the file/s?
You can easily recover a deleted file on your Mac system if you have moved it to the Trash unless you have used the Option + Command + Delete key combination, which permanently deletes a file from the system. Moreover, recovery chances get slimmer if the TRIM command is enabled.
For such scenarios, data backups, iCloud, Time Machine backups, etc., come in handy.
Methods to Recover Deleted Files on a Mac
Whether you have emptied the Trash or used the ultimate shortcut to permanently delete files/folders from your Mac, stop using your Mac. This will help increase the chances of performing a successful file recovery. Another vital point to keep in mind is that if you shut down your Mac at this stage and the TRIM command is enabled, it could result in 100% data loss.
Hence, stop using your Mac and don’t power it OFF. Follow the stepwise methods shared below.
Method 1: Recover Deleted File/Folder Using the Undo Function
If you have recently moved a file/folder to Trash, the simplest way to recover it is by undoing the action. This will help you recover recently deleted files on Mac. Here’s what to do:
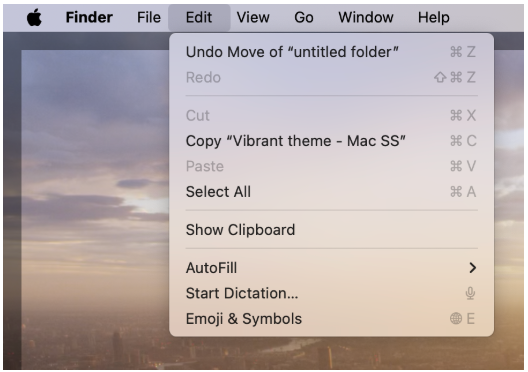
- Click on Edit in the Menu Bar at the top.
- Choose the Undo Move of option.
Note – You can also use the Command + Z shortcut for this.
Method 2: Recover Deleted File from Trash
Another way to recover deleted files on Mac is to recover them from Trash. When you delete a file on a Mac, it goes into the Trash. Trash stores every deleted file for 30 days before they are automatically deleted forever by the OS. Here’s how you can recover deleted files on Mac from Trash:
- Click on the Trash icon in the Dock.
- Locate the file in the Trash that you have accidentally deleted. Select it. If there are multiple files, select them.
- Use the two-finger tap gesture and click on Put Back.
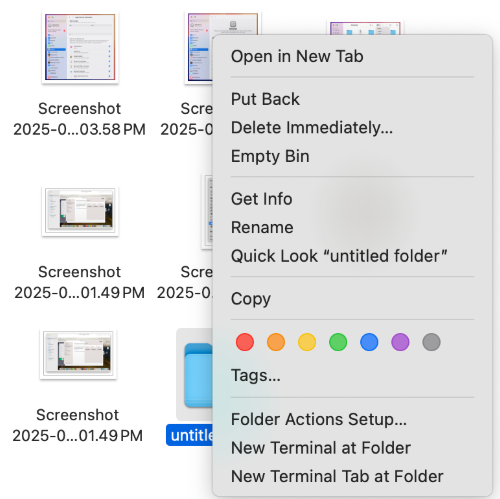
The selected files will be restored to their original locations from where they were deleted.
Method 3: Recover Deleted Photos using the Photo App
Mac stores photos and videos in the native photo and video manager for macOS called Photos. This app has a trash known as Recently Deleted, which stores deleted photos and videos for 30 days, post which it is emptied automatically.
If you have accidentally deleted some photos or videos from your Mac, you can use the steps discussed further to recover them. Here’s what to do:
- Open the Photos app from the Dock.

- Expand the Utilities in the left pane and click on Recently Deleted.
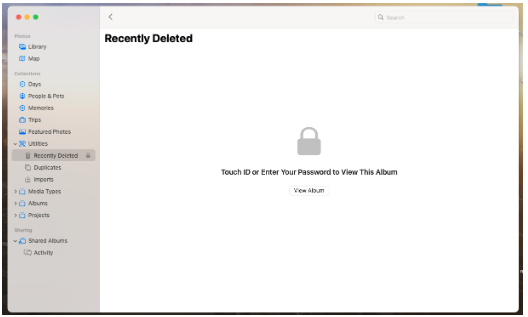
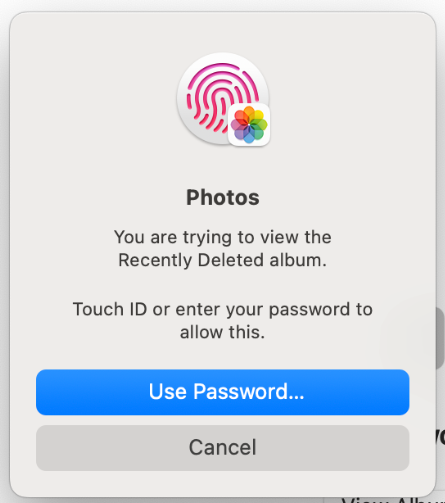
- Click on View Album. It will prompt you to enter your password. Click on Use Password to enter your Mac password. Press OK.
- Locate the photo/s or video/s that you want to restore.
- Select them and click on Recover. You can also use the two-finger tap gesture on the selected media files and click on Recover.

The selected media files will be restored to their original location.
Method 4: Check Files App on iPad/iPhone
If you are logged in on an iPad or an iPhone using the same Apple account on your Mac, check the Files application for deleted files.
Method 5: Use an External Drive Backup
If you have created a backup of important Mac files on an external HDD/SSD, you can use it to recover deleted files on your Mac. Connect it to your Mac device and locate the file you have permanently deleted from your Mac.
Method 6: Use iCloud Drive to Recover Files
If you have enabled the iCloud Drive feature on your Mac, you can use it to recover files you have deleted from your iCloud Drive and other applications. You can do this by logging in on iCloud(dot)com. However, you cannot recover permanently deleted files.
Follow the steps below:
- Open Safari or any other web browser on your Mac and go to iCloud(dot)com. Log in with your Apple account credentials.
- Click on Drive.

- Click on Recently Deleted in the left pane.
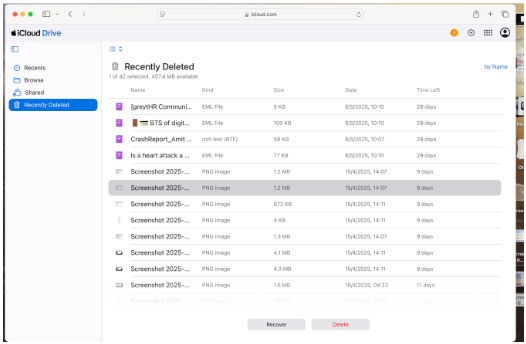
- Locate the accidentally deleted file you want to restore and select it.
- Press the 3-dot icon at the right end of the selection and click on Recover.

You can also follow this guide to restore other application files using iCloud Drive.
If you have used any other cloud storage service, such as Google Drive, One Drive, or DropBox, for backing up your Mac data, use it to recover deleted files.
Method 7: Use Time Machine to Recover Accidentally Deleted Files on Mac
Every Mac system comes pre-installed with Time Machine – a feature that lets you create snapshots of your system and important data at regular intervals. However, it needs to be enabled and set up in advance. When you enable Time Machine, you can configure it with either external storage drives or an Apple AirPort Time Capsule to create timely data backups.
This utility is very useful in recovering permanently deleted files or folders from a Mac. It can also be used to restore entire Mac data on another Mac machine.
This is how it can help you recover permanently deleted files on Mac:
- Connect the external drives or AirPort Time Capsule that you have configured with Time Machine on your Mac.
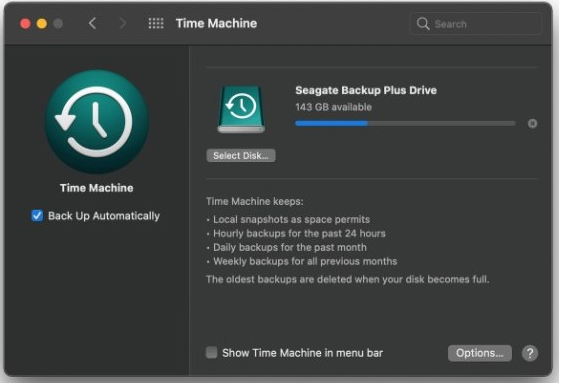
- Click on Time Machine in your Menu bar and click on Enter Time Machine.
- It will show all the available snapshots. Use the given up/down arrow to navigate between them.
- Once you locate the required files in a particular snapshot, select them.
- Click on Restore. This will restore the selected files on your Mac.
- Close the Time Machine and use the Finder to go to the location where the deleted files have been restored.
Method 8: Recover Using a Mac Data Recovery Software
In some cases, no Time Machine backup is found in the configured drive, or the external drive containing backup of your Mac data could fail due to logical errors. It may also happen that you didn’t enable the Time Machine backup in the first place. In such scenarios, you will not be able to recover the deleted files on your Mac.
The only way out is to use an advanced Mac data recovery Software like Stellar Data Recovery for Mac. It is a powerful data recovery software that lets you recover accidentally deleted files, photos, documents, and more from your Mac. You can also use it to recover files deleted permanently either by emptying the Trash or using the option + command + delete shortcut.
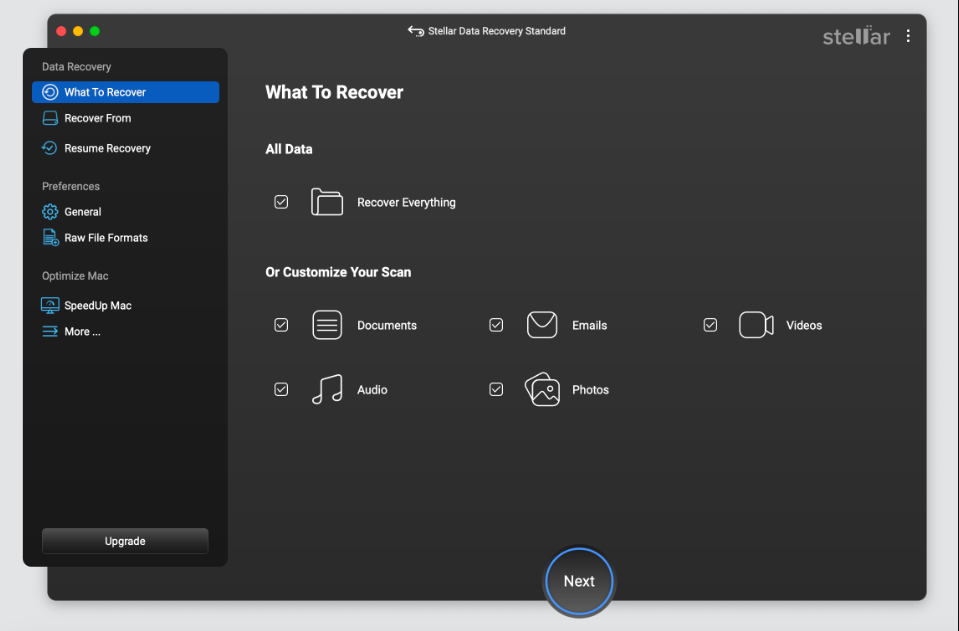
This DIY software comes with a simplified and intuitive UI, which makes recovering lost files simple and quick. And the best part is that it needs no internet connection to recover deleted files. Hence, you can use it while on the go!
It uses a quick 3-step recovery process to help you restore deleted files on your Mac – Scan > Preview > Recover.
Tips to Prevent Data Loss
Here are some tips that can help you reduce the likelihood of accidental deletion and subsequent data loss:
- Stop using Mac immediately
- Carefully delete files
- Backup important files regularly
- Create multiple copies of important files
- Use the 3-2-1 backup strategy
- Enable the Time Machine as soon as you set up a new Mac
- Set up iCloud Drive or use a cloud storage platform to create an off-site data backup
- Disable the TRIM command on the internal Mac drive (if possible)
Conclusion
Deleting files has become a muscle memory that we don’t pay much attention to. But sometimes, our carelessness leads to unwanted data loss due to accidental deletion of critical files. Hence, you should be careful while deleting files and do it when not in a hurry. You should also check twice before pressing the delete button, emptying Trash, or using the shortcut to permanently delete files and folders.