How to Install macOS on your Windows PC: 2025 Guide

It’s no secret that macOS and Windows are two very different operating systems. While most apps are available on both systems, certain apps, such as Xcode and Final Cut Pro, remain exclusive to Apple. This puts Windows users at a disadvantage, as they are barred from using these services. However, instead of spending thousands of dollars on a new MacBook, you can actually run macOS on your Windows PC using virtualization. This article will guide you through the necessary steps to set up macOS in no time.
What is Virtualization?
To put things into perspective, virtualization refers to running a new operating system in a virtual box within another OS. This allows users to use both operating systems simultaneously without manually switching between the two. However, it is important to note that since both operating systems share the same resources, your PC needs to have at least 8GB of RAM and a 4-core processor.
Now that we have the requirements out of the way, we need to choose virtual machine software to install macOS on. While there are several options available, we have chosen VirtualBox for this tutorial since it is the easiest to set up and manage.
Step 1: Download VirtualBox and its extension
Fortunately, the installation process is simple. Users need to:
- Go to the VirtualBox website.
- Click on the “Downloads” section.
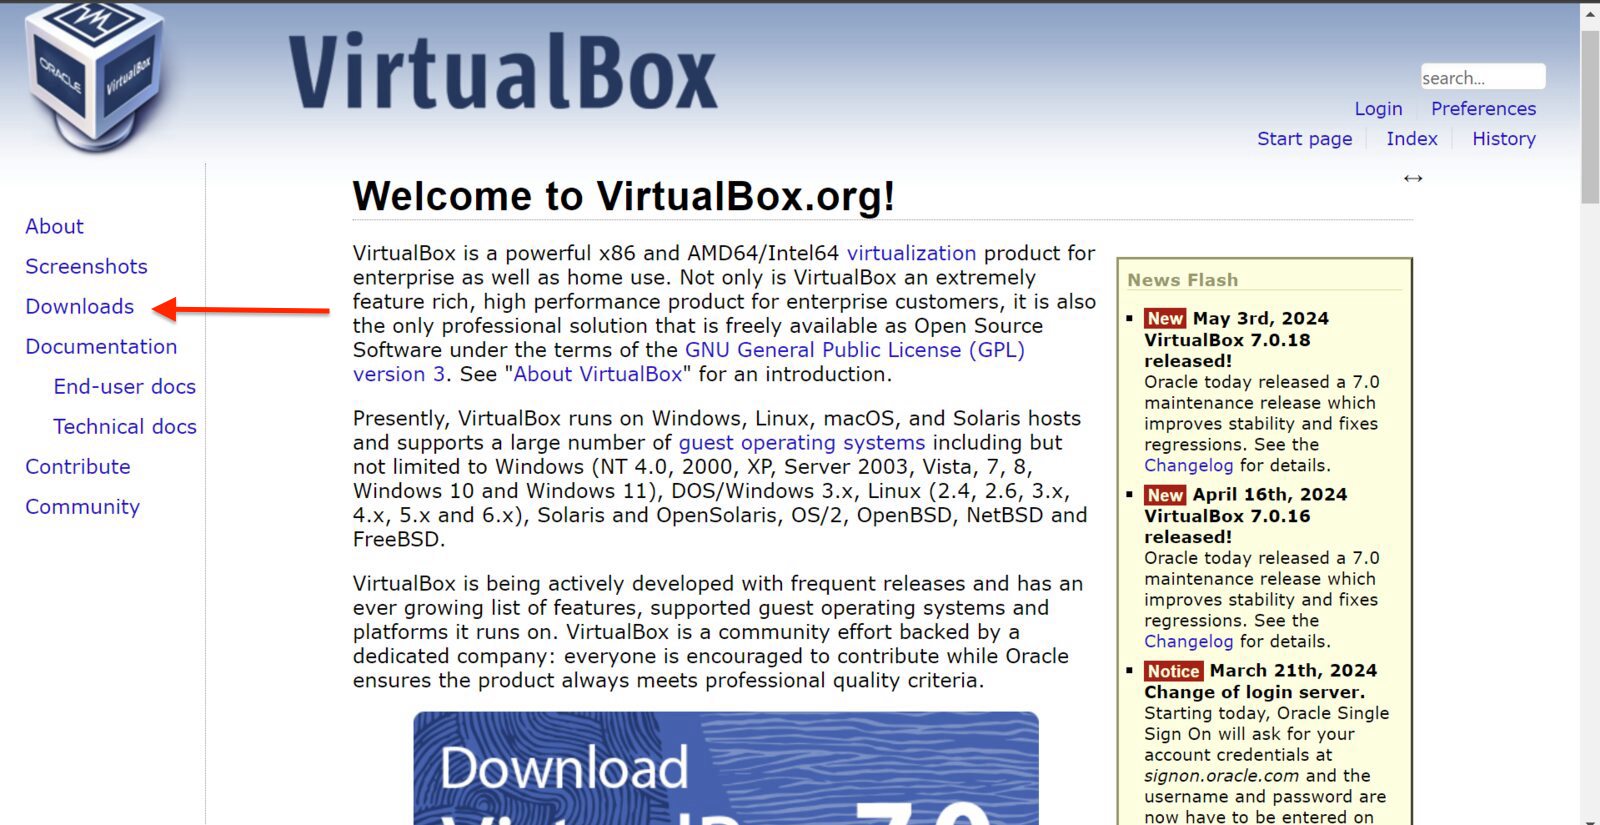
- Tap the “Windows Host” link and download the software.
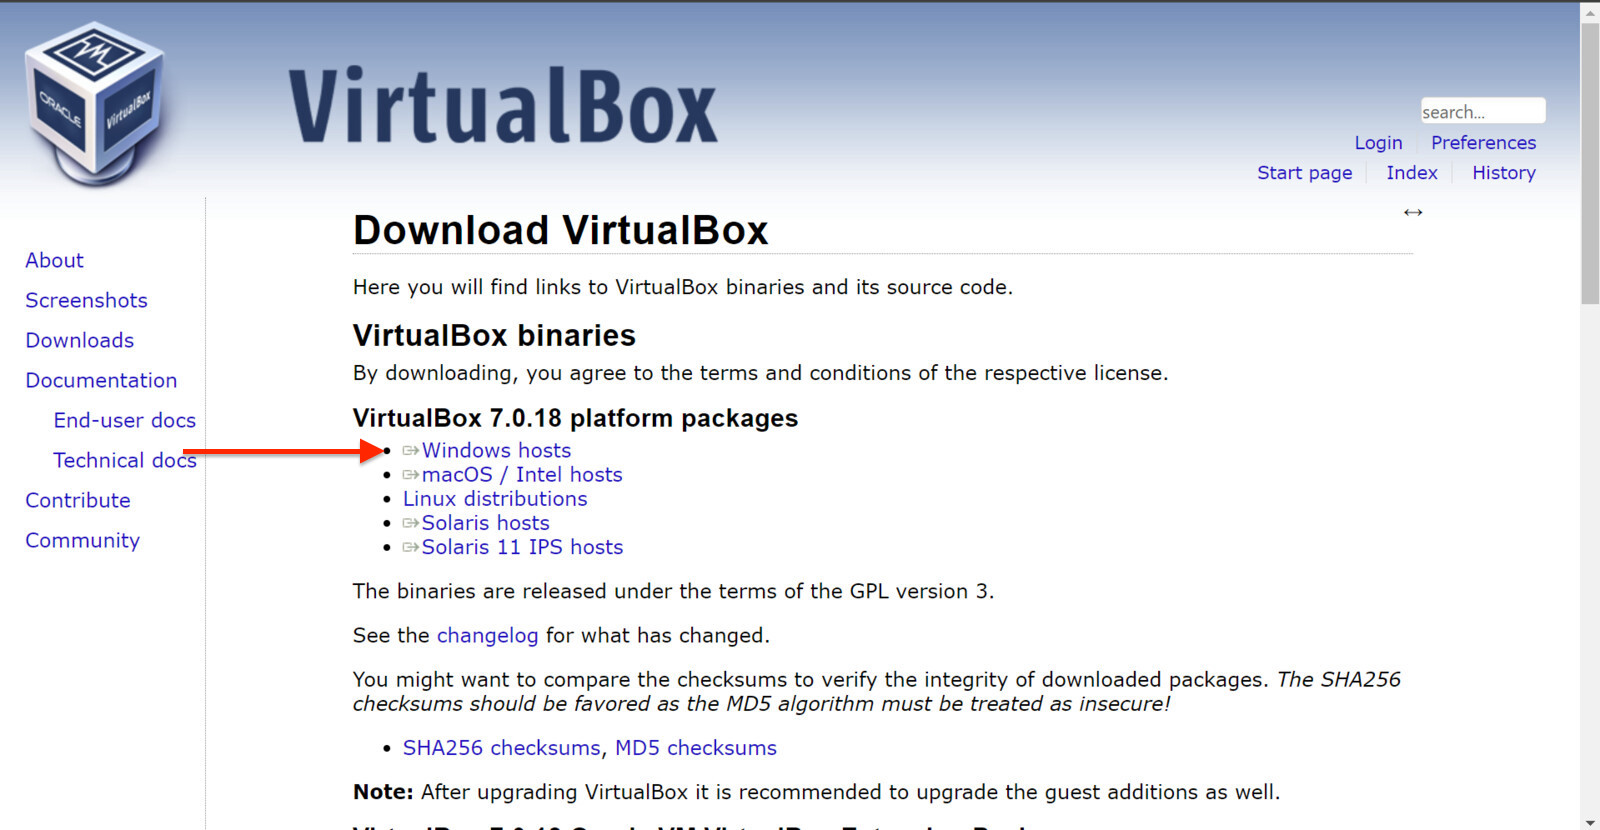
- Open the downloaded file and set up VirtualBox.
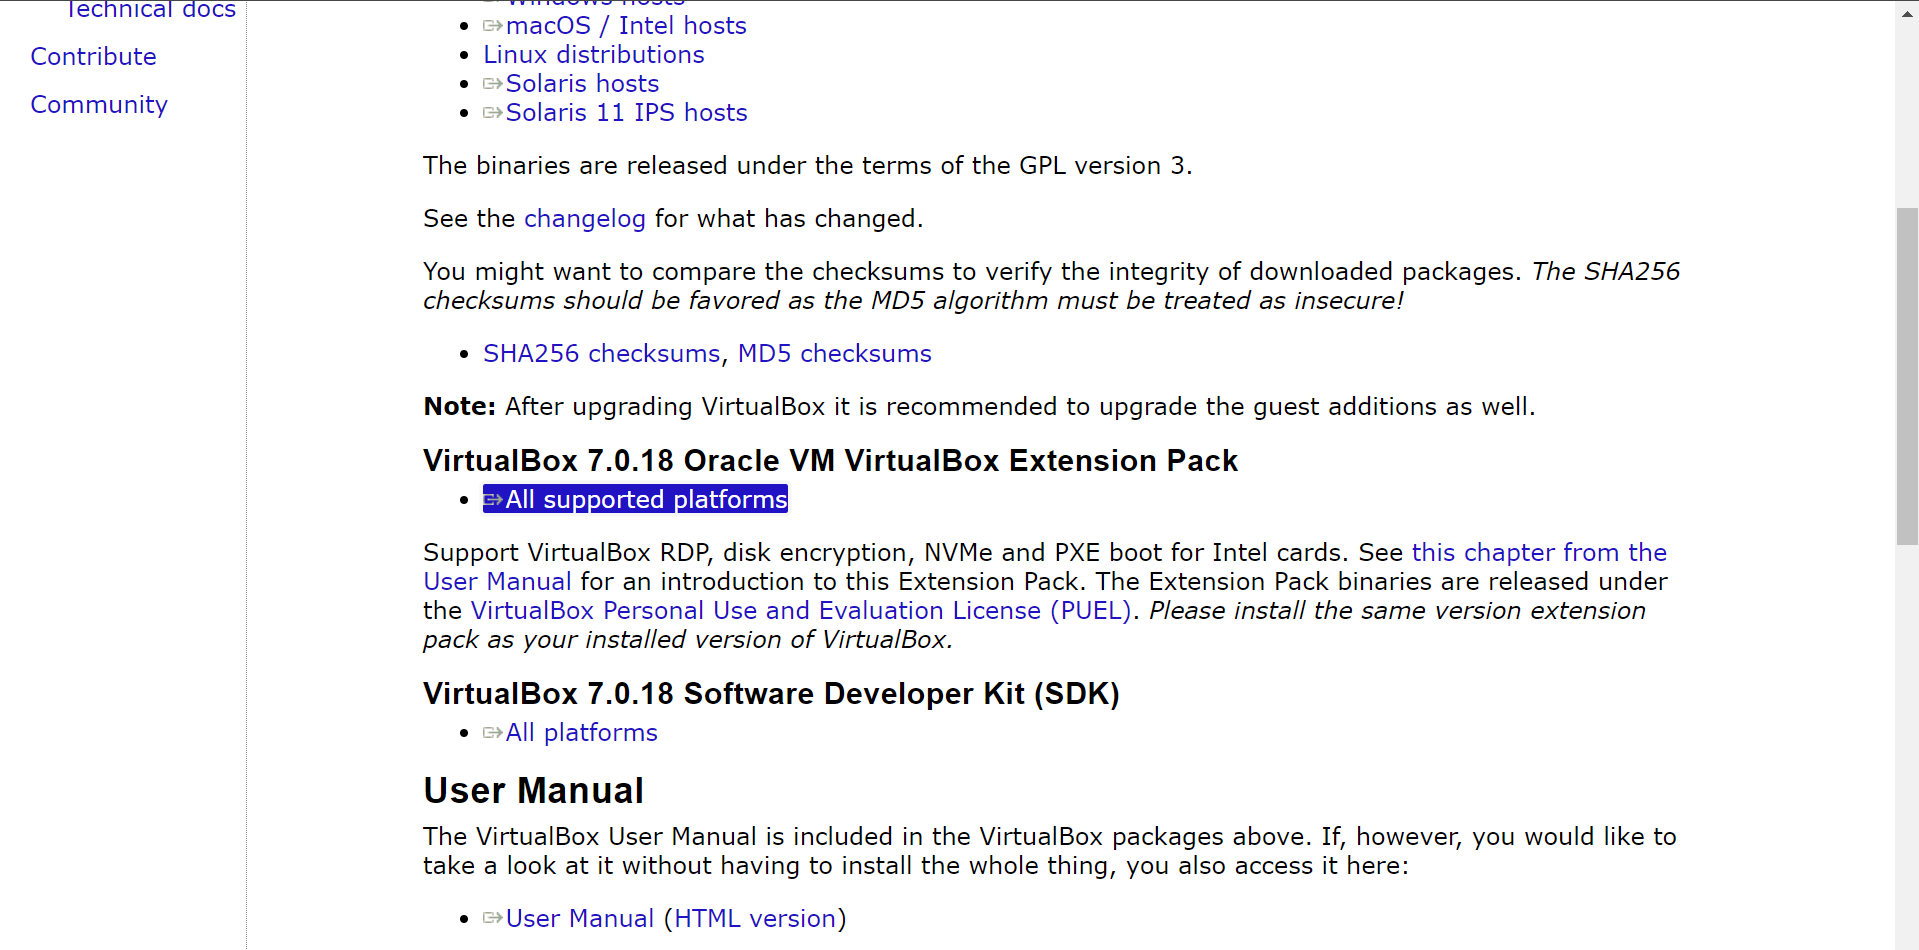
Since we will install the latest macOS version, we must also download the VirtualBox extension pack. To do this:
- Head back to the VirtualBox website.
- Navigate to the “Downloads” section.
- Download the extension pack under the “VirtualBox 7.0.18 Oracle VM VirtualBox Extension Pack” heading.
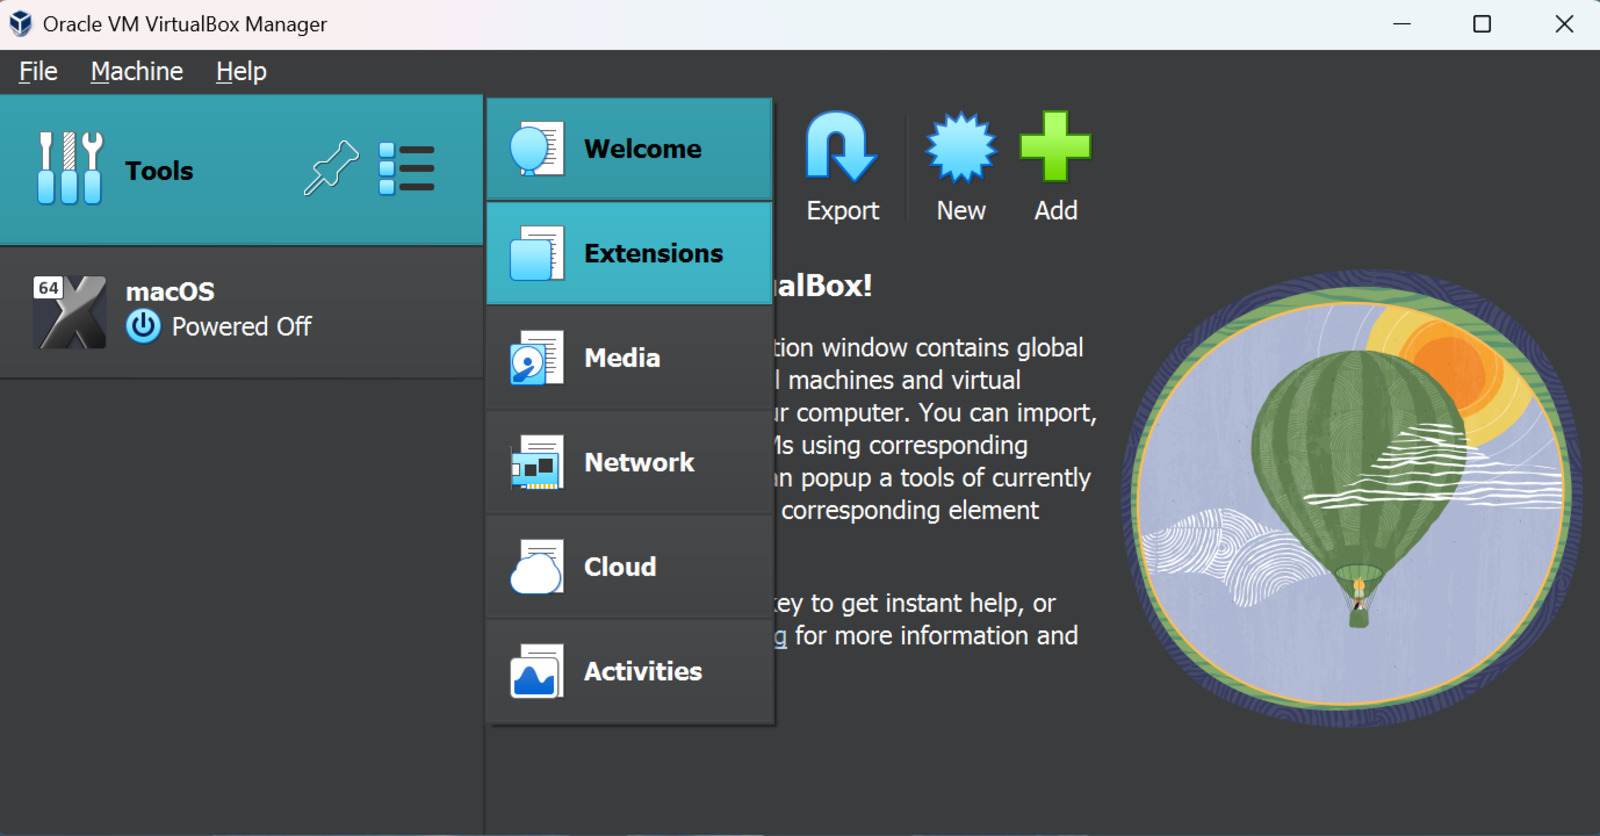
- Open the VirtualBox app.
- Click on the menu icon beside the “Tools” button.
- Select “Extensions” from the drop-down menu.
- Click on “Install.”
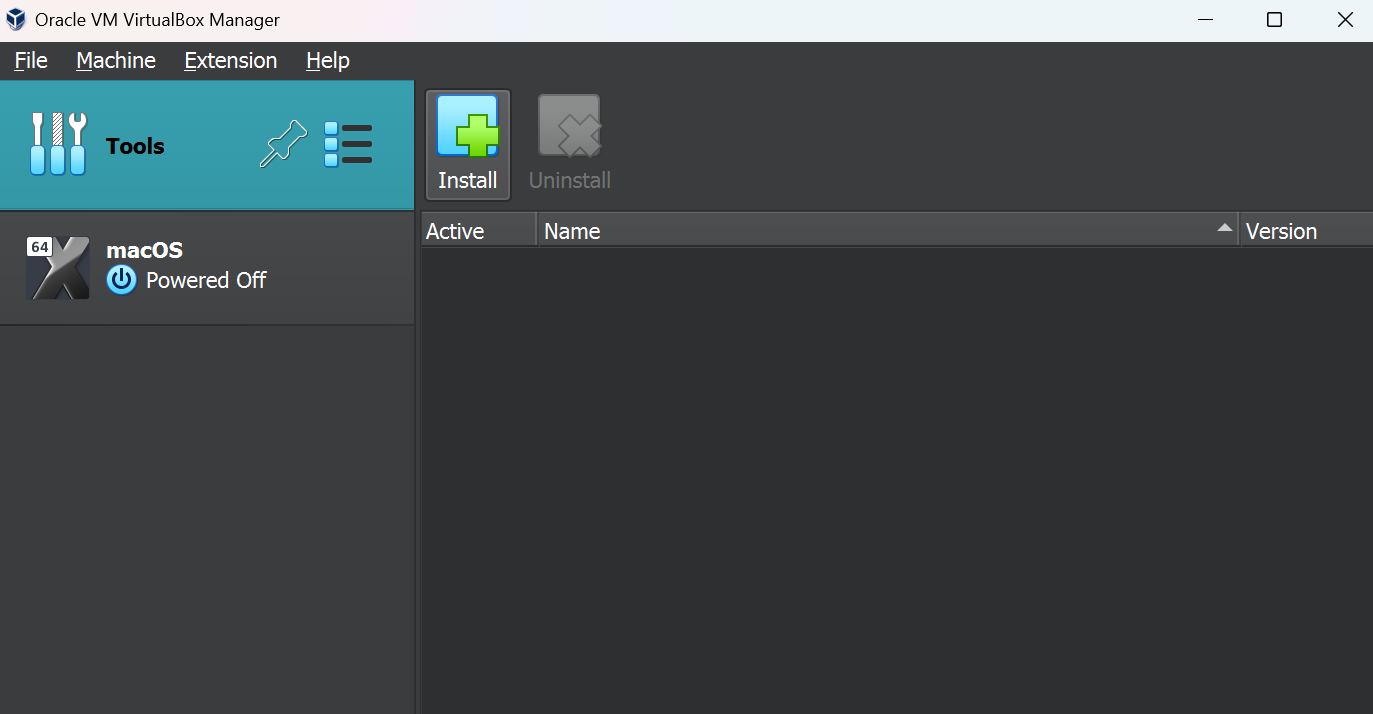
- Locate your installed file.
- Go through the setup process.
Step 2: Download macOS Sonoma
People familiar with emulation know there are a couple of ways to get an ISO file. To begin with, one can use a MacBook to get the latest ROM, but this requires access to a macOS machine, which defeats the purpose of installing macOS on Windows. Therefore, websites like the Internet Archive are a logical way to get a macOS ISO file. Here is how:
- Head over to this website.

- Download the Zip file. It may take a while, depending on your internet connection.
- Unzip the ISO file and save it to a convenient location.
Step 3: Set up VirtualBox
After downloading the macOS file, the next step is to import macOS to the VirtualBox application. Here is how:
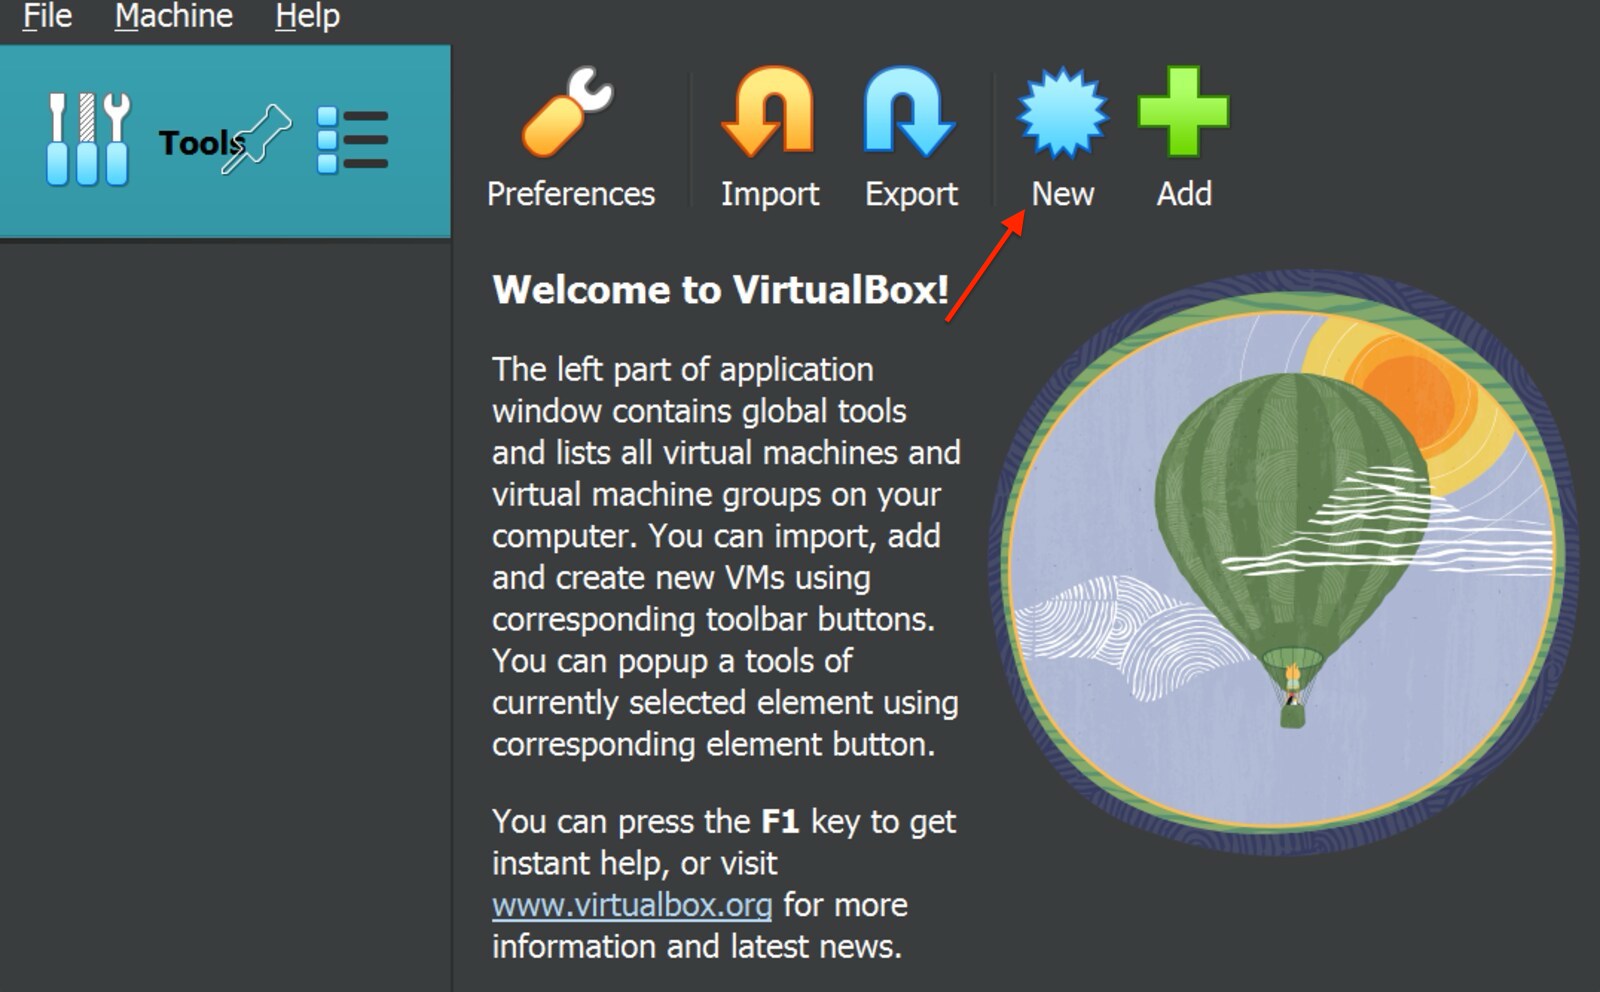
- Open the VirtualBox app.
- Click the “New” button at the top.
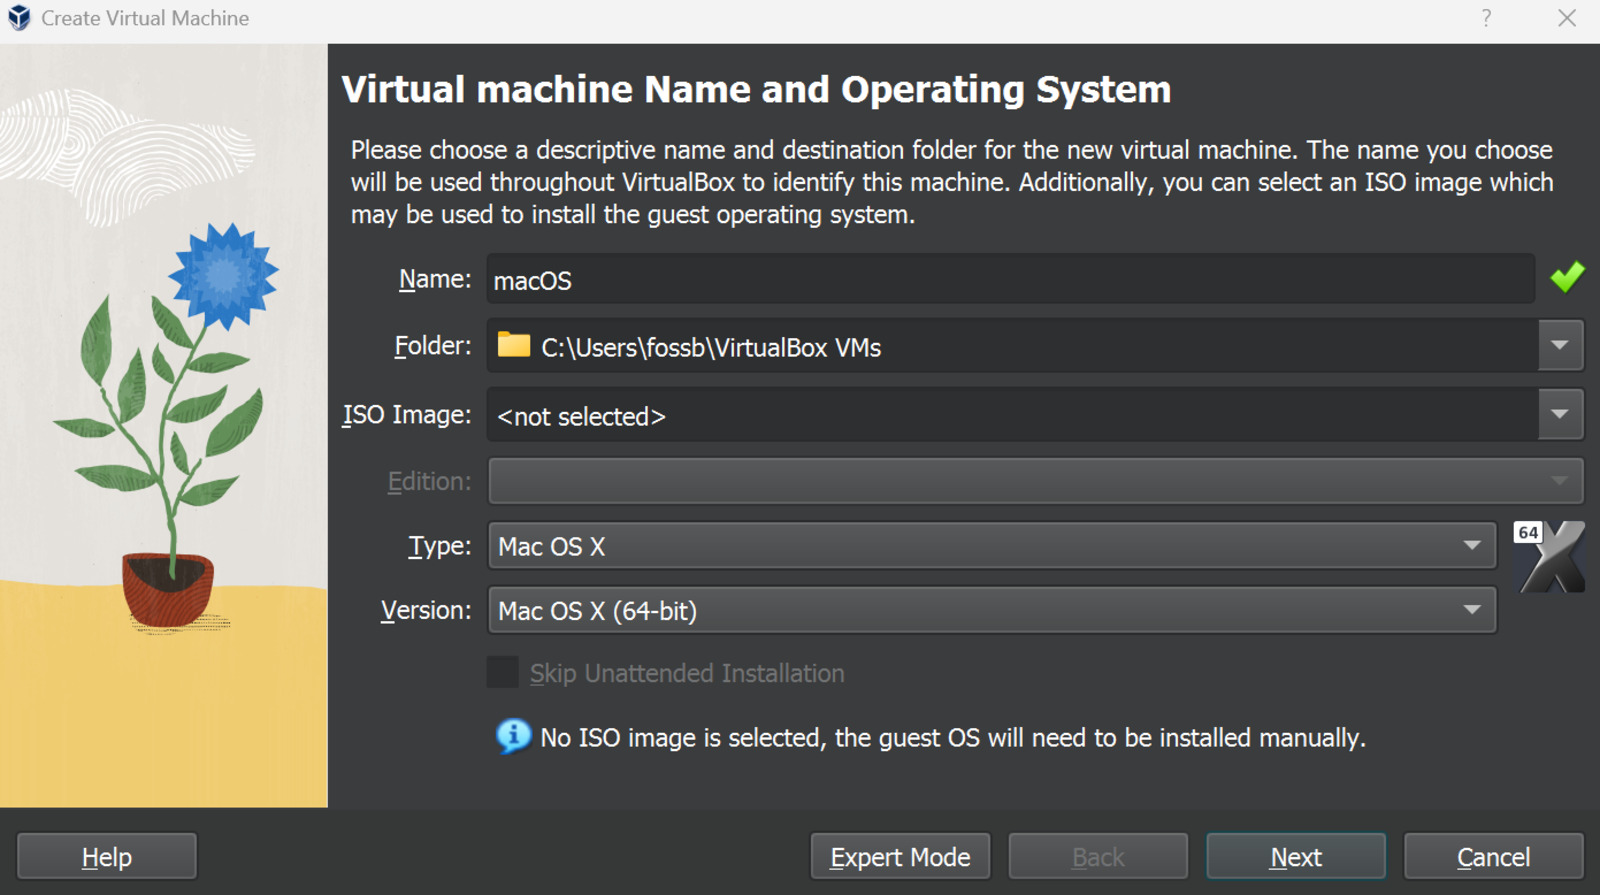
- In the dialog box, give a suitable name for your OS. We have chosen “macOS” for this example.
- After typing the name, the Type and Version options should be filled out automatically. If not, select “Mac OS X” for the Type and “Mac OS X (64-bit)” for the Version.
- Allocate the desired memory and CPU cores to the macOS file. If unsure, we recommend at least 4GB of RAM and two cores.
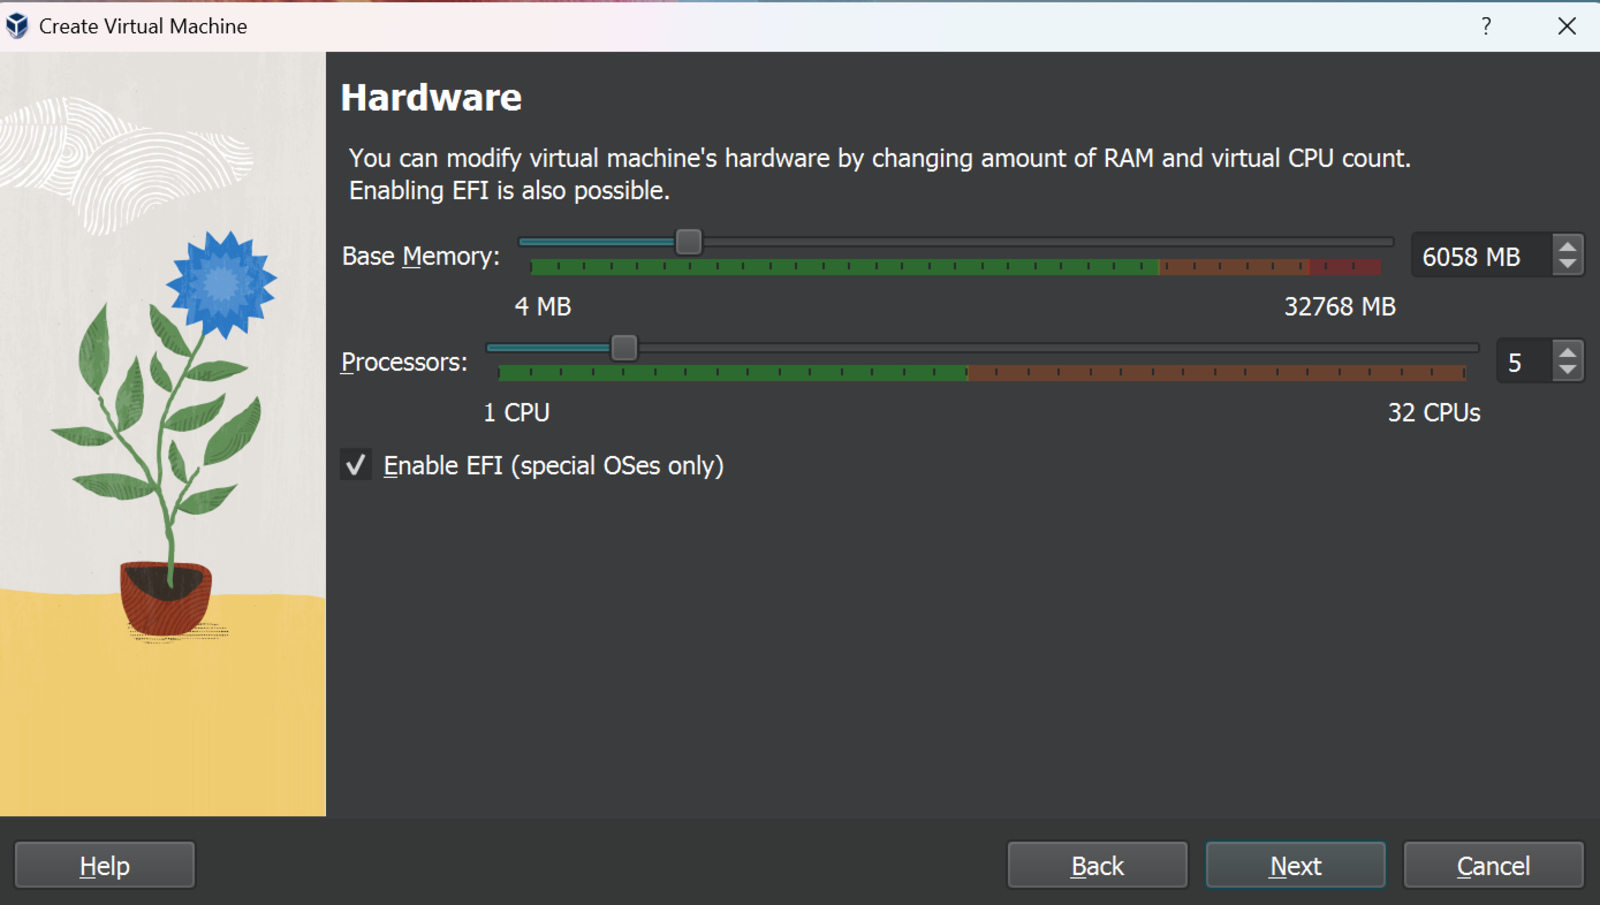
- Click “Next.”
- Configure the hard drive space for macOS on the following page. We recommend at least 35GB.
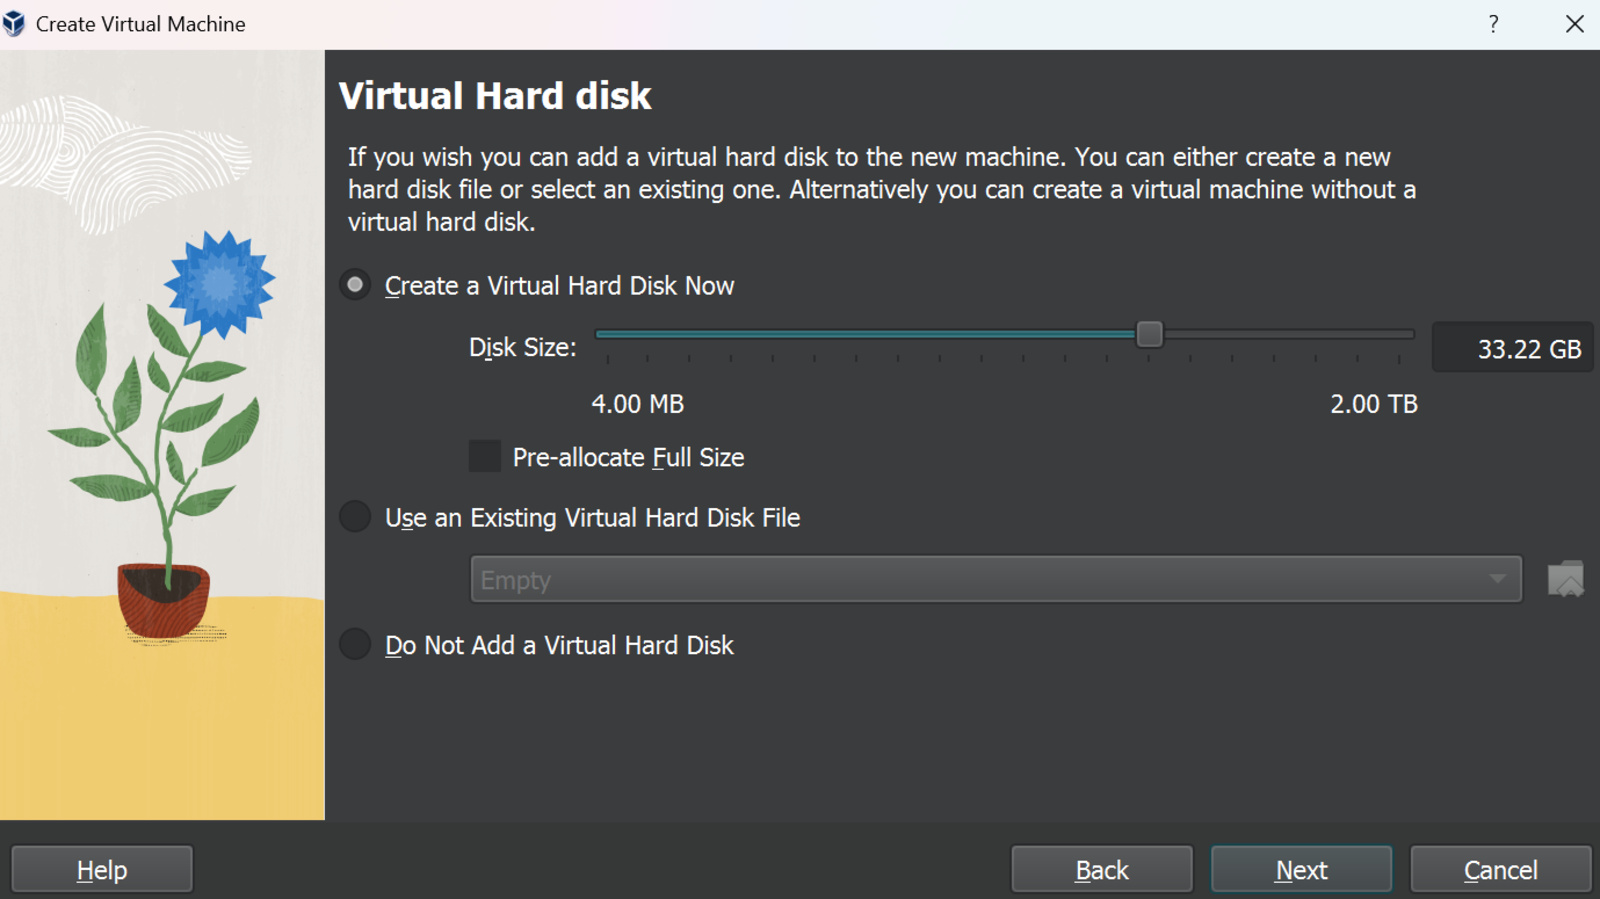
- Click “Finish.”
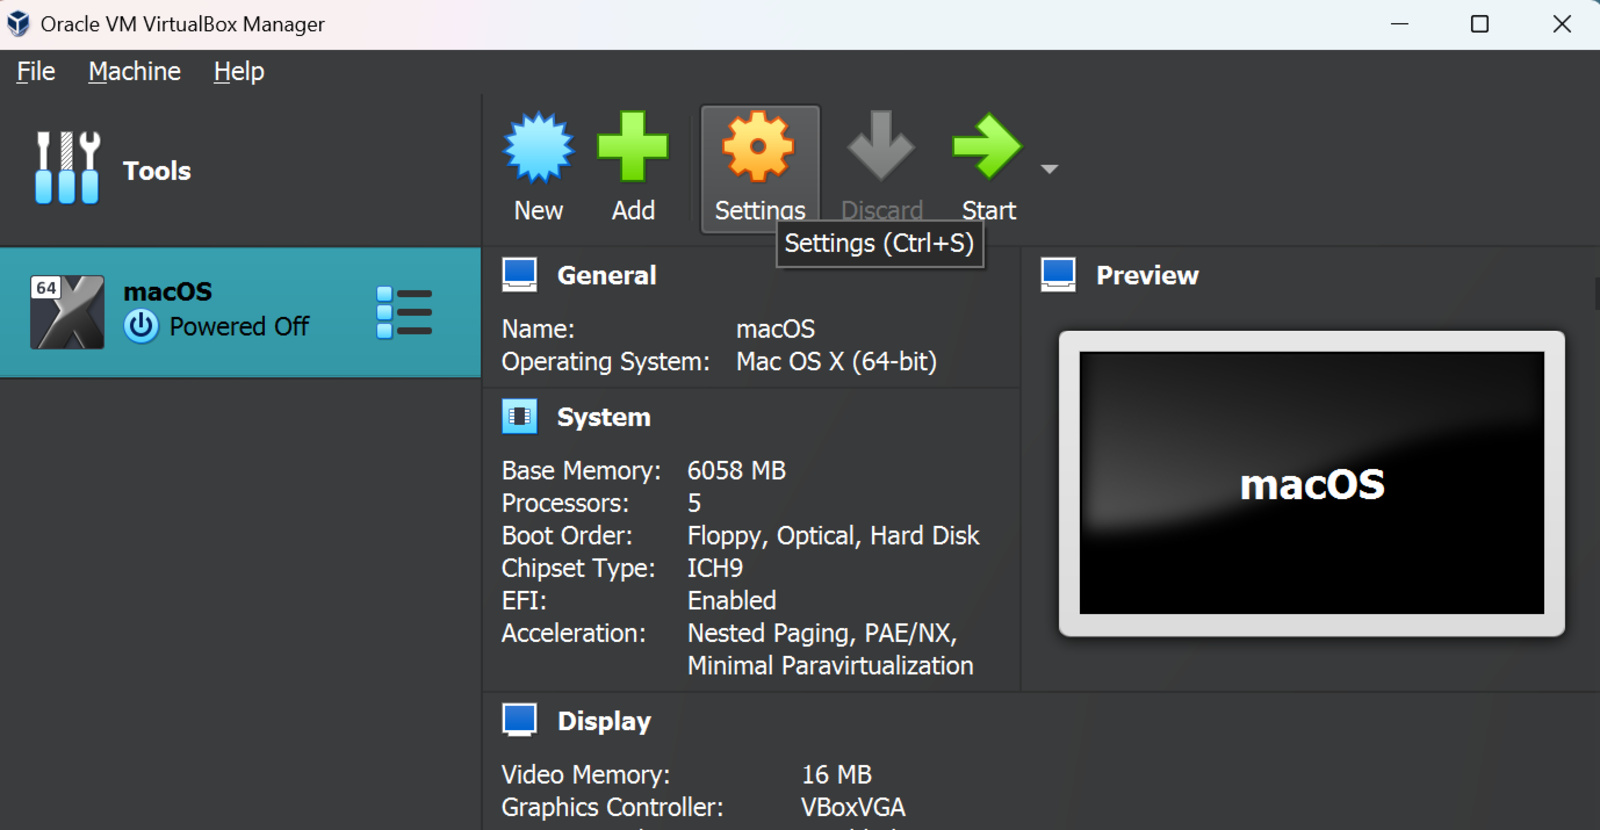
Step 4: Configure VirtualBox Settings
Before starting our macOS virtual machine, there are some settings we need to change to ensure a smooth experience:
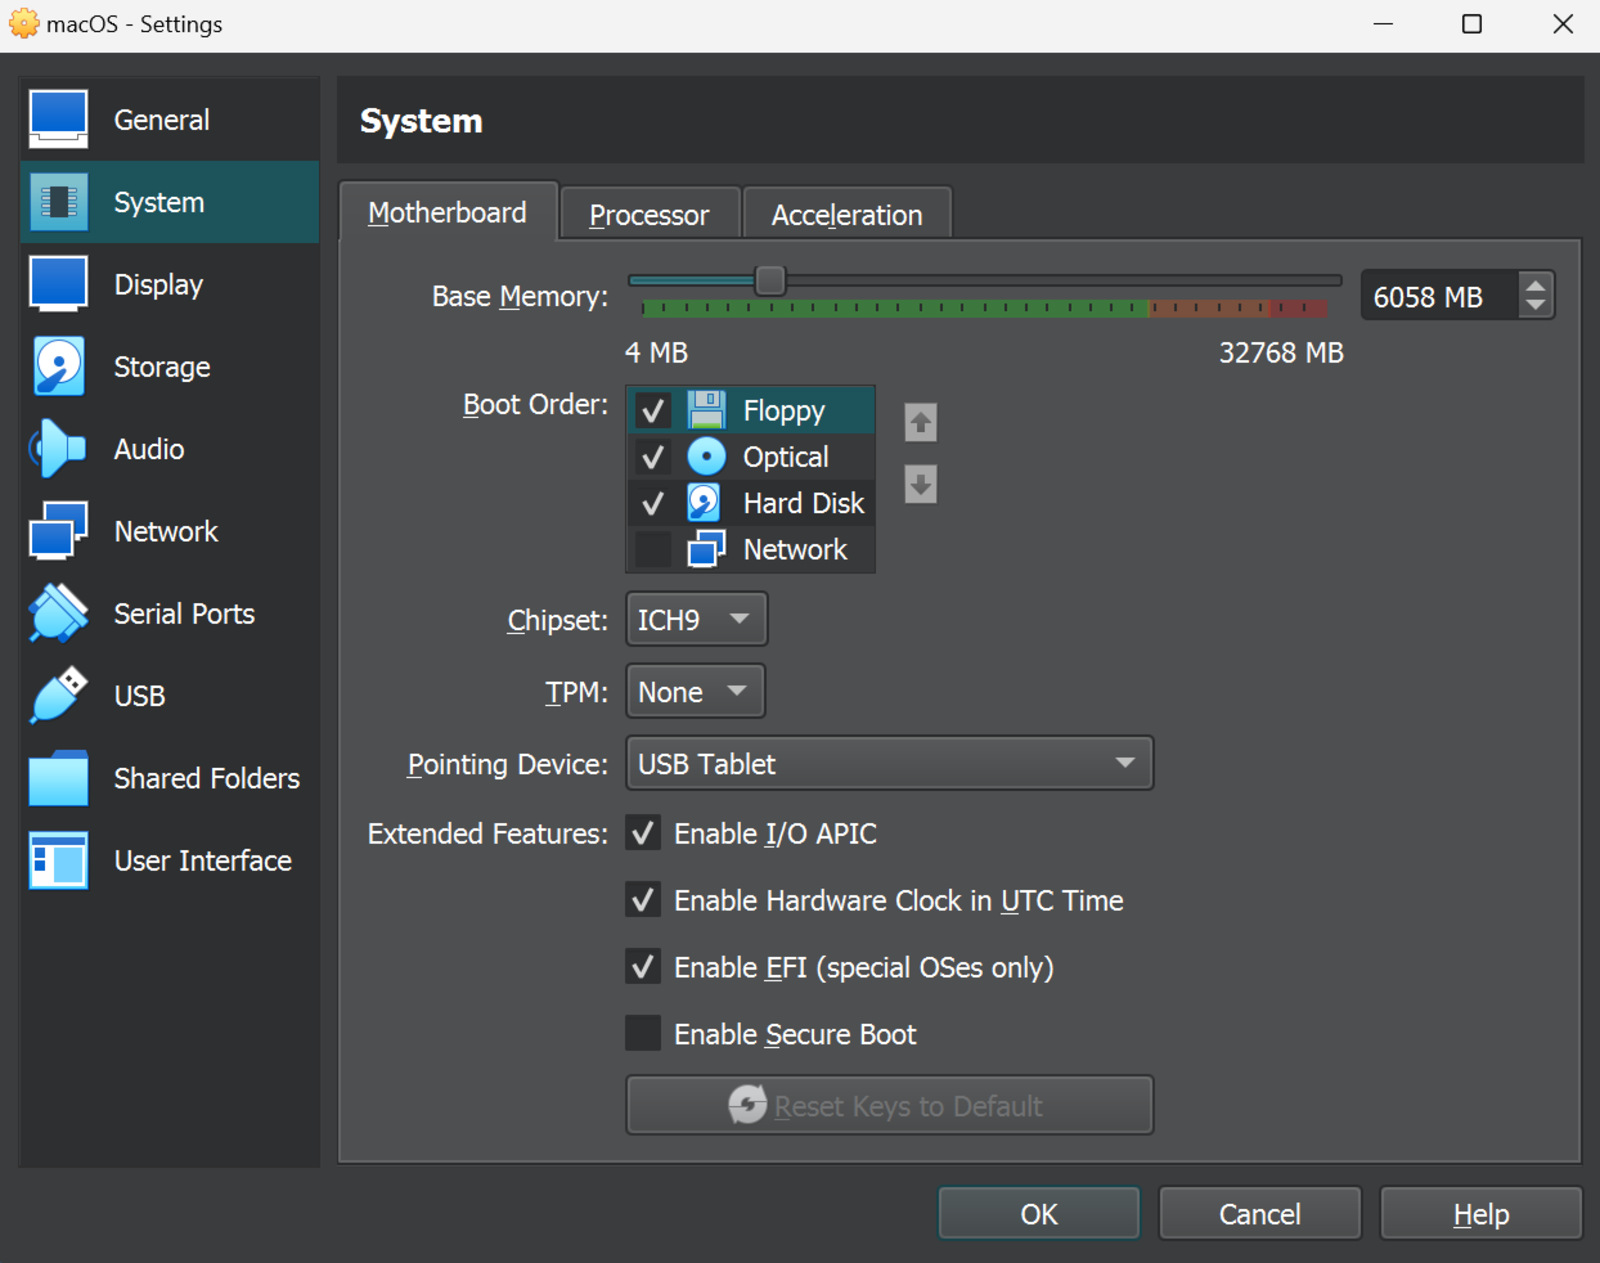
- In the VirtualBox app, open the “Settings” section.
- Change the motherboard chipset to “ICH9” in the System pane and check the “Enable EFI” box.
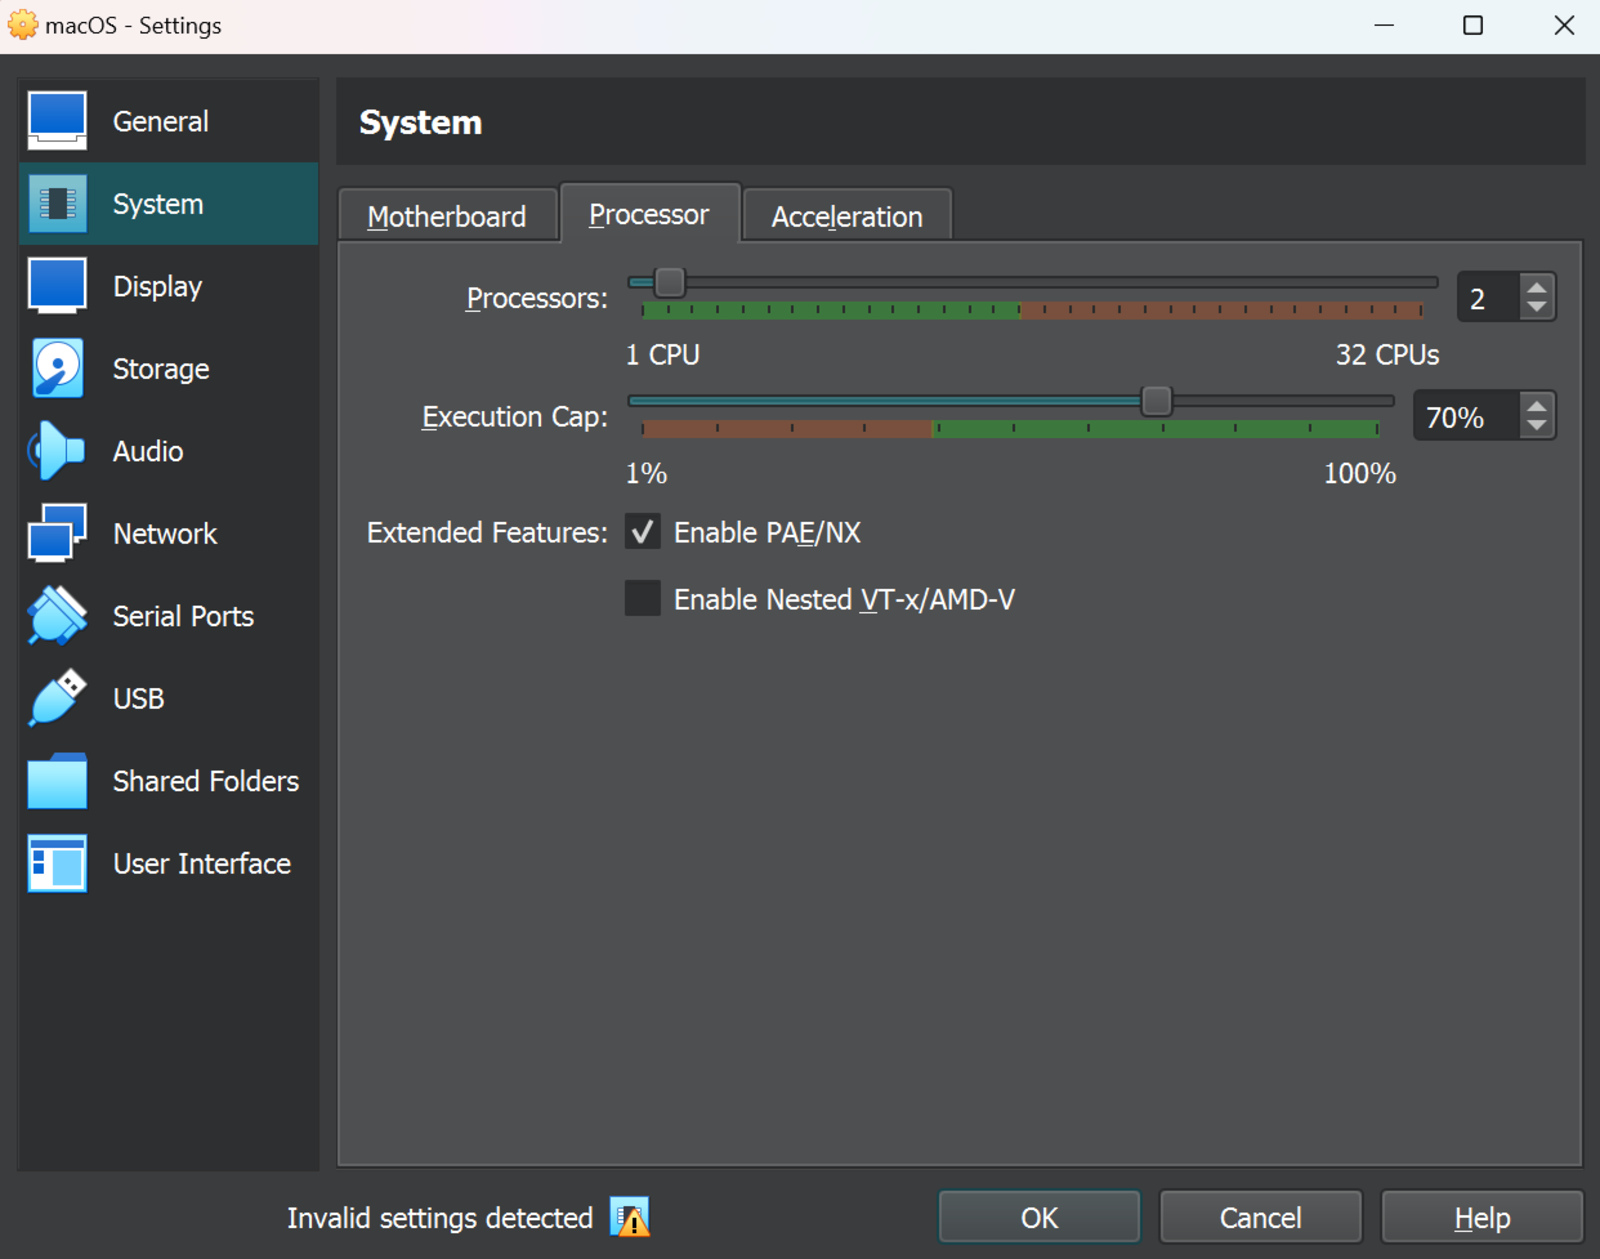
- Change the processor count to two and set the “Execution Cap” to 70%.
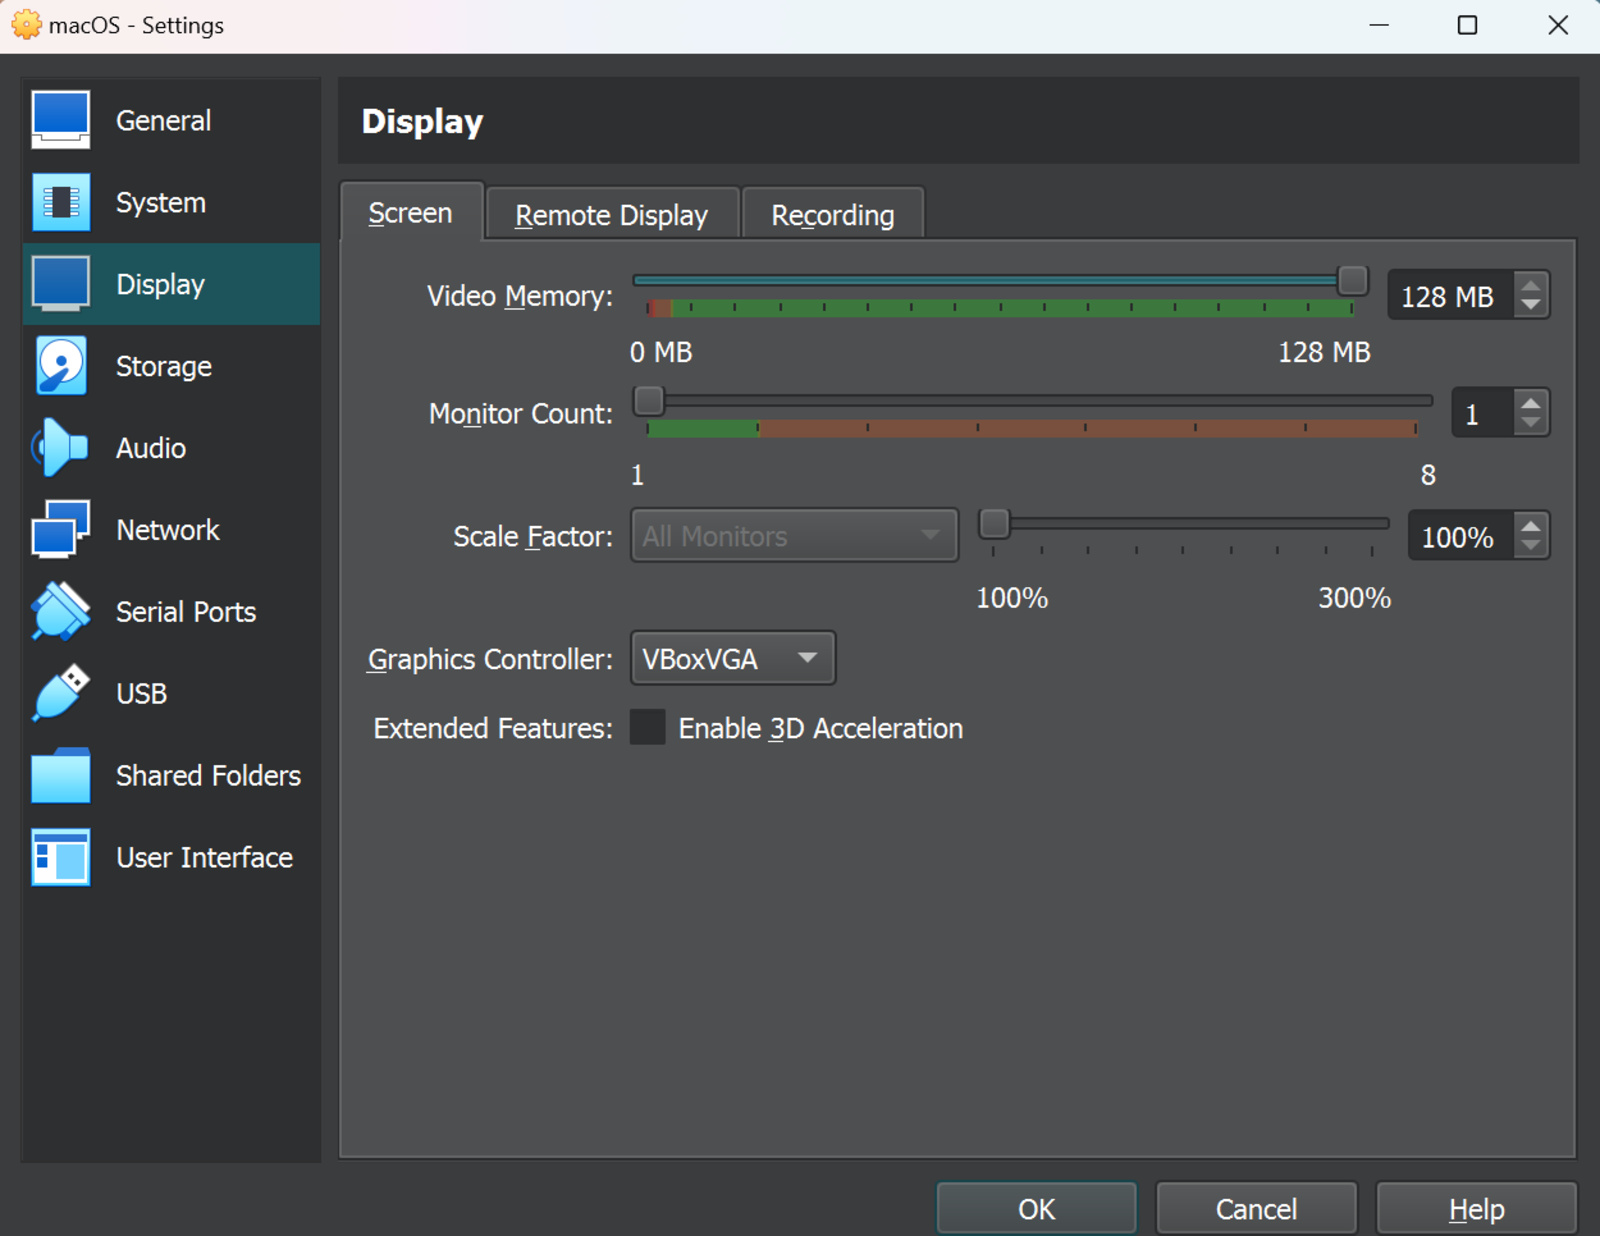
- In the “Display” section, set the video memory to “128 MB.”
- Navigate to the “Storage” section and select the “Empty” option.
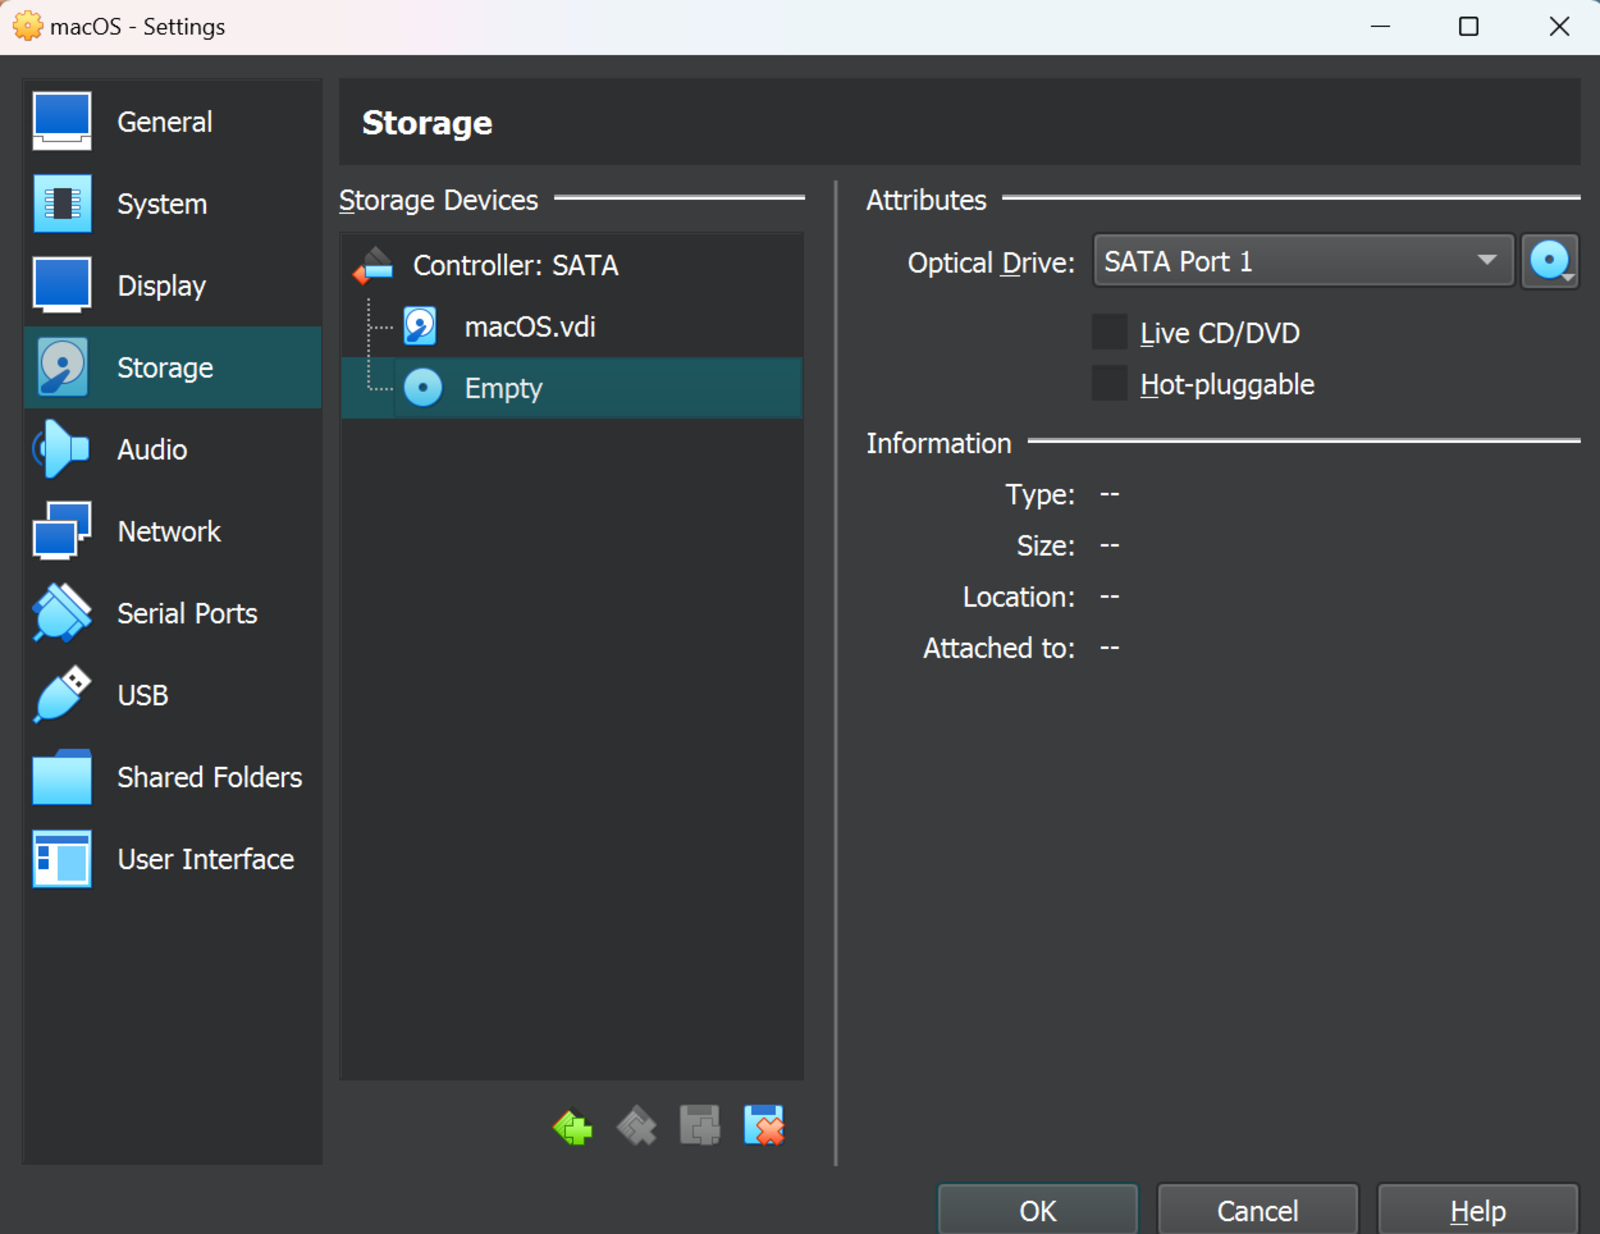
- Tap the blue dot next to “Optical Drive” and select the “Choose a file” option.
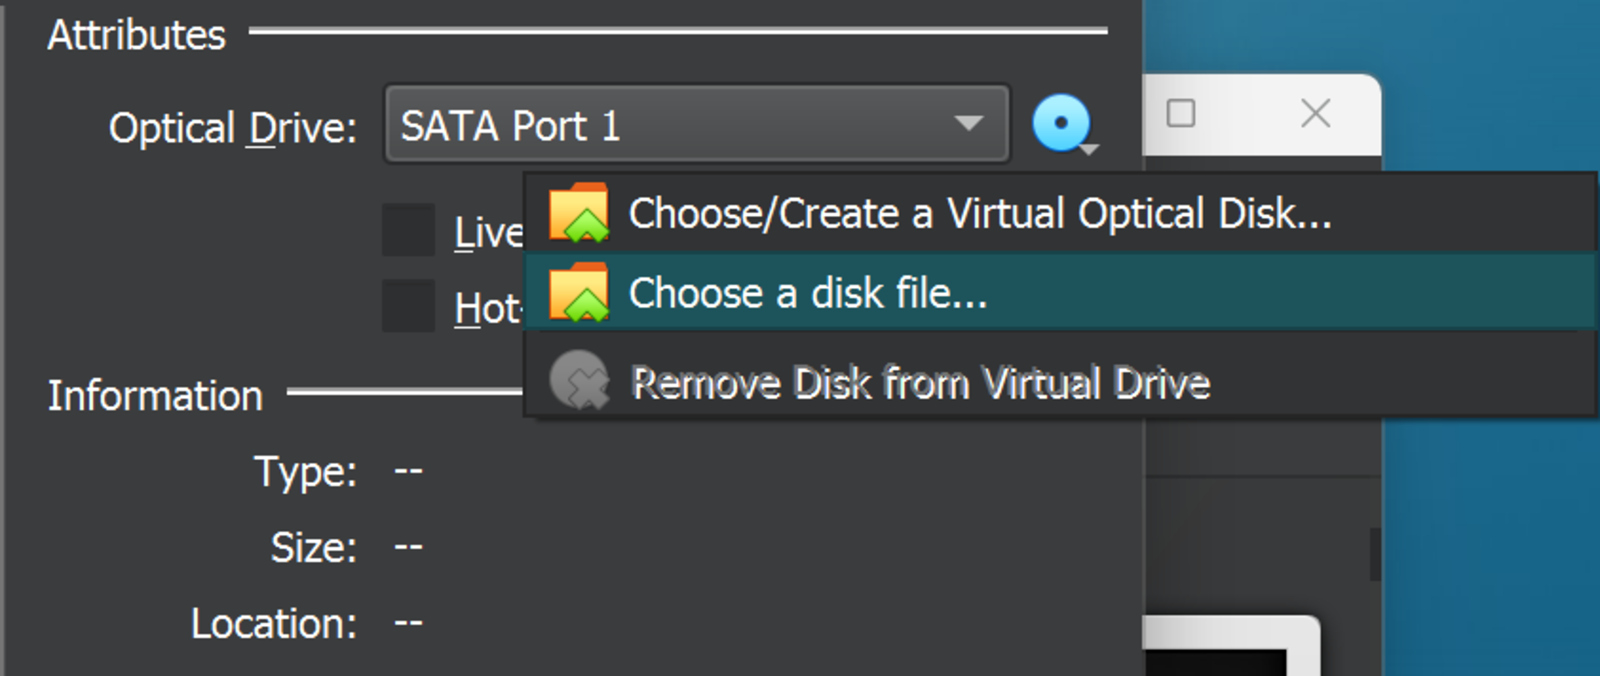
- Locate and select your downloaded macOS file.
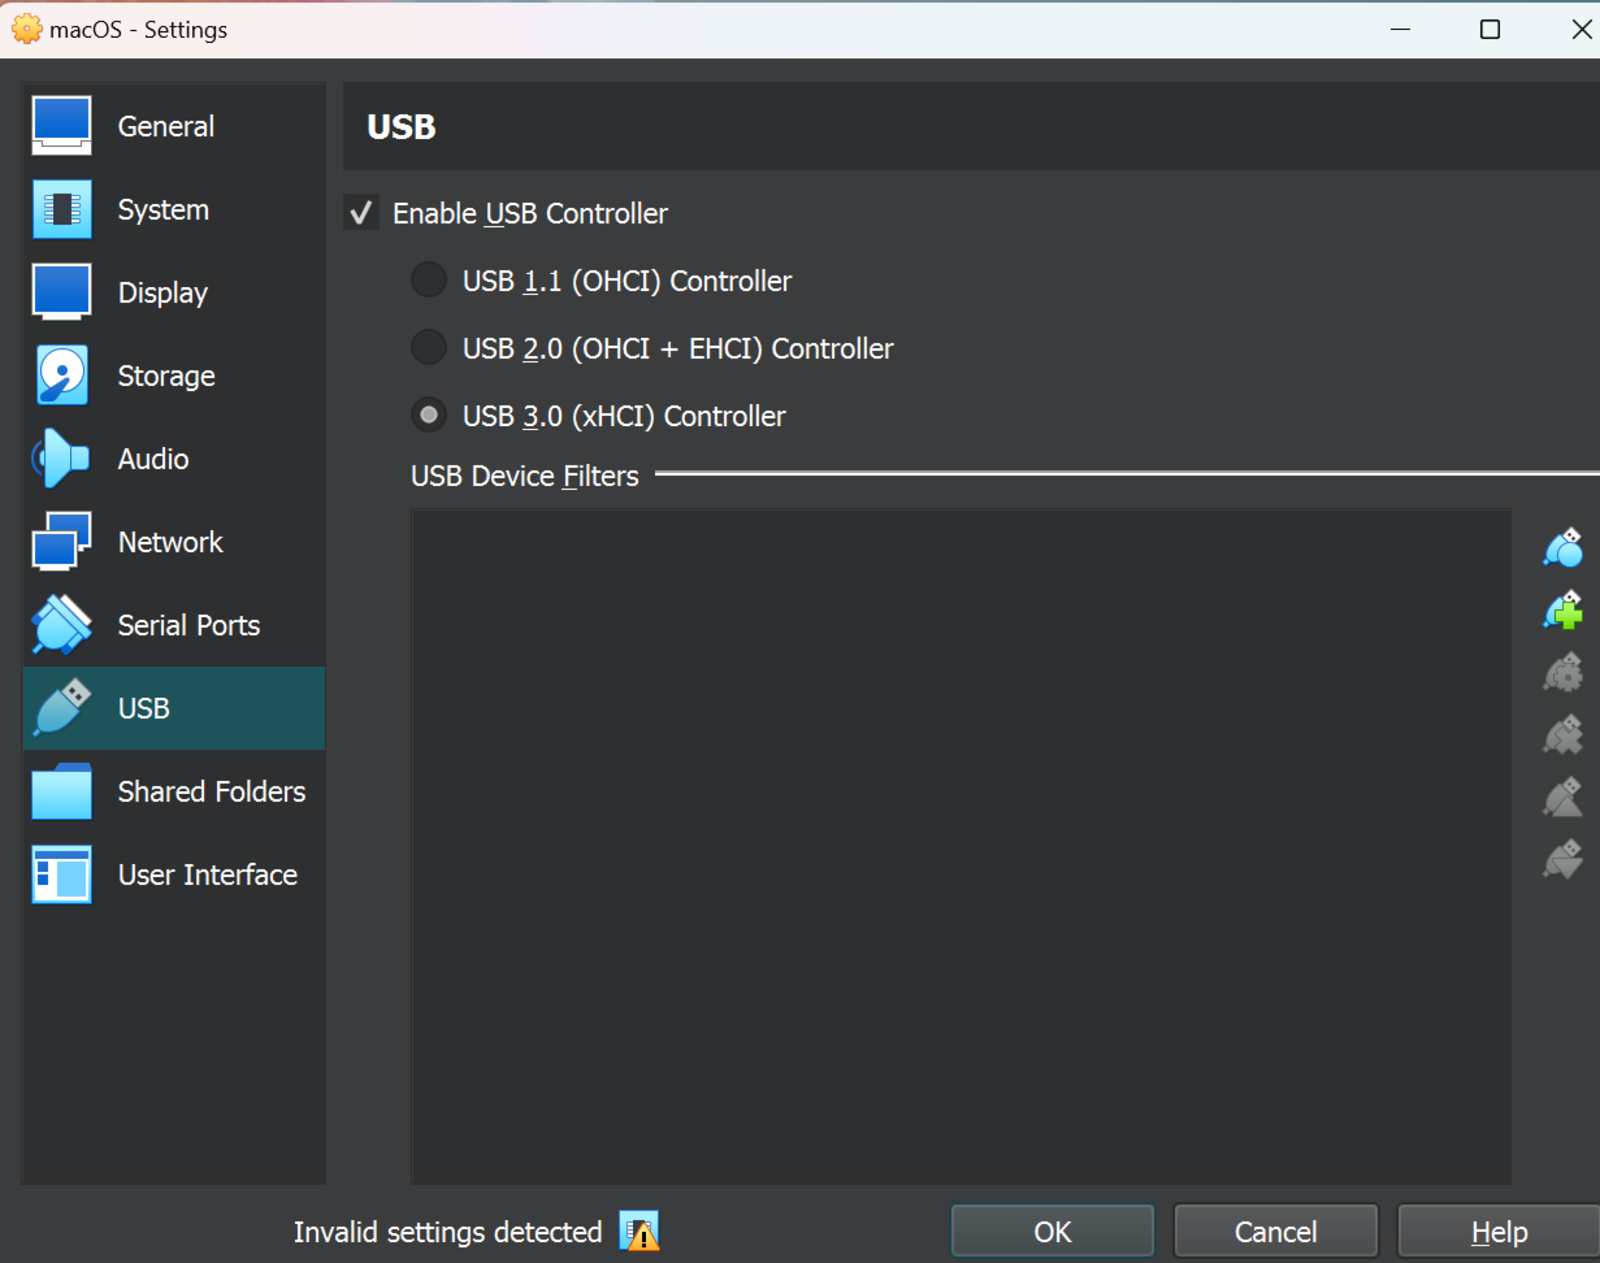
- Enable the USB 3.0 setting in the “USB” section.
We also need to make some changes through the Command Prompt to ensure that macOS recognizes the hardware as Apple Silicon. To make them, run the following commands given below. However, remember to replace “VM Name” with the name of your macOS virtual machine. Additionally, note that these commands are for an Intel-based Windows laptop.
cd "C:\Program Files\Oracle\VirtualBox\"

VBoxManage.exe modifyvm "VM NAME" --cpuidset 00000001 000106e5 00100800 0098e3fd bfebfbff

VBoxManage setextradata "VM NAME" "VBoxInternal/Devices/efi/0/Config/DmiSystemProduct" "iMac19,3"

VBoxManage setextradata "VM NAME" "VBoxInternal/Devices/efi/0/Config/DmiSystemVersion" "1.0"

VBoxManage setextradata "VM NAME" "VBoxInternal/Devices/efi/0/Config/DmiBoardProduct" "Iloveapple"

VBoxManage setextradata "VM NAME" "VBoxInternal/Devices/smc/0/Config/DeviceKey" "ourhardworkbythesewordsguardedpleasedontsteal(c)AppleComputerInc"

VBoxManage setextradata "VM NAME" "VBoxInternal/Devices/smc/0/Config/GetKeyFromRealSMC" 1
Step 5: Launch macOS
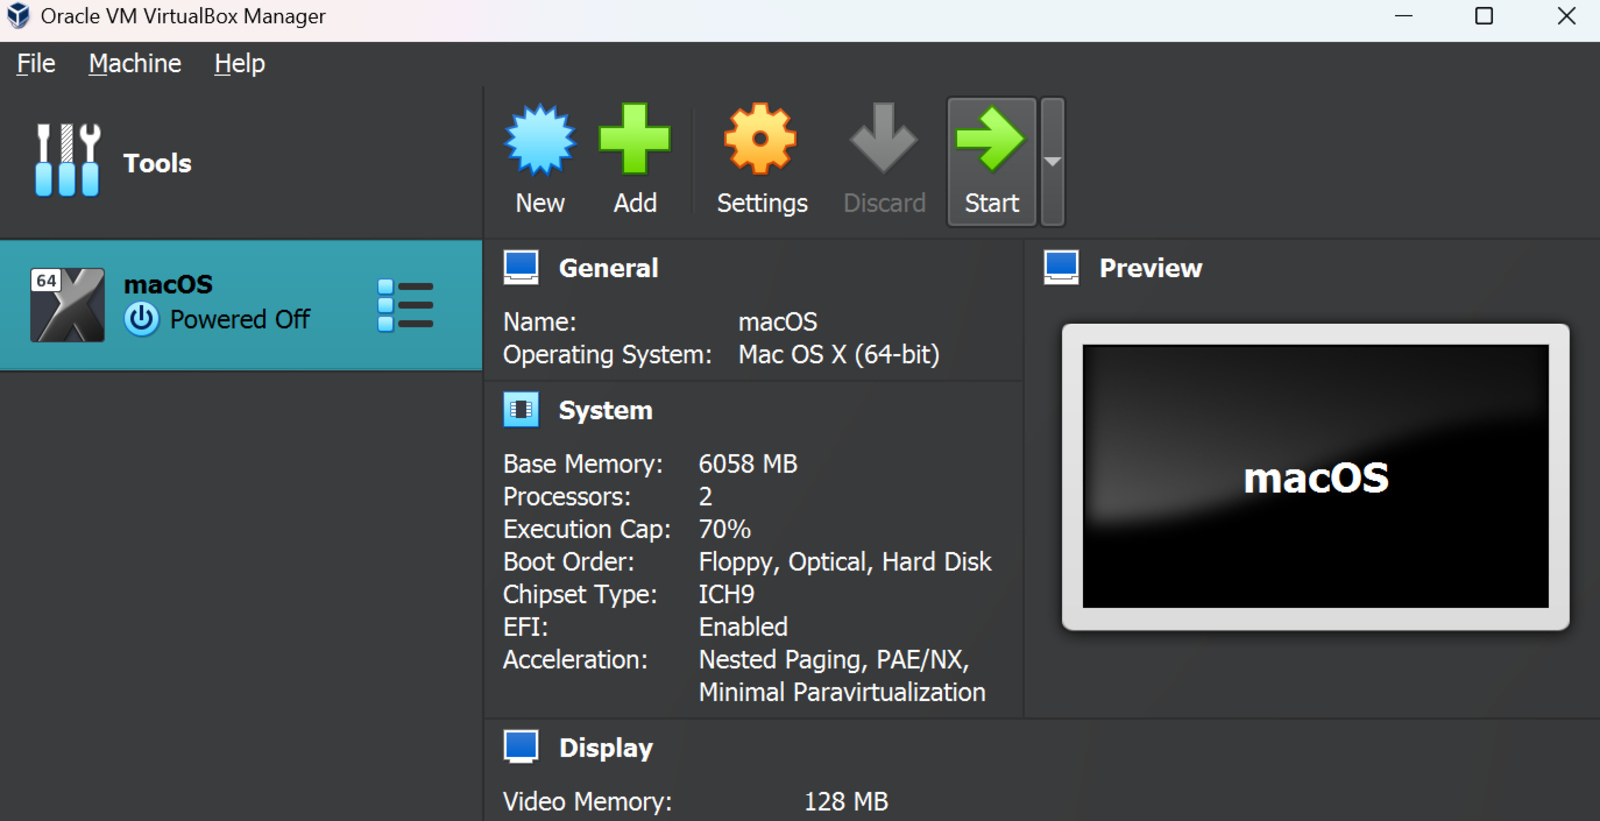
After successfully running the commands, the final step is to launch macOS. Here’s how:
- Open the VirtualBox application.
- Click on the “Start” button.
- Go through the macOS setup process.