Boring Lockscreen? Here’s How To Enable Screensavers On Windows 11
Screensavers have stuck around for quite a while. Since the Windows XP era, most people have enjoyed fiddling around with different screensavers to put on their computers. Likewise, it was wise of Microsoft to keep an option for screensavers even in their latest release of Windows i.e. Windows 11.
The need for screensavers rose when the world used CRT monitors on their PCs. Hence, to avoid image retention and burn-in, screensavers were used. Although, they became quite popular in very little time. Let us have a look at how to enable and set a screensaver in Windows 11.
Enable screensavers on Windows 11
You can easily enable screensavers on Windows 11 using the Setting app. Here’s how to do the same in a few easy steps.
1. Firstly, open the Start menu and open Settings. Alternatively, you can use the shortcut Windows + I to open Settings.
2. From the left sidebar, click on the Personalization button. There, click on the Lock Screen tab to open its respective settings.
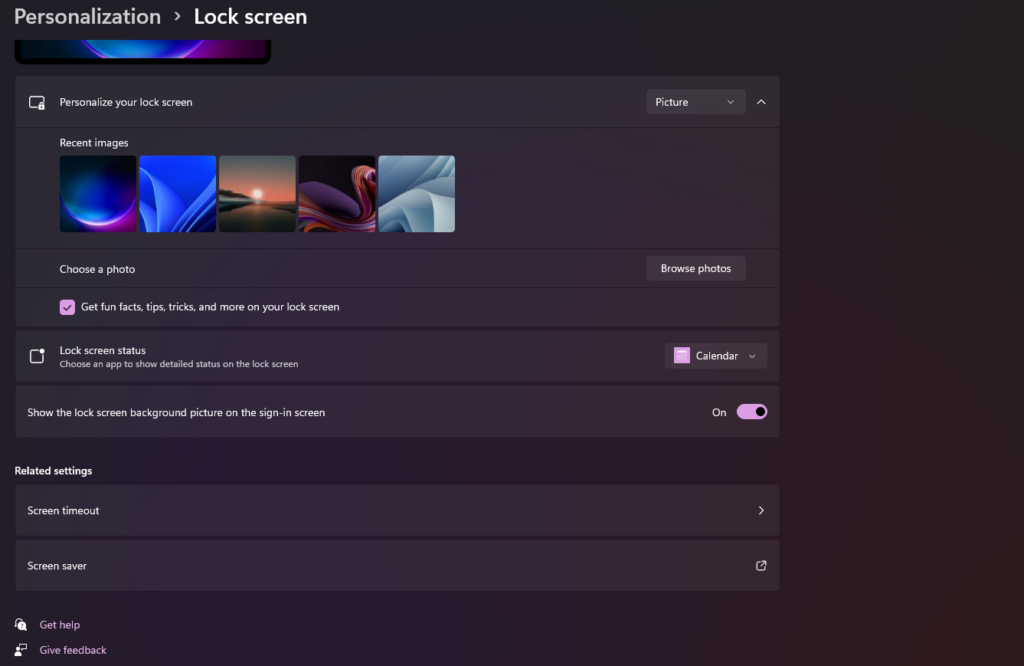
3. On the Lock Screen page, you’ll see a Screen saver option. Click on it to continue.
4. Further, a window will open displaying the Screensaver options.
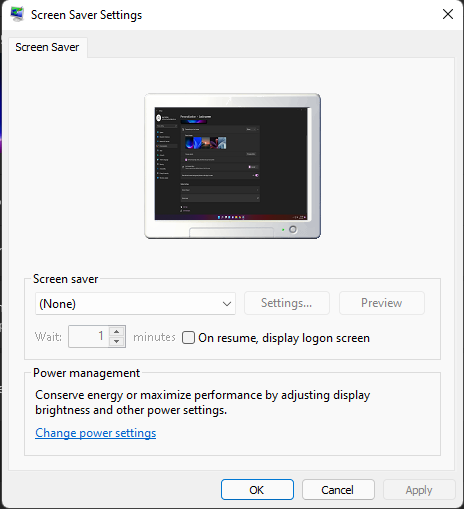
Note: You might find this newly-opened window familiar as it looks the same as it has since the Windows XP era.
5. Now, the default screensaver will be set to none since Windows doesn’t display a screensaver. You can choose one from the drop-down menu. Windows provides various options to choose from including Bubbles, 3D text, blank, mystify, ribbons, and photos.
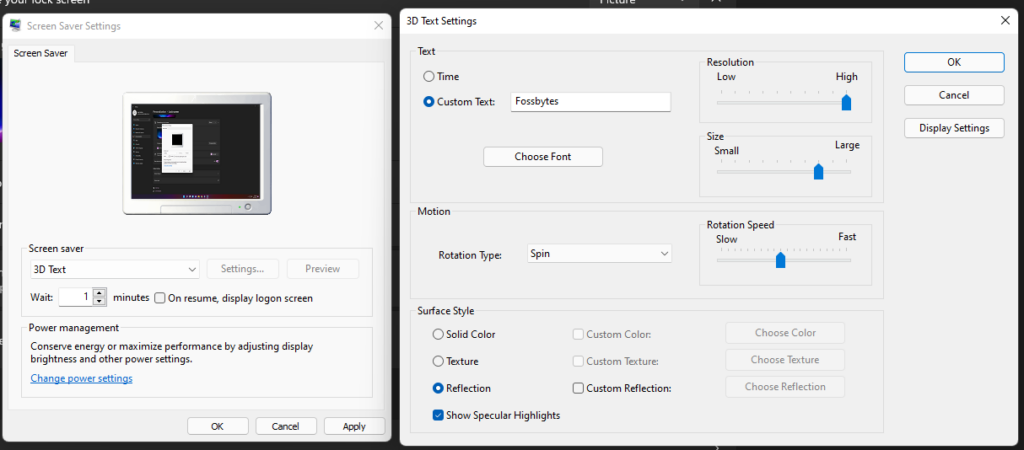
6. If you’ve chosen Photos or 3D text, you can click on the Settings button next to the drop-down menu to configure both of them. You can choose from which set of photos the Screensavers will display from your computer, and change what the 3D text will be and its styling.
7. Finally, you can preview your screensaver to see how it will look like. When you’re done, click on OK.
And that’s it. Changing screensavers is as easy it was before. Make sure to check our useful Windows 11 guide.