How To Cancel iCloud Storage Plan?

Canceling an iCloud storage plan can help you save money if you no longer need the extra space. Whether you’re switching to another service or just reducing your storage needs, the process is straightforward. By default, Apple gives you 5 GB of iCloud storage space when you create an Apple ID account.
If you ever want to cancel an upgraded plan and go back to the free 5 GB, you can do that from your mobile device, Mac, or Windows PC. This guide will walk you through the steps to cancel your iCloud storage plan on your Apple device, making it easy to manage your storage options.
Steps to Cancel this Plan
1. Check Your Current Storage Plan
- Open Settings: On your iPhone or iPad, go to the “Settings” app on your home screen.
- Tap on Your Name: At the top of the Settings menu, you will see your name and Apple ID. Tap on it to open your Apple ID settings.
- Select iCloud: Here, you will see the details of your current iCloud storage plan.
2. Access Manage Storage
- Tap Manage Storage: Within the iCloud settings, scroll down until you find the option labeled “Manage Account Storage.” Tap on it to proceed.
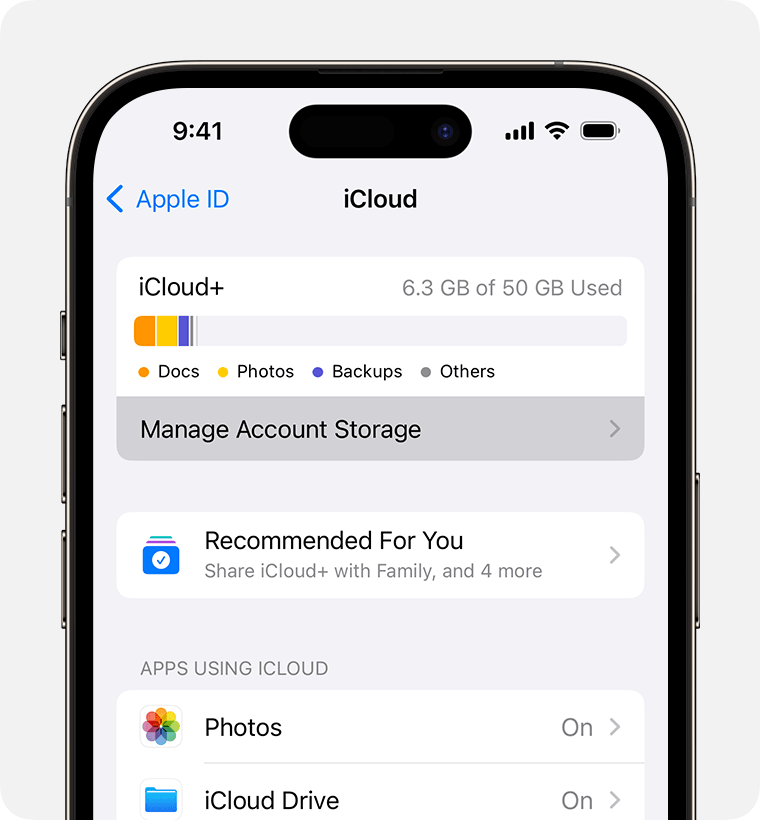
- View Storage Details: This section provides a detailed breakdown of your storage usage. Additionally, you will find a list of available storage plans and their costs.
3. Change Storage Plan
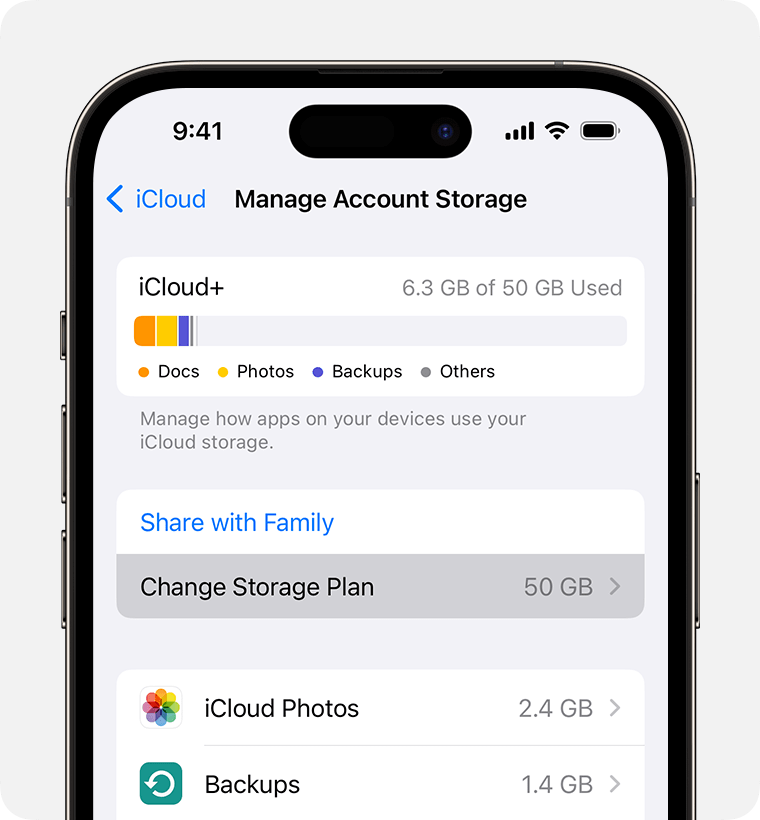
- Select Change Storage Plan: In the “Manage Storage” or “iCloud Storage” section, look for the option that says “Change Storage Plan.” Tap on this option to proceed. This will open a list of available storage plans, including options to upgrade, downgrade, or cancel your current plan.
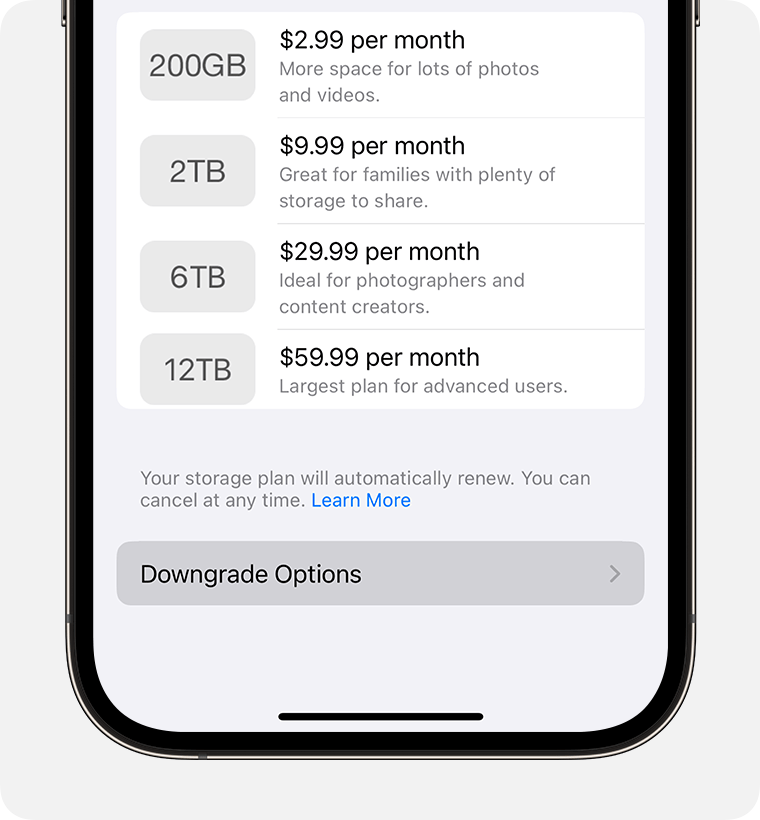
- Downgrade Options: At the bottom of the list of available plans, you will see a section labeled “Downgrade Options.” Tap on this option. This will take you to a screen where you can choose the free 5 GB plan or any lower-tier plan that suits your needs.
4. Confirm Downgrade
- Enter Apple ID Password: For security purposes, you will be asked to enter your Apple ID password. Type in your password and tap “OK” or “Sign In” to proceed.
- Select Free Storage Plan: You will see a list of available storage plans. Scroll down and select the “Free” 5 GB plan to cancel your current paid plan.
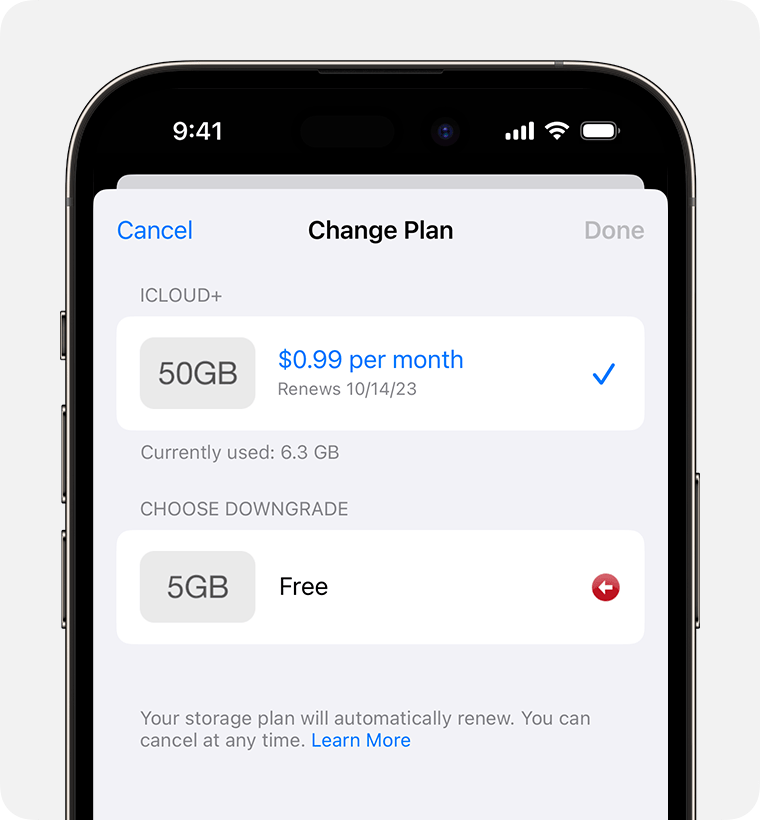
- Confirm: Tap on “Done” or “Confirm” to finalize the downgrade. You will receive a confirmation message confirming that you have successfully downgraded your storage plan.
What to Expect After Downgrading?
Once you downgrade, your data needs to fit within the 5 GB free limit. If you have more data than this, some of it may no longer be stored in iCloud. Therefore, you may need to delete files you don’t need or move some of your data to a different storage option. This helps make sure all your important data is backed up properly.

