How To Fix TPM 2.0 Error When Installing Windows 11?

After the Windows 11 build leaked, people rushed to download the ISO on Virtual Machines and PCs. While most of them succeeded in installing the same, some were left with a TPM 2.0 error. If you’re one of them, let’s look at how you can bypass this error and start using Windows 11.
TPM stands for Trusted Platform Module for starters, which provides additional hardware-based security built inside the processor. By trying to install Windows 11 on a computer without TPM 2.0, you’ll get the following error “This PC can’t run Windows 11. The PC must support TPM 2.0.” You might get this error if you have a PC with Intel’s 4th gen or above processor or if TPM and secure boot are disabled in your BIOS settings. Stick until the end because we also have a way to run it on PCs with Intel 4th gen or below processors.
TPM 2.0 Windows 11 Error Fixed
Enable Secure Boot And TPM In BIOS Settings
If your PC meets the minimum spec requirements, it’s highly possible that the error appears because Secure Boot and TPM are disabled in your PC’s BIOS settings. However, they can be enabled easily. All you need to do is follow the given steps.
1. Shut down your computer.
2. Press the power button and while you’re at it, also press the designated key to enter into the BIOS settings. The key to enter BIOS depends on the make of the PC/Laptop. For our HP computer, it’s F10. You can also refer to the user manual or look it up on the internet to find the BIOS settings key for your computer. You can also try pressing all the function keys.
3. Once you’re into the BIOS, head over to boot options using the arrow keys, find “Secure Boot” and enable it if it’s not already enabled.
4. Next up, head over to the ‘Security’ section and enable every option that reads “TPM” or “Security Chip.”
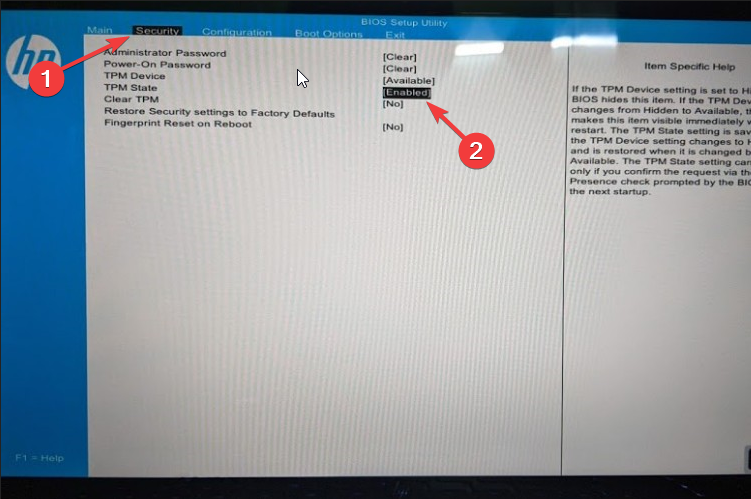
5. Remember that not all BIOS menus look the same. The location of the options could also be different depending on where the device manufacturer.
6. Once done, you should have no issues booting into Windows 11.
Replace The appraiserres.dll File
1. Head over to this link and download the appraiserres.dll file. This file is from a Windows 10 ISO. Since Windows 10 doesn’t check if a computer has a TPM 2.0 chip, we essentially replace this file with the one in Windows 11.
2. If you’re on Windows, mount the Windows 11 ISO (Right-click on the ISO and click on Mount). If you’re on Linux, open the ISO using an archive manager.

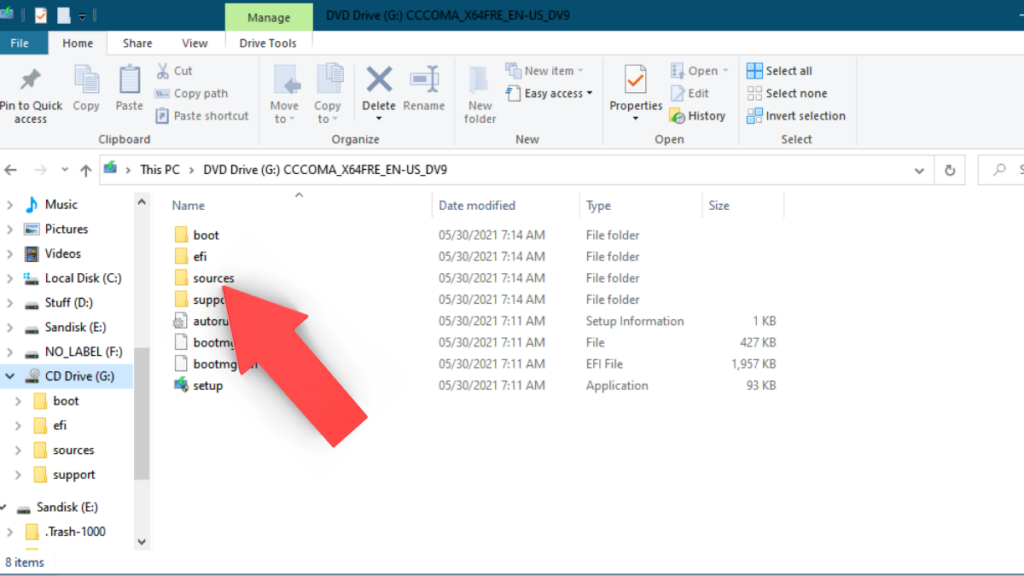
3. After mounting/extracting, head inside the extracted ISO and go to the sources folder.
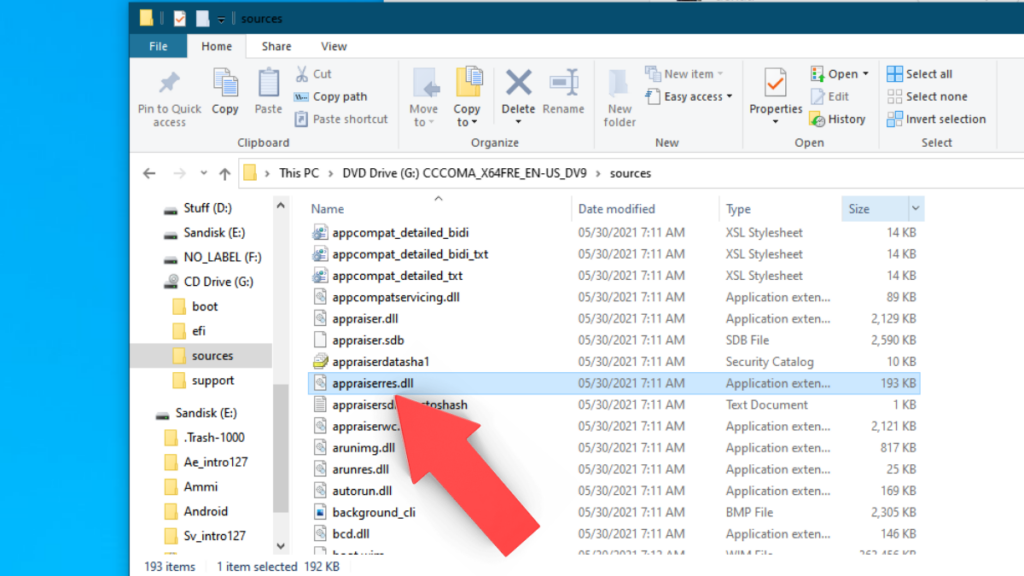
4. Find the appraiserres.dll file and delete it. Copy the appraiserres.dll file that you downloaded and paste it into the Windows 11 ISO.
5. To convert the extracted ISO folder back to an ISO on Linux, all you need to do is open the terminal, type this command, and hit enter.
genisoimage -o "what you want to name your iso"iso "Directory of the file"For example, genisoimage -o Windows11.iso /Desktop/Windows-11
Now, try installing Windows 11 on your PC or VM, and it should work. Also, the basic requirements for installing windows 11 requires a system to support Secure Boot. Learn how to enable/ disable Secure Boot In Windows 10, 8.1, 8, 7 here!
What do you think of Windows 11? What do you think might’ve triggered Microsoft to release Windows 11 after declaring that Windows 10 would be the last version? Here are our thoughts about the same.
Do you think the upgrade to Windows 11 will be free? Share your opinions and feedback in the comments section below.


![How To Watch “Black Bullet” Anime Online [For Free]](https://fossbytes.com/wp-content/uploads/2022/06/watch-black-bullet-for-free-768x432.jpg)